- Capabilities
- Getting started
- Architecture center
- Platform updates
Generate and export documents
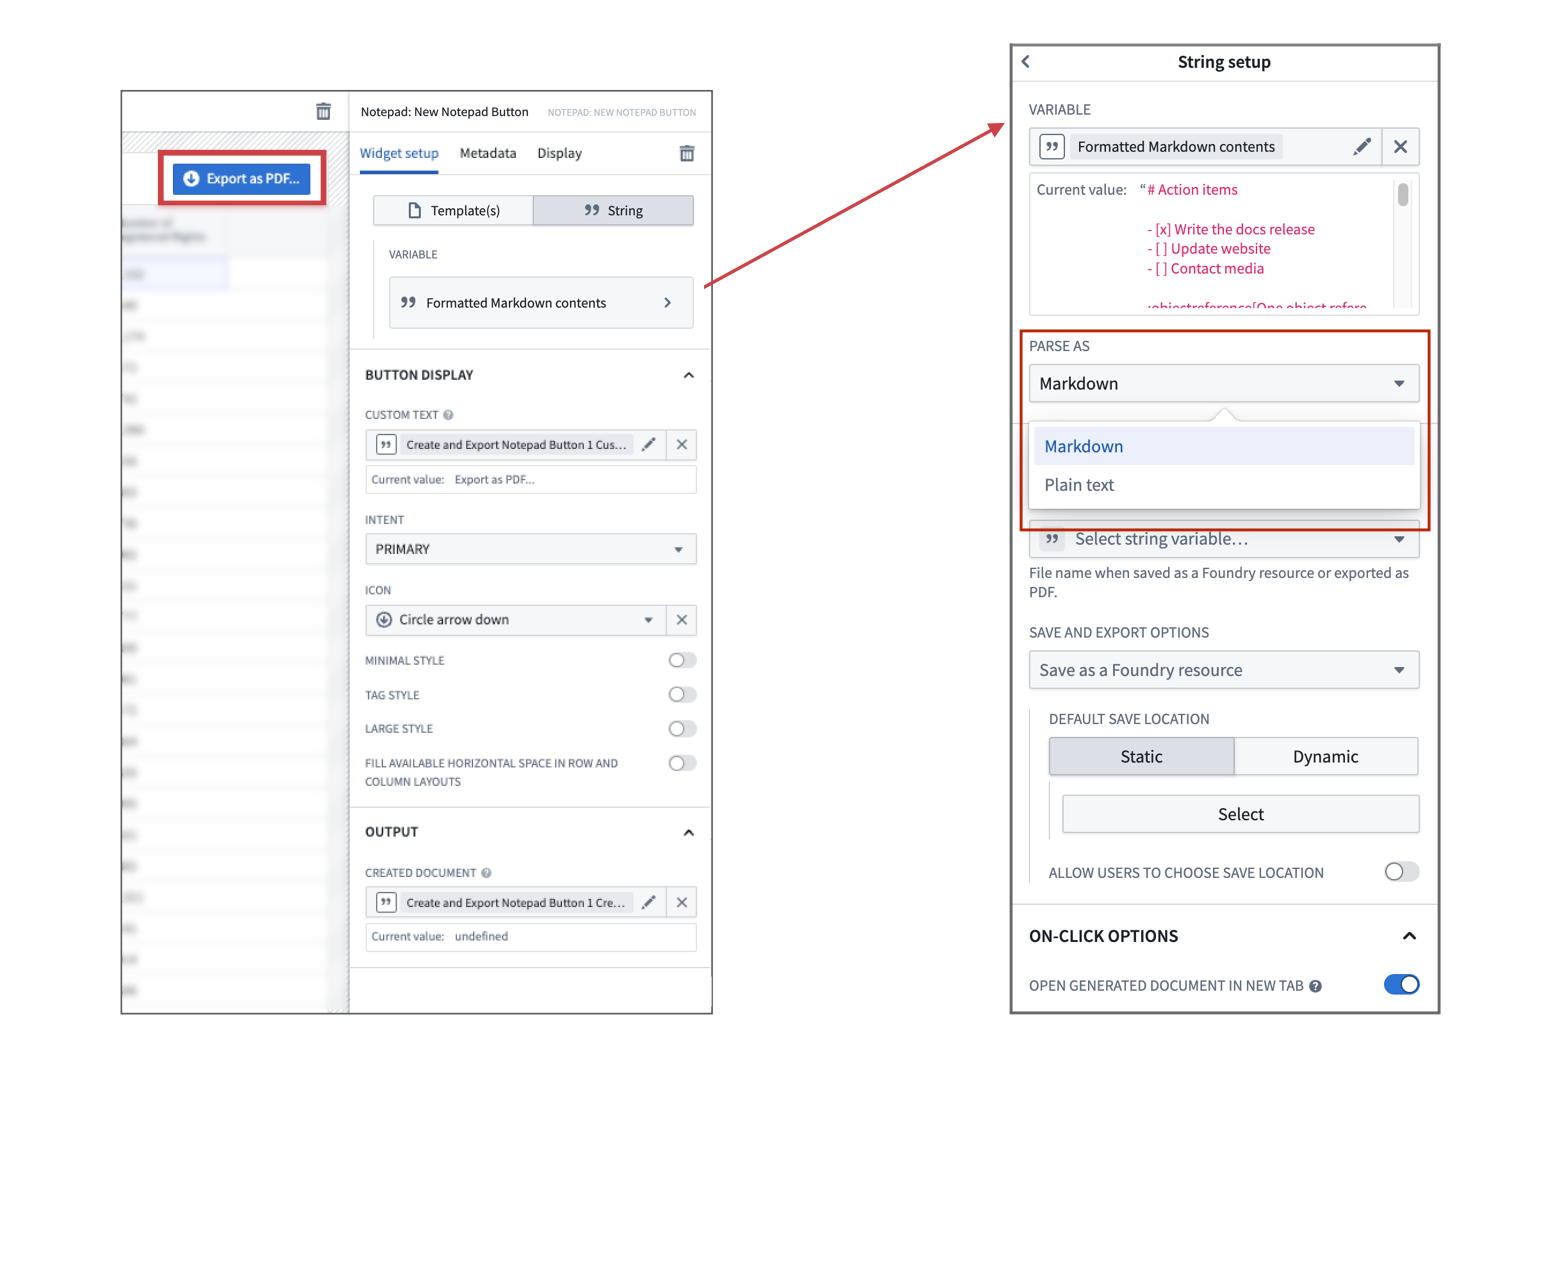
To allow others to generate new documents based on your template or a string variable, use the Notepad: New Notepad Button widget. You can also optionally choose to allow exports of these documents as PDFs.
Notepad: New Notepad Button widget
The Notepad: New Notepad Button widget allows you to create and export Notepad documents from templates or Workshop string variables.
Generate a document from a template
First, add the Notepad: New Notepad Button widget to your Workshop module. Then, from the configuration options on the right of the screen, choose the Template(s) option and then + Select. From the filesystem view, browse for your Notepad template file to add it to the Document templates list. Next, select the new template entry to open its configuration, then choose a Template version. If there is no version available, open the template in a new tab and publish a template version. Selecting a version will automatically load the template's required input parameters in the Template inputs section.
You can specify a Menu display name for your template if you choose. If you do not set a display name, the Custom text from the Button display settings will be used.

Template inputs
Depending on the template and its version, your Notepad template may consume multiple template inputs. For each of these inputs, link a Workshop variable of the same data type (string, number, date, timestamp, object, or object set) that you would like to use as an input to the template. The current values of these variables will be used to generate your document from the template whenever the Notepad: New Notepad Button is selected.
If your input parameter requires a single object, be sure to link it to a Workshop object set variable that contains one object.
Create a document from a string variable
To create a Notepad document from a Workshop string variable instead of a document template, choose the String configuration option from the panel on the right. The variable value may be parsed as Markdown or plain text, in accordance with our existing Markdown features.
Save options
You can set the following options for the different document templates and/or string variables you configure for use with the Notepad: New Notepad Button widget:
- Allow users to choose save location: Allow users to select their own save location and file name before the document is generated. Any pre-defined Default save location is ignored.
- Default save name: Define a default file name for newly generated documents. The value is also used for the PDF file name when Export generated notepad as PDF is set.
- Default save location: Choose where new documents are saved. This can be configured by manually selecting a folder or by passing in a Compass RID through a Workshop string variable. By default, a document will be saved in the home folder of the user generating it.
On-click options
The on-click options allow you to modify certain behavior when using the Notepad: New Notepad Button:
- Export generated Notepad as PDF: Documents will be automatically downloaded as a PDF after they are generated. By default, the generated Notepad documents will not persist in Foundry unless they are created from a string variable. Thus, all save options except the Default save name will be ignored.
- Save Notepad from PDF export: When set, the generated Notepad document used to export to PDF will be saved in Compass as well.
- Open generated Notepad in new tab: Documents will open in a new tab.
Additionally, you can specify Workshop events or actions that should be executed when a document is created. For example, this can be used to persist the RID of the newly generated document as an object property by using the Created document output variable from the Notepad: New Notepad Button.
Use a generated Notepad RID in an action
To pass a generated RID to an action, the corresponding parameter must have a configured type class. To do this, open the action parameter in Ontology Manager and add a notepad:notepad_rid type class in the Details tab.
