- Capabilities
- Getting started
- Architecture center
- Platform updates
Set up a Public Application
The instructions in the sections below outline the end-to-end process to set up a Public Application in Developer Console and Control Panel.
Public Applications expose ontology data and actions to anyone on the public internet. Each application requires an Information Security Officer in your enrollment to review and approve the intended use case before enablement. Discuss your intended use case, exposed ontology resources, and intended audience with your Information Security Officer before completing the steps below to create a Public Application in Developer Console.
Prerequisites
Before you set up your Public Application, ensure that:
- Your Foundry enrollment supports Public Applications. If you are not sure, contact Palantir Support.
- You have the Developer Console permissions required to create a new application.
- You can identify an Information Security Officer in your enrollment who can both approve the use case and approve the subdomain registration in Control Panel. The same role performs both approvals.
- You have permission to declassify every Marking on each resource you intend to add to the application. If you do not, Foundry will block the resource from being added, as the resource does not meet the proper export controls.
Step 1: Create the application in Developer Console
- Navigate to Developer Console and select + New application.
- Step through the creation wizard and enable an Ontology SDK on the Resources page.
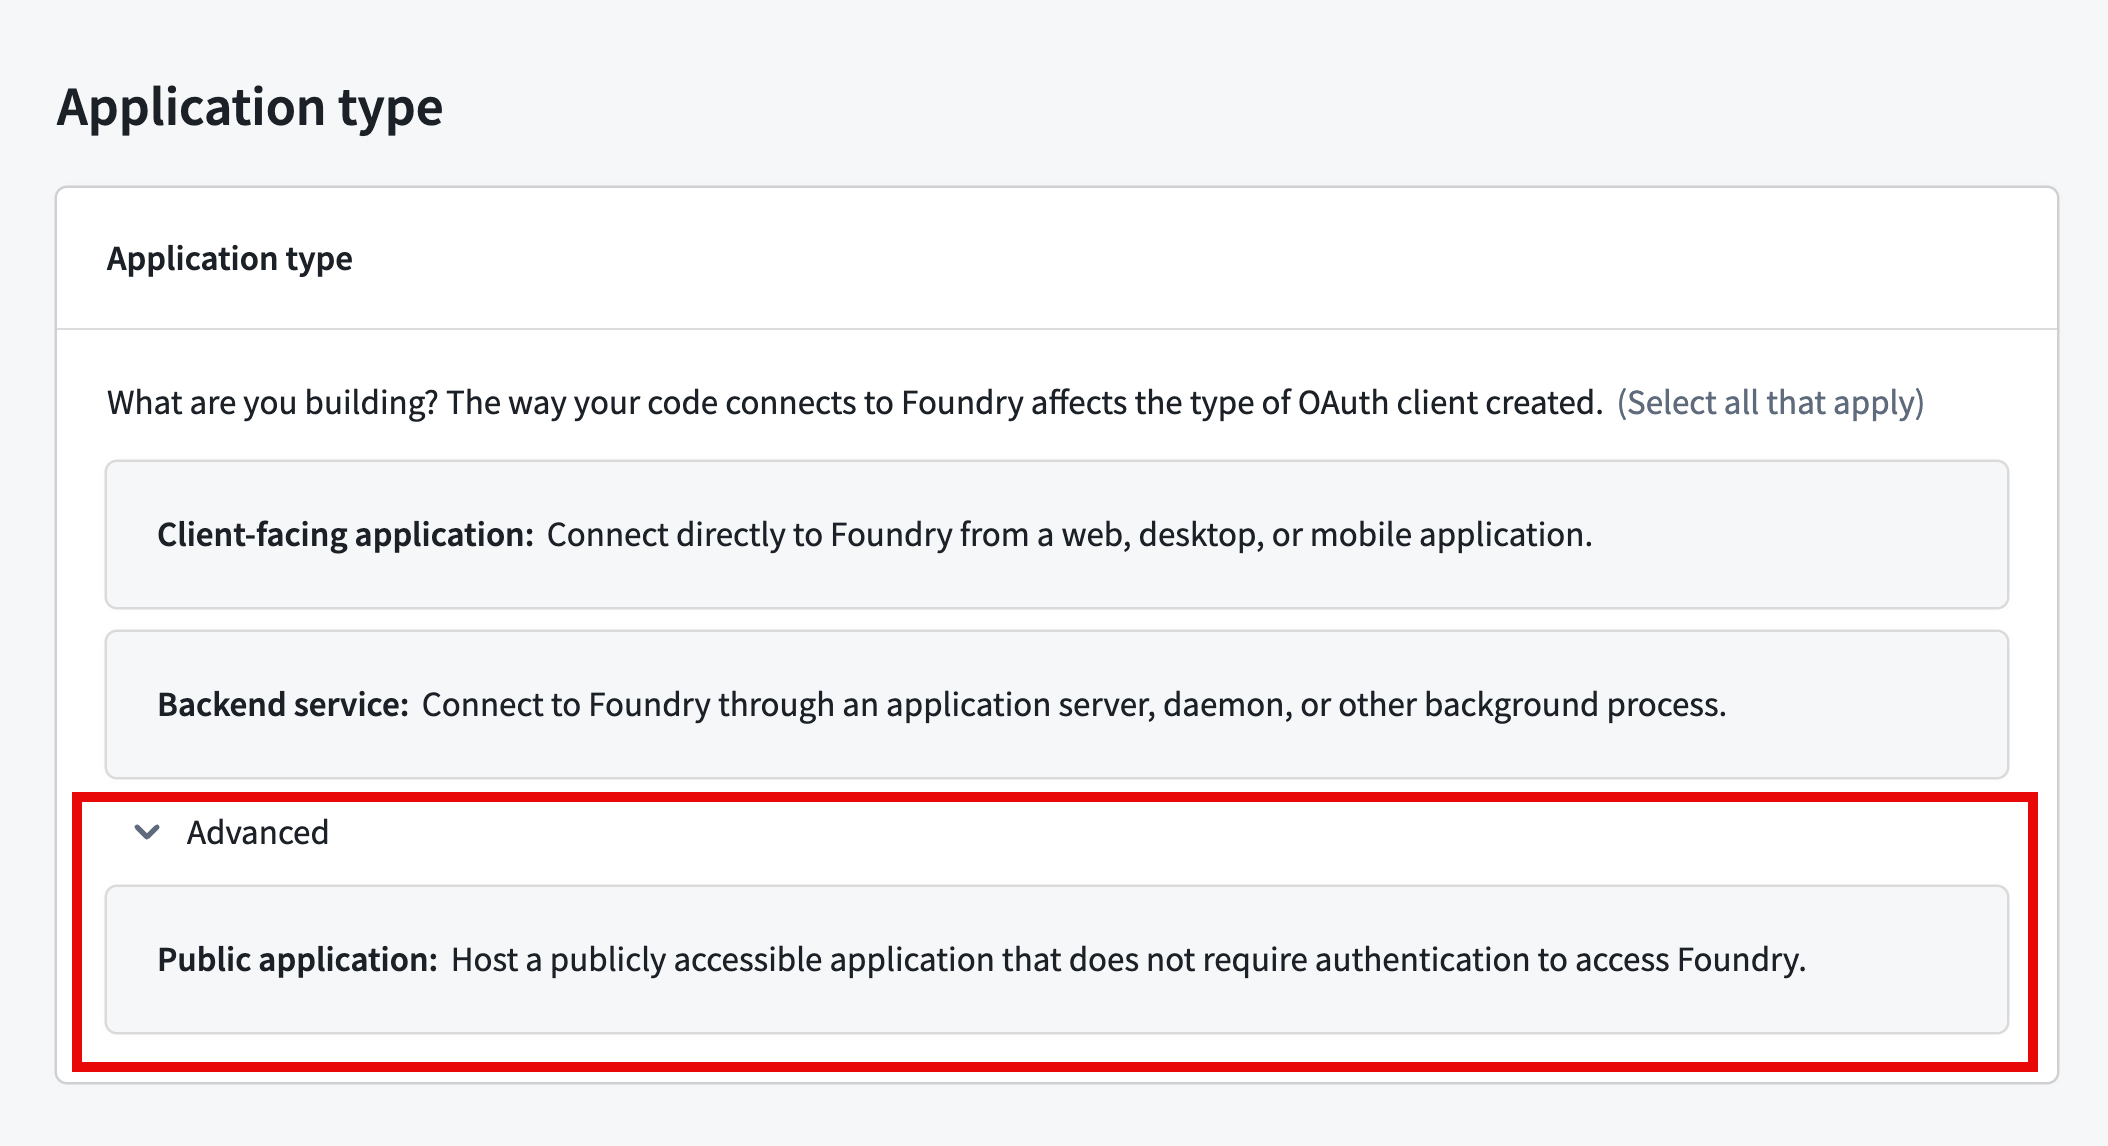
- Expand the Advanced section on the Application type step and select Public application.
- Continue through the Developer Console creation flow and select Create application.
Public Applications use a service user for permissions when reading or writing data. Foundry creates the service user when you create the application in Developer Console, after which you can grant permissions for Foundry resources to the service user.

Step 2: Request the unauthenticated subdomain and unauthenticated endpoints
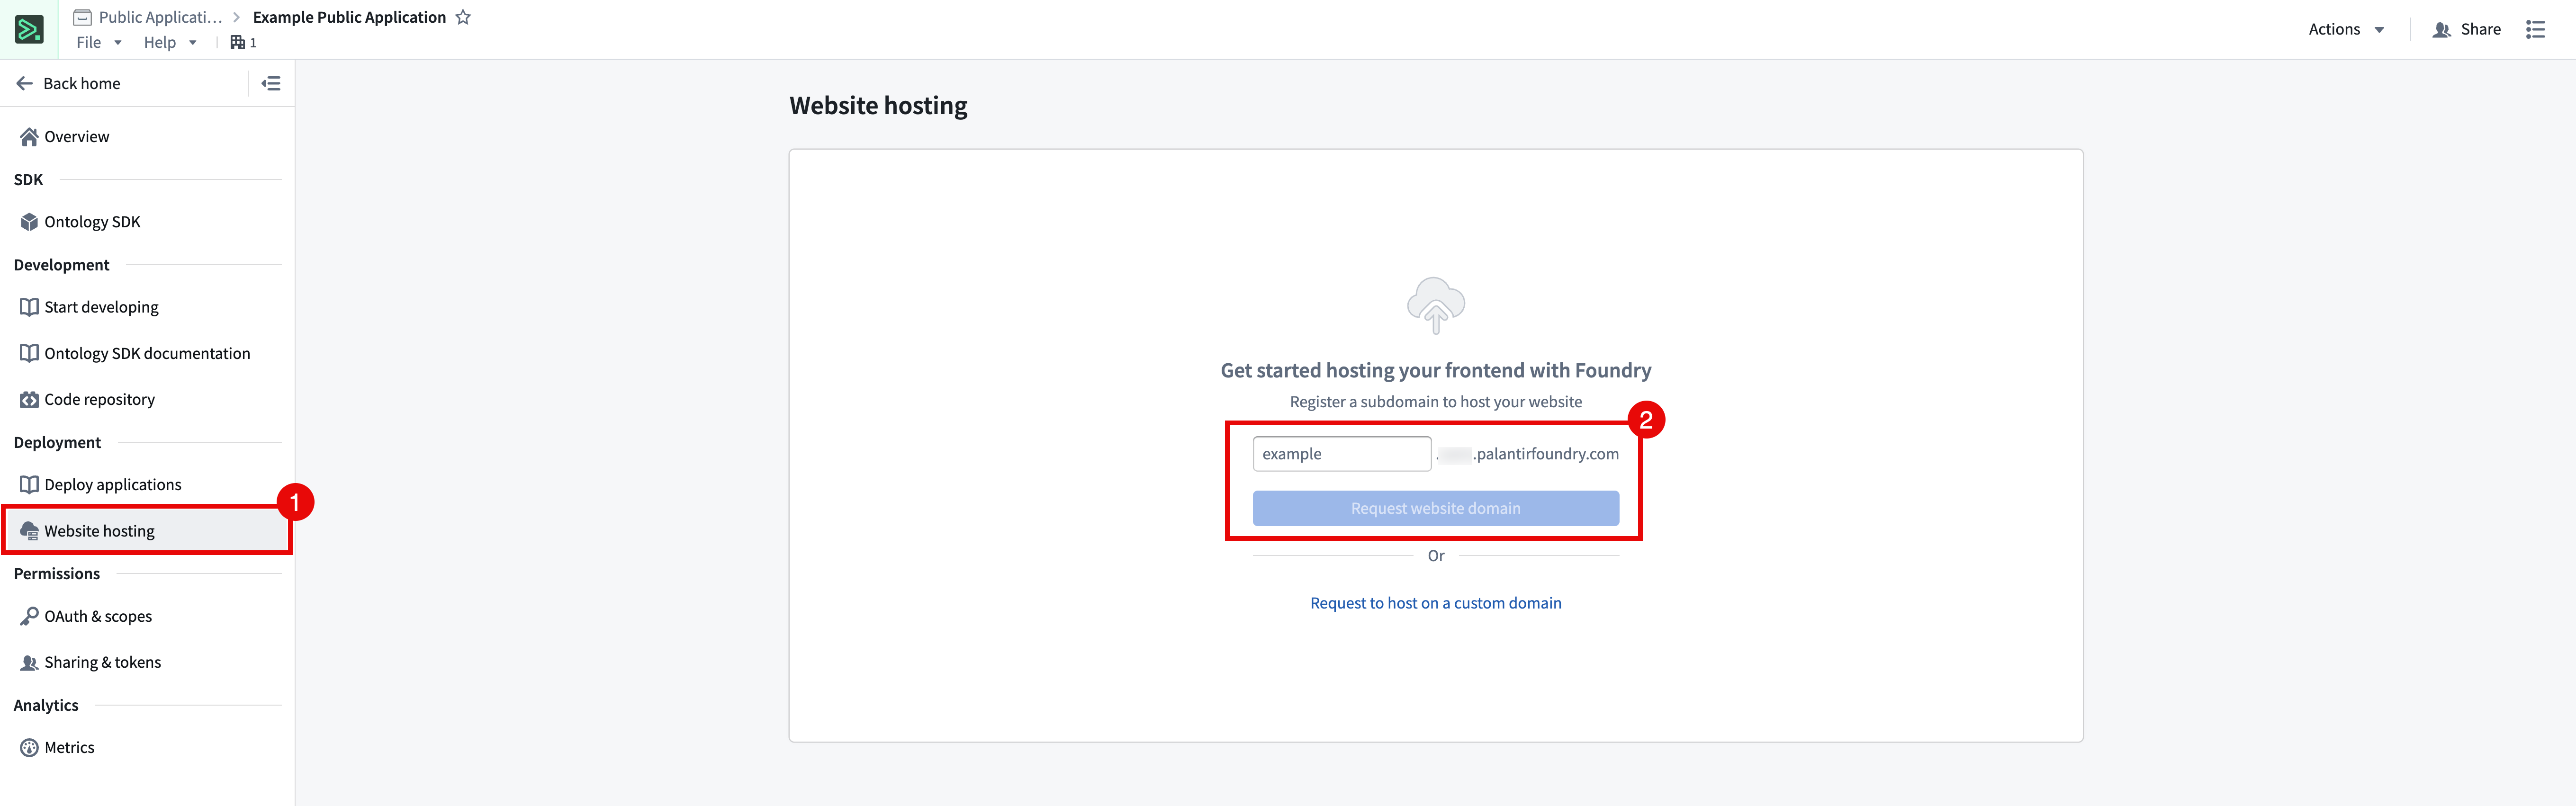
- Select Website hosting from the left panel.
- Enter a subdomain name and select Request application domain. Foundry serves your application from
<your-subdomain>.<your-enrollment>.palantirfoundry.com. Optionally, select Request to host on a custom domain to host the application on a domain of your choosing, such ascustom-domain.com.
- When you request a domain for a Public Application, Foundry automatically requests a public internet domain, enabling unauthenticated users to access the application and load its static assets. Confirm whether or not you want your Public Application to additionally Enable unauthenticated Foundry API calls, which exposes all OSDK resources without authentication. Select the checkbox to enable the feature and choose Request to proceed.
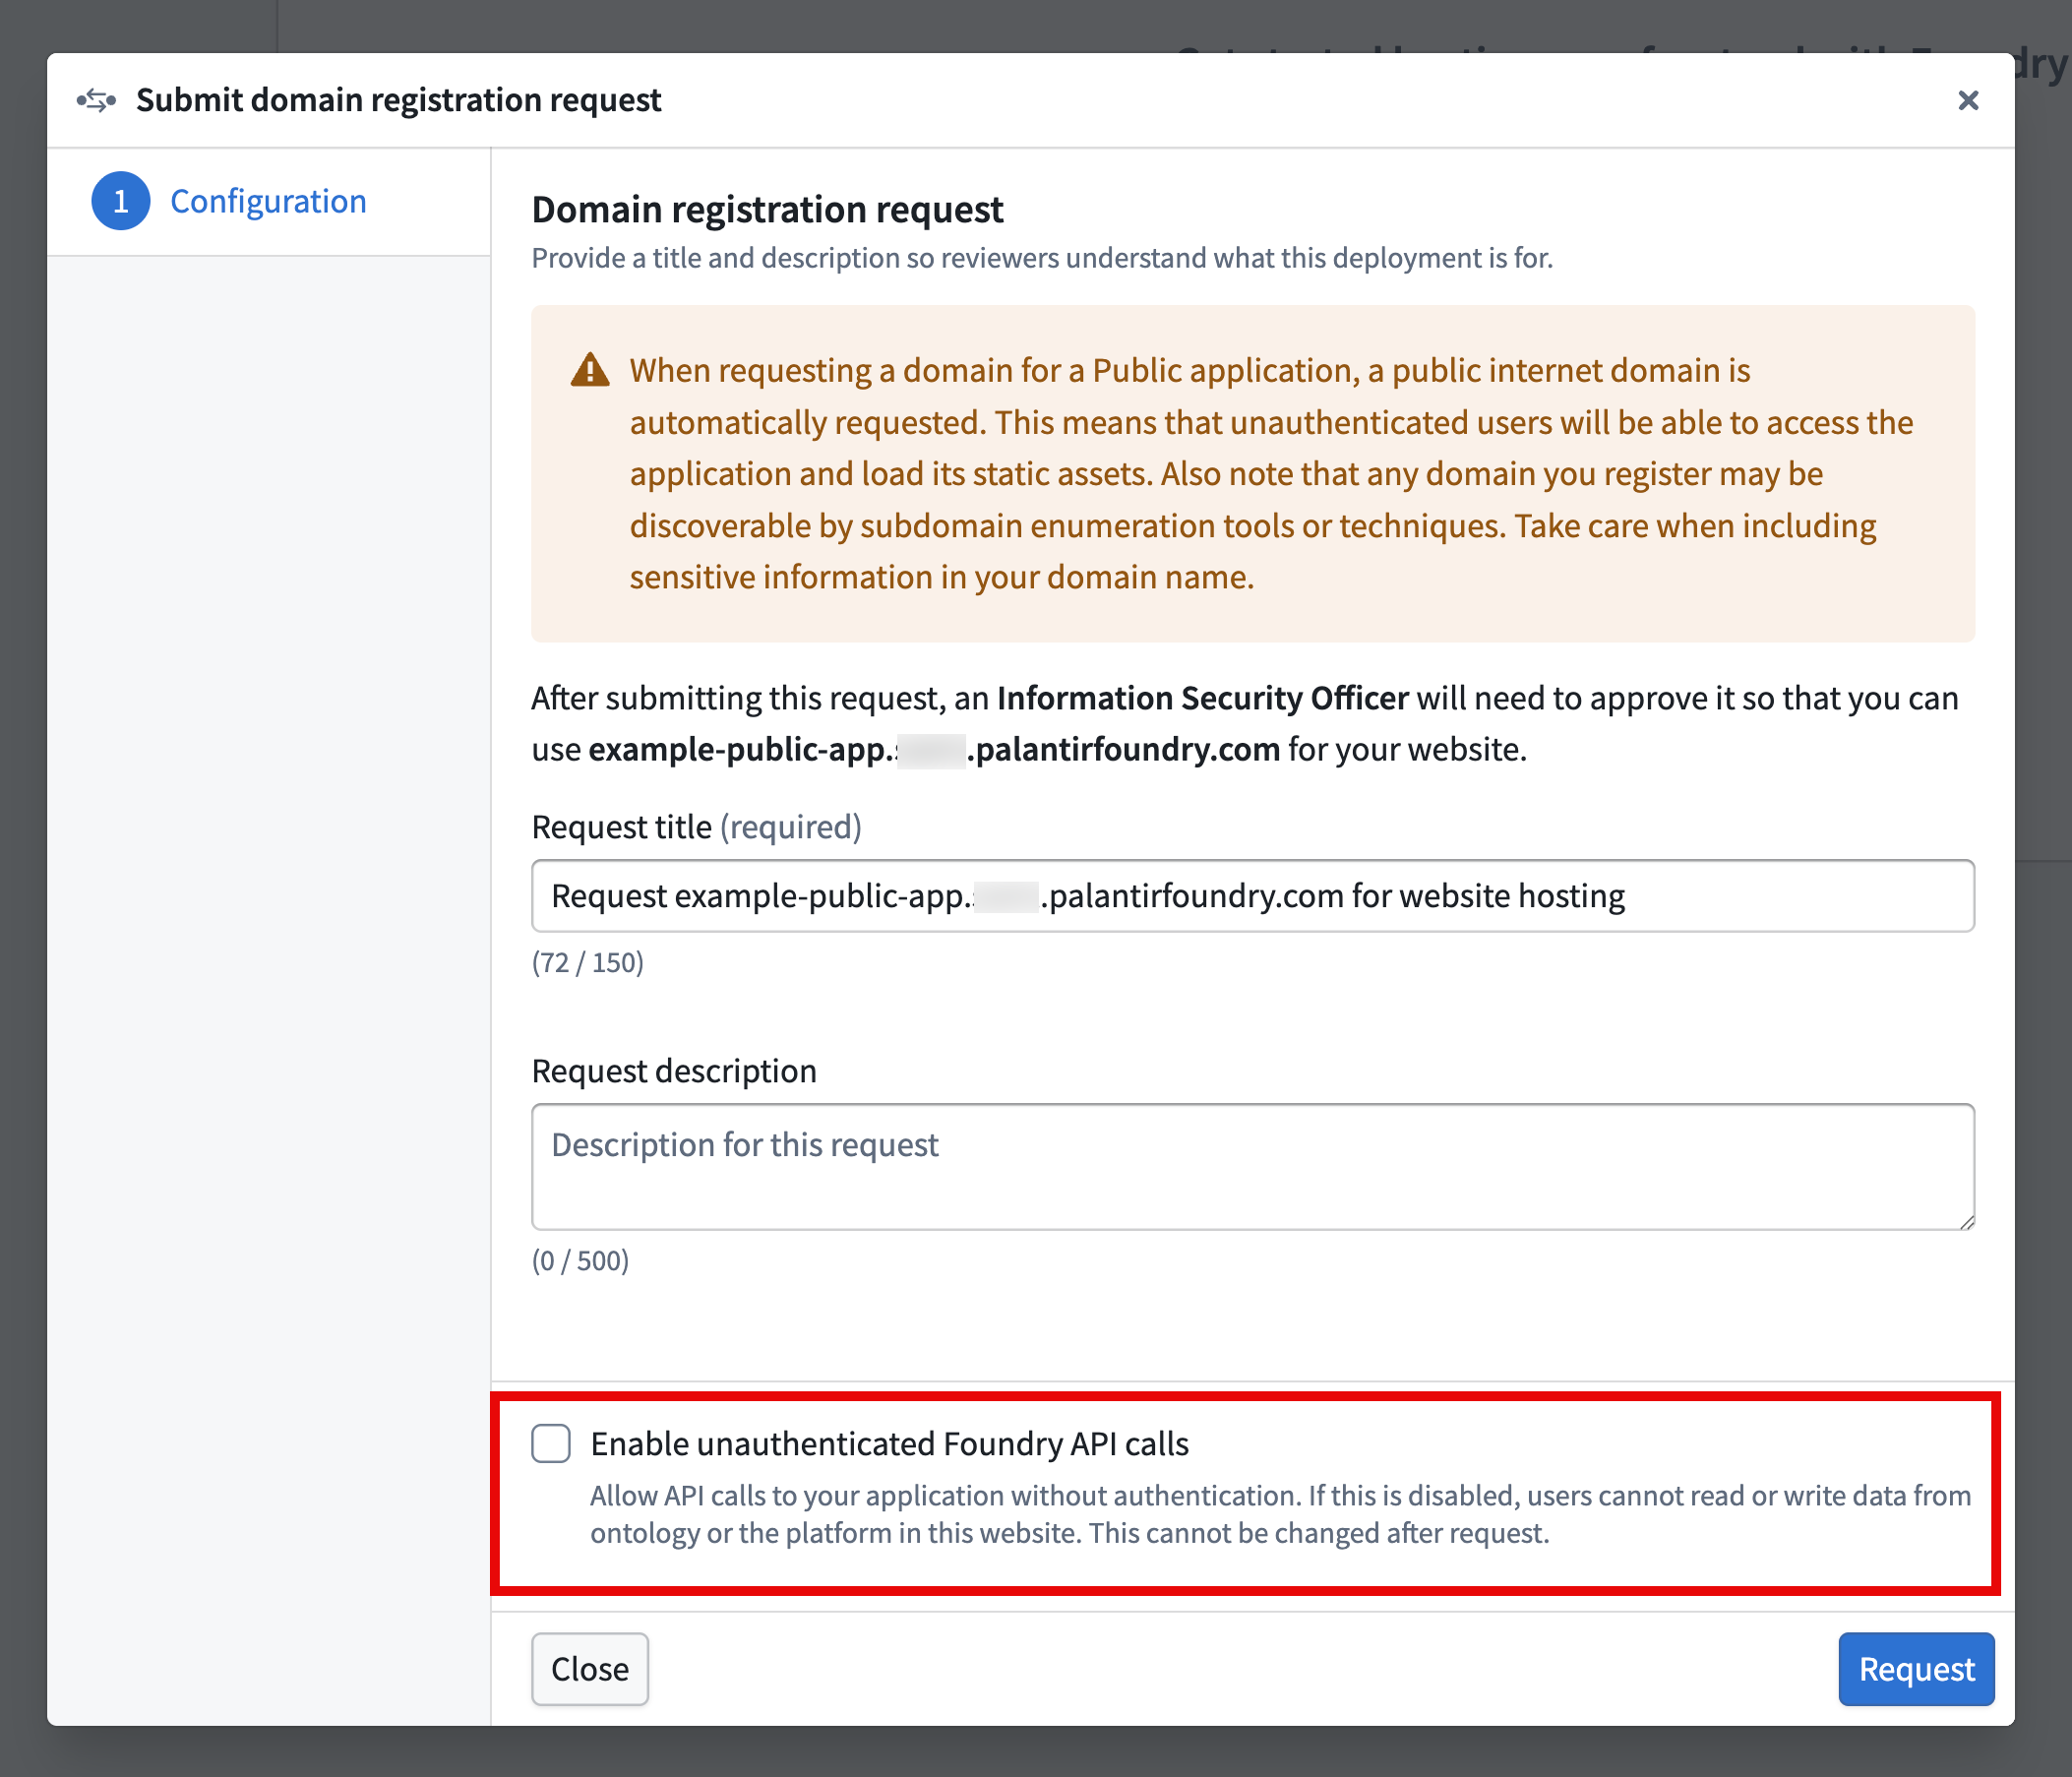
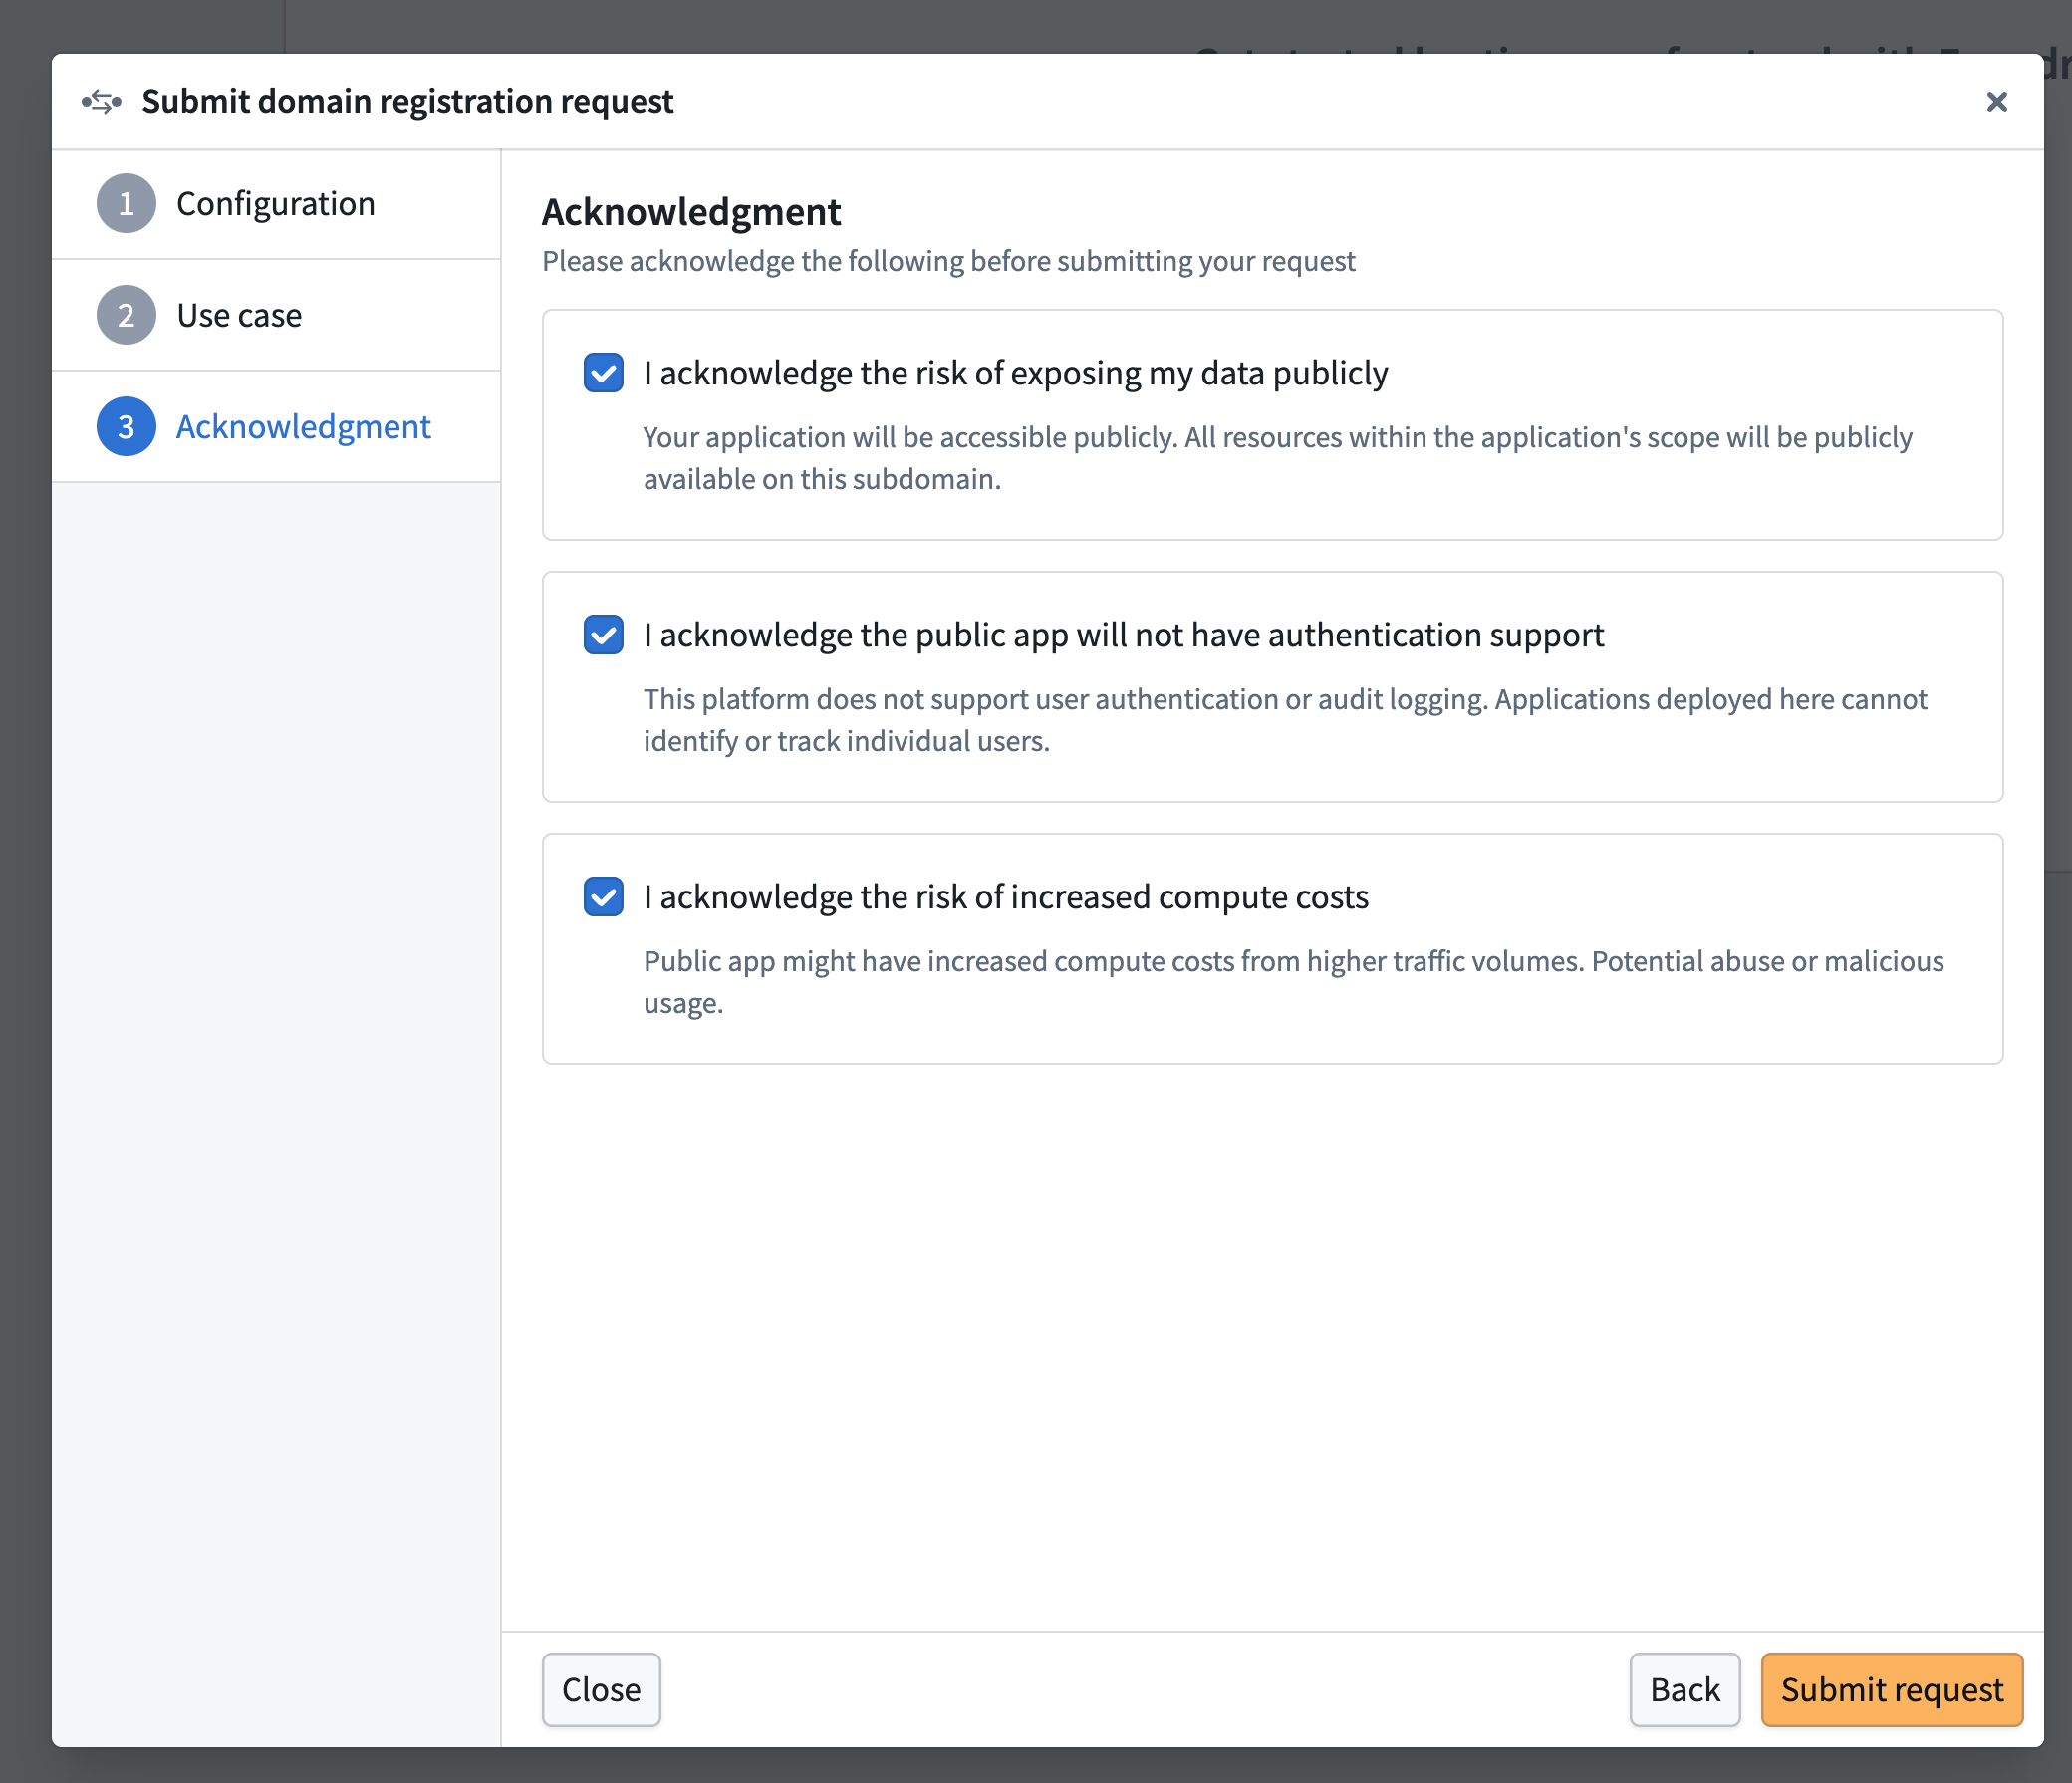
- If you choose to Enable unauthenticated Foundry API calls, Developer Console prompts you to acknowledge the additional risks from users being able to make unauthenticated Foundry API calls. Select Submit request after reviewing and acknowledging each.
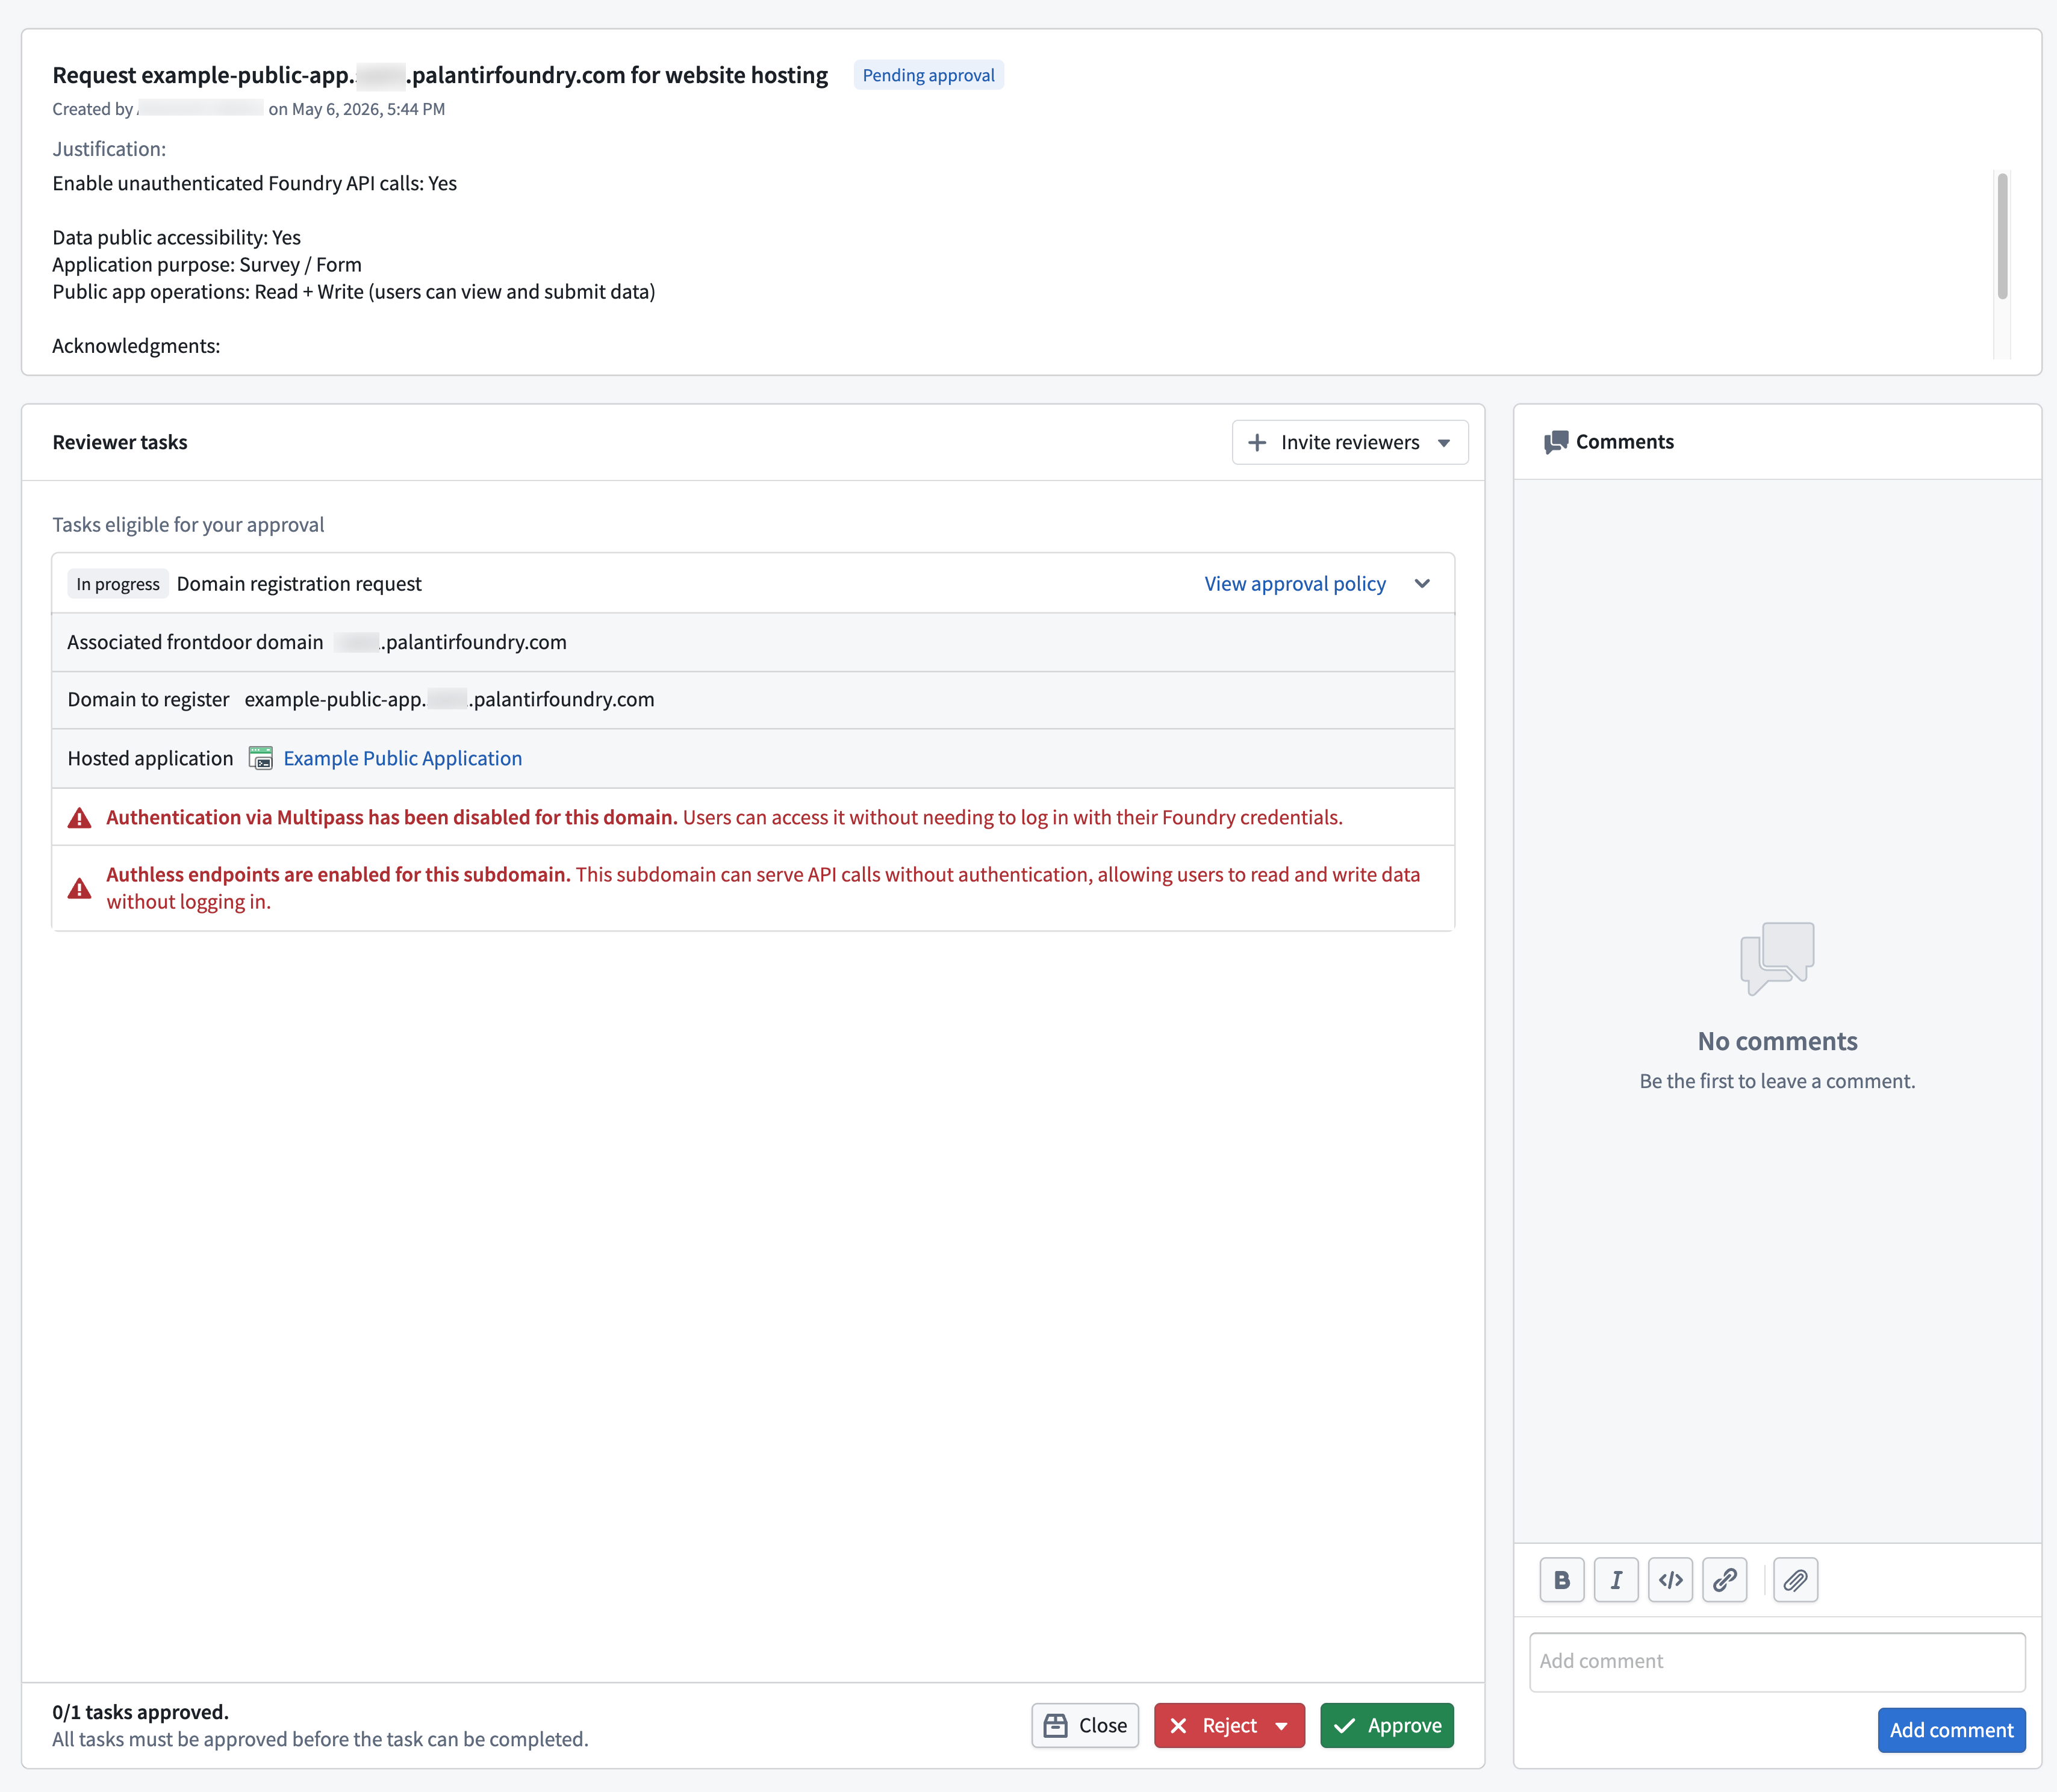
Step 3: Request approval for the Public Application in Control Panel
An Information Security Officer in your enrollment must approve your subdomain registration request in Control Panel's Approvals inbox.
If you are an Information Security Officer, follow the instructions below to review and approve the request:
- Review the content in the Justification section to determine if the requester's use case is valid.
- Confirm that the Public Application request is for an unauthenticated subdomain and check whether or not it enables unauthenticated Foundry API calls. The Reviewer tasks section of the approval form explicitly states whether Authentication via Multipass has been disabled for this domain or Authless endpoints are enabled for this subdomain to indicate whether one or both conditions are true.
- Approve, Reject, or Close the request.
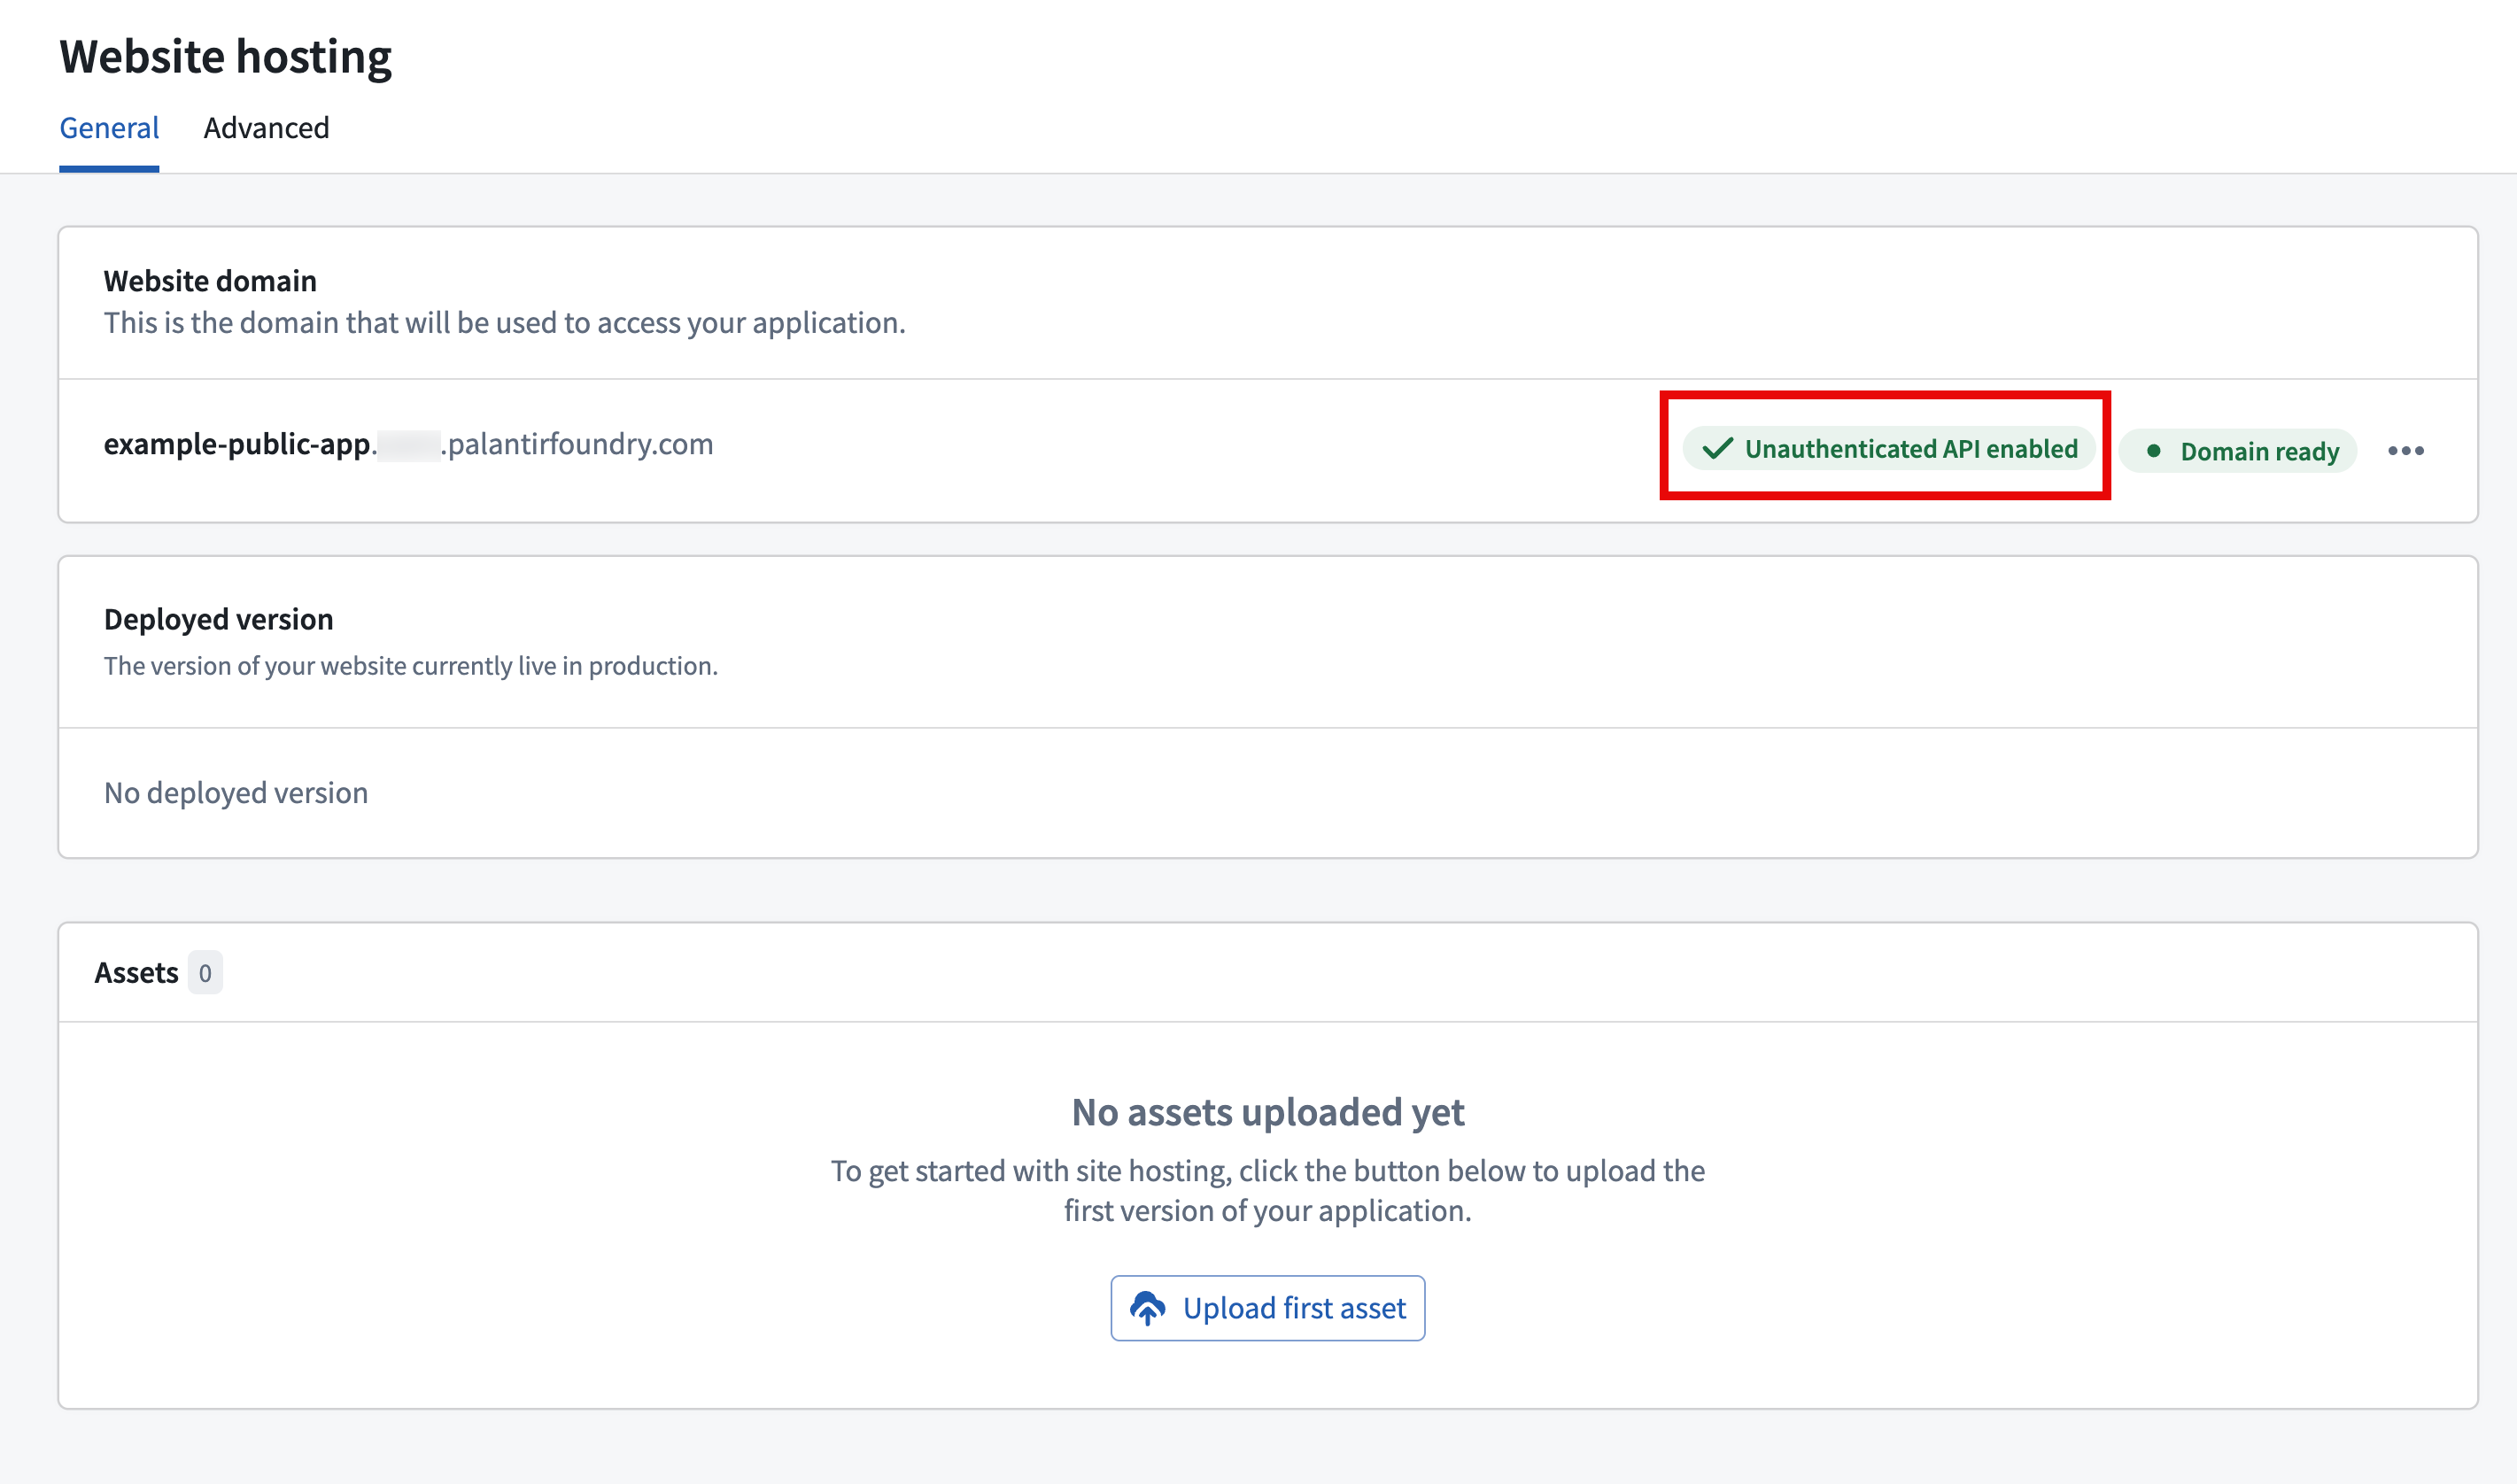
Step 4: Wait for the domain to become ready
After the Information Security Officer approves your request in Control Panel, return to the Website hosting tab in Developer Console and refresh the page. After a few minutes, the domain status will transition from Provisioning to Domain ready. Developer Console also displays a status tag indicating if the application enables unauthenticated API calls.
Review the Developer Console documentation to learn more about building frontend-only applications using the OSDK.
Step 5: Add unauthenticated ontology resources
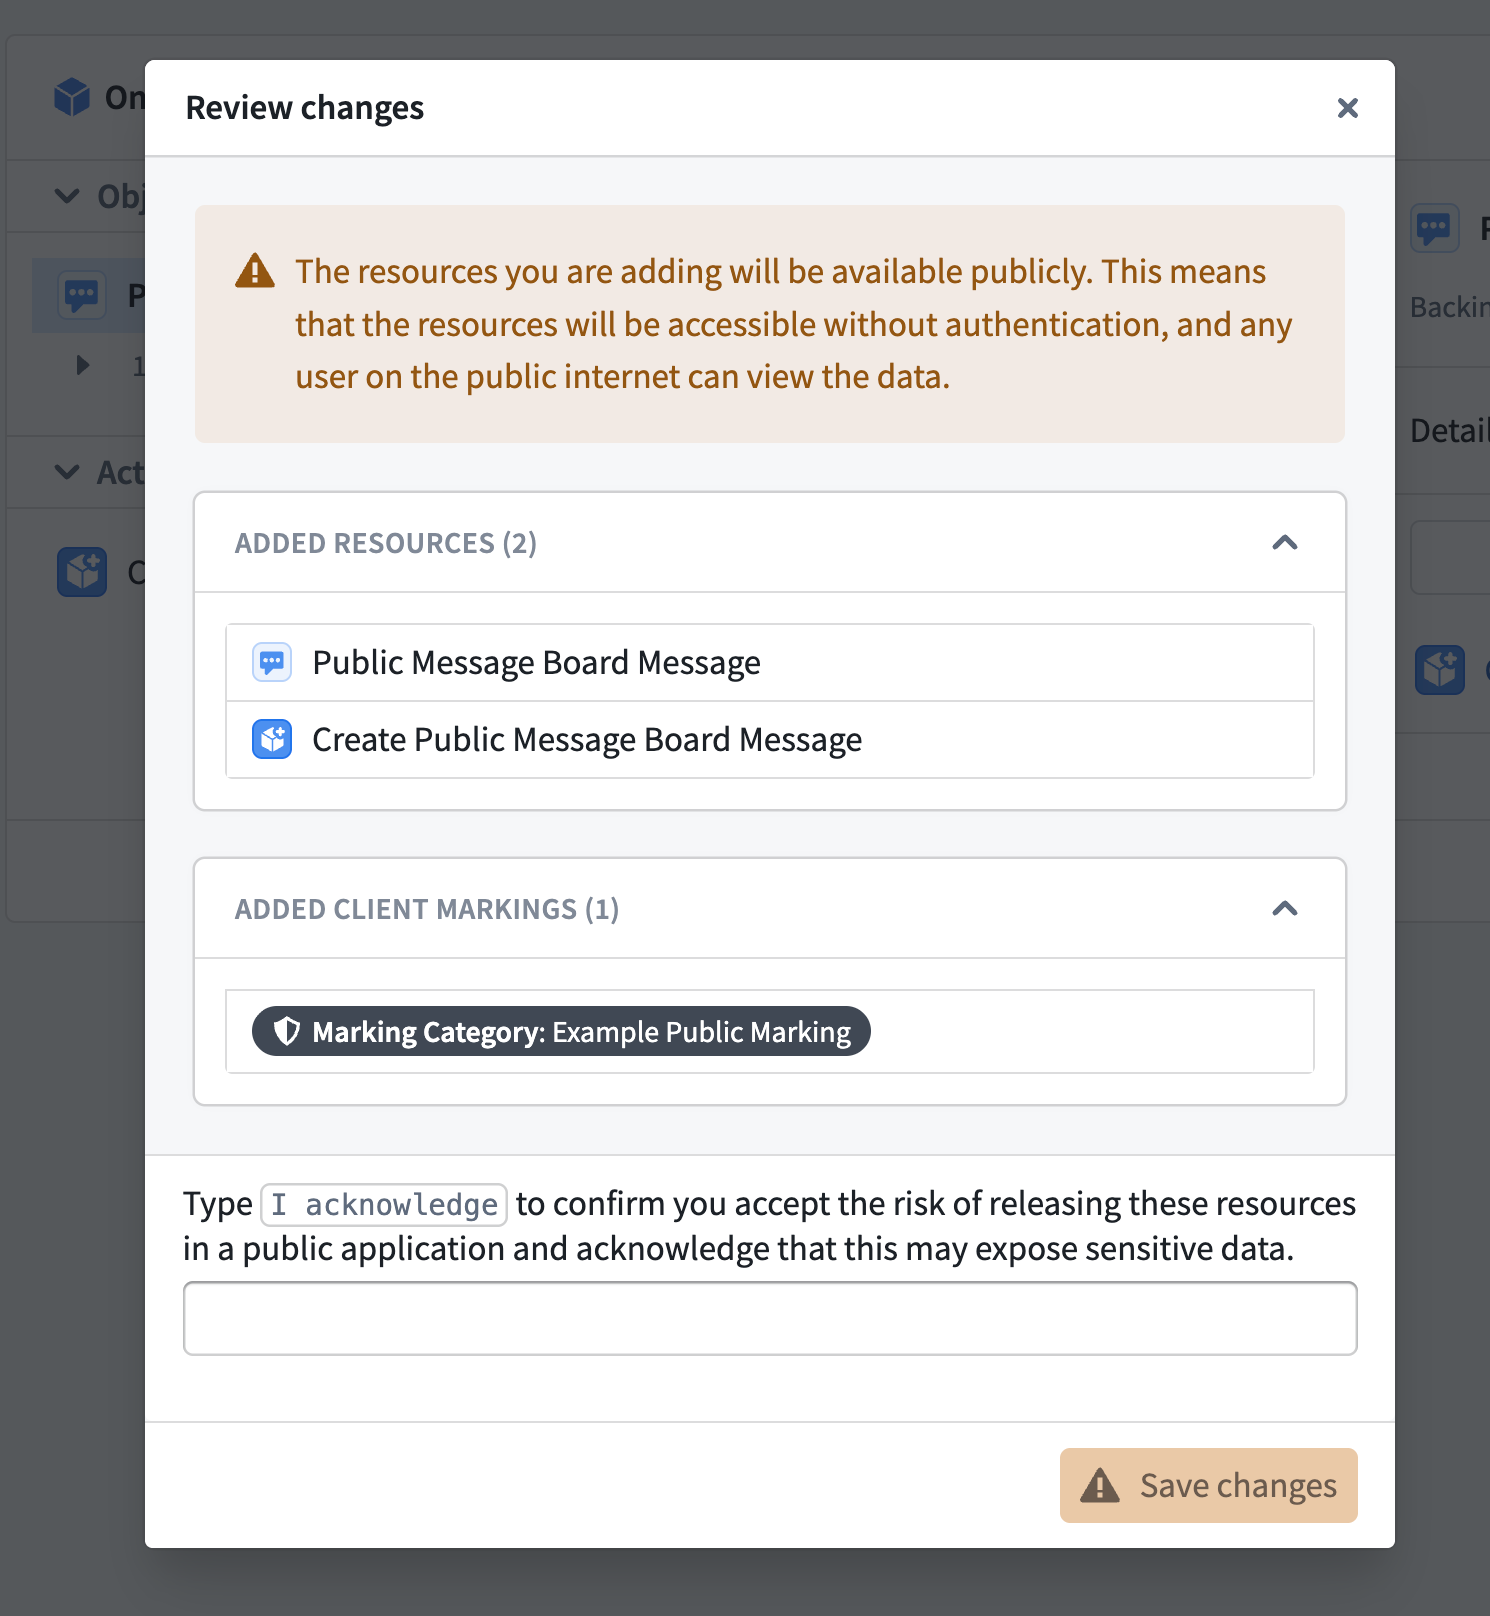
If you enable unauthenticated API calls for your Public Application, you can next select the Ontology SDK tab in Developer Console to add all required object types and action types as application Resources. Foundry enforces strict export controls on Public Applications, so you can only add a resource if you have permission to declassify all of its Markings and Organization Markings. Foundry restricts Public Applications to a small set of ontology operations, so you should review the list of currently supported operations before populating your application's resources to confirm your intended workflow is supported.
Once you add all relevant ontology resources to your application, Developer Console prompts you to review each change before saving. Once saved, all resources in your application's scope will be accessible without authentication.
Step 6: Create the linked code repository
With your Public Application's Ontology SDK resources added, you will next create a code repository linked to your application by following the steps below:
- Select Code repository in the Development section of your application in Developer Console.
- Create a new code repository from the Authless code template. The template provides the scaffolding required for a website that uses the unauthenticated ontology API.
- Wait for the initial build of your website to complete. The build status appears under the Tags tab of your code repository, and a link to your website appears under Website hosting.
Your linked code repository houses your Public Application's code. Review the existing how-to guides in the Developer Console documentation to learn how to add your OSDK to the application and bootstrap its development in various languages, such as TypeScript, Python, or Java.
Step 7: Verify unauthenticated access
Open your Public Application's subdomain URL in an incognito or private browser window, and the application will load without showing a Foundry login prompt.