- Capabilities
- Getting started
- Architecture center
- Platform updates
Create a walkthrough
Configuration
- Navigate to the Walkthroughs application and select New walkthrough. You will be prompted to name the walkthrough and select a save location.

- Next, enter the walkthrough editor to configure the walkthrough contents.
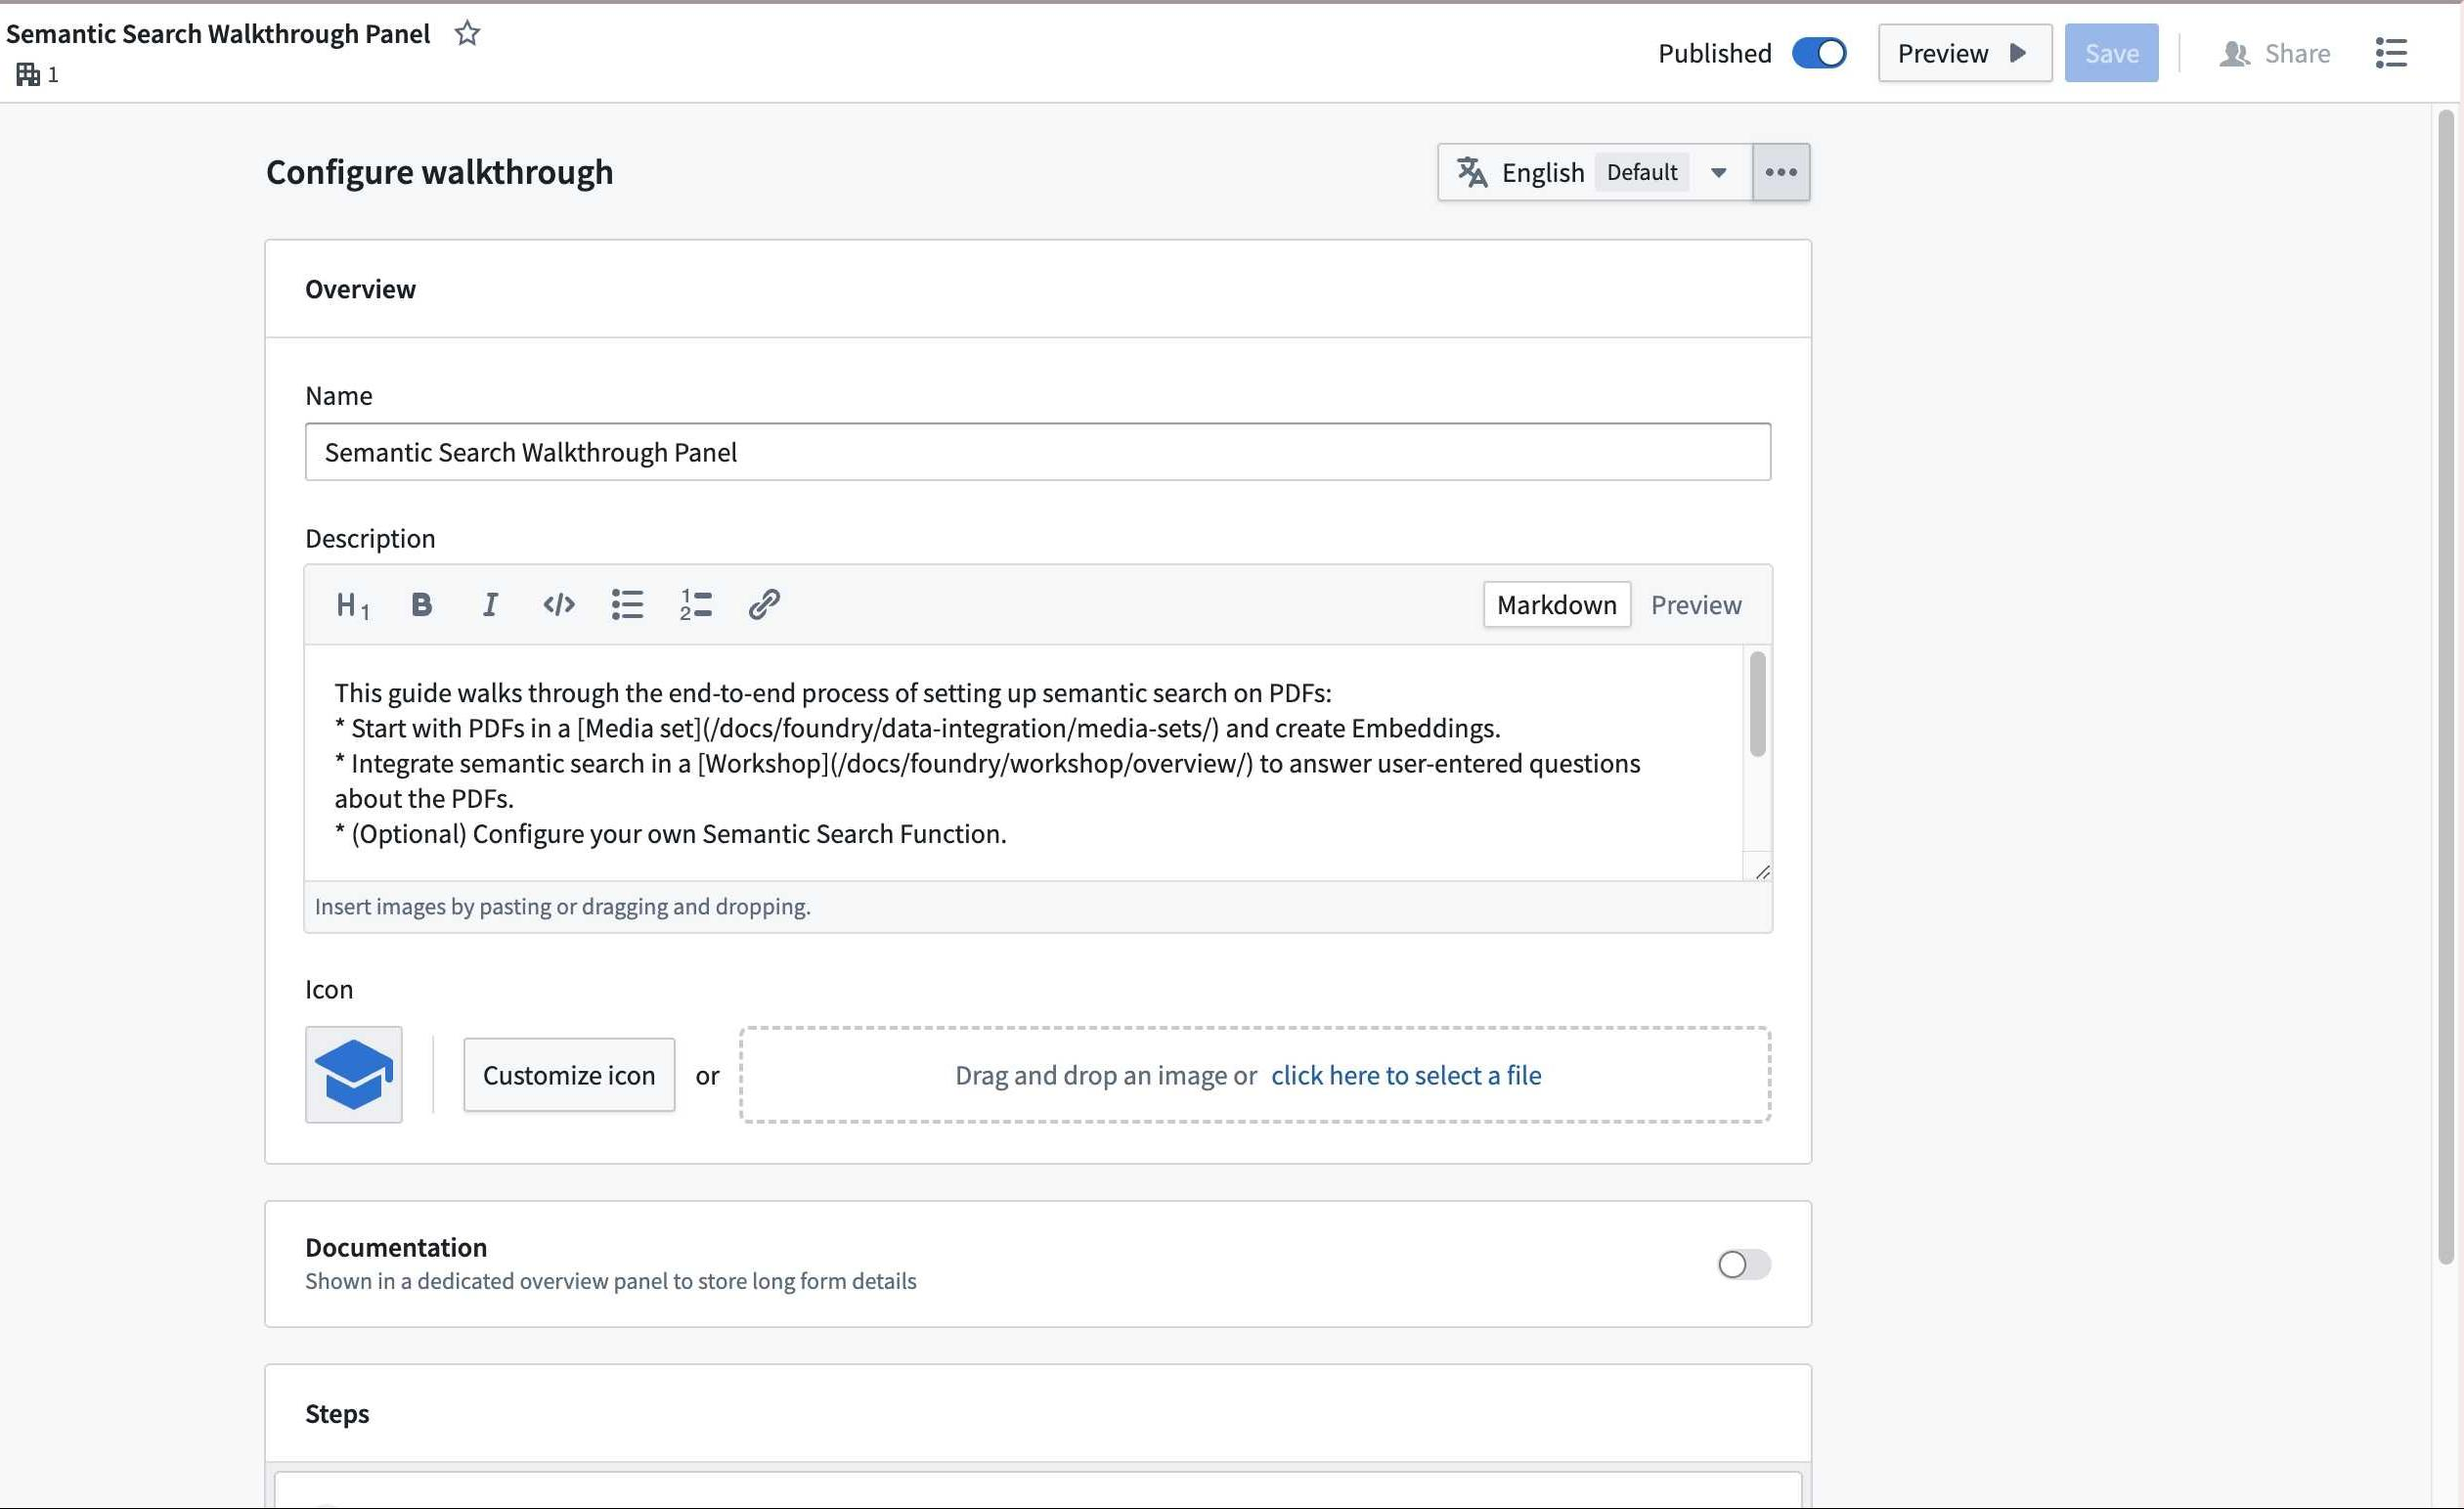
- Fill out the Name field to provide a title for your walkthrough.
- Enter a brief description in the Description field.
Note: Both the name and description will appear in the Walkthroughs landing page, and can help users determine the appropriate walkthroughs to complete.
- Optionally customize the walkthrough icon by selecting Customize icon, or by uploading a custom image.
- Optionally enable the Documentation toggle to show a dedicated overview panel for displaying long-form walkthrough details using Markdown.
The Documentation panel and step descriptions support a subset of Markdown based on the CommonMark specification ↗, such as headers, lists, links, and code blocks. This subset is narrower than the Markdown available in other Foundry applications.
Edit an existing walkthrough
To make changes to a walkthrough after it has been created, open the walkthrough resource (for example, from the Walkthroughs application, your project's file browser, or search) and select Edit. This opens the same editor used during creation, where you can update the name, description, icon, steps, and associated resources.
Add steps
The primary elements in a walkthrough are called steps. Each step should include a thorough description of the actions that users should perform. You can optionally include links to related resources, or add documentation in the Documentation configuration during setup. This will be discoverable through the Learn more option during the walkthrough. We recommend only adding a single resource to a given step to streamline end-user experience. To preview a walkthrough, select Preview on the top right at any time.
You can open and close the Preview sidebar while the editor remains active. Changes you make in the editor update in the Preview sidebar in real time.
- In the Steps section, select Click to add new step. A new panel will appear on the right side of the screen for step configuration.
- Provide a name and description for the step.
- Add associated resources by selecting the Add resource dropdown menu and selecting the type of resource you want to add. Added resources will open in the same window.

Publish your walkthrough
- Select the Preview option to test the rendering and readability of your content.
- Select Save.
- When you are ready to make your walkthrough discoverable to users with access, select Publish.
Walkthrough translations
To translate a walkthrough, select the language dropdown menu.

You can manually input translations, or use AIP to generate suggested translations for each description in the walkthrough.
