- Capabilities
- Getting started
- Architecture center
- Platform updates
Media layers and image annotations
Media layers in Vertex allow you to visualize and annotate objects on maps or images, enabling spatial analysis and contextual understanding of your data. You can add objects as overlays, filter them based on properties, and create interactive annotations.
This section of documentation uses public domain images from Wikimedia Commons ↗ as an example to notionally construct a World War II-era naval ship via schematics overlaid with objects in Vertex.
.png)
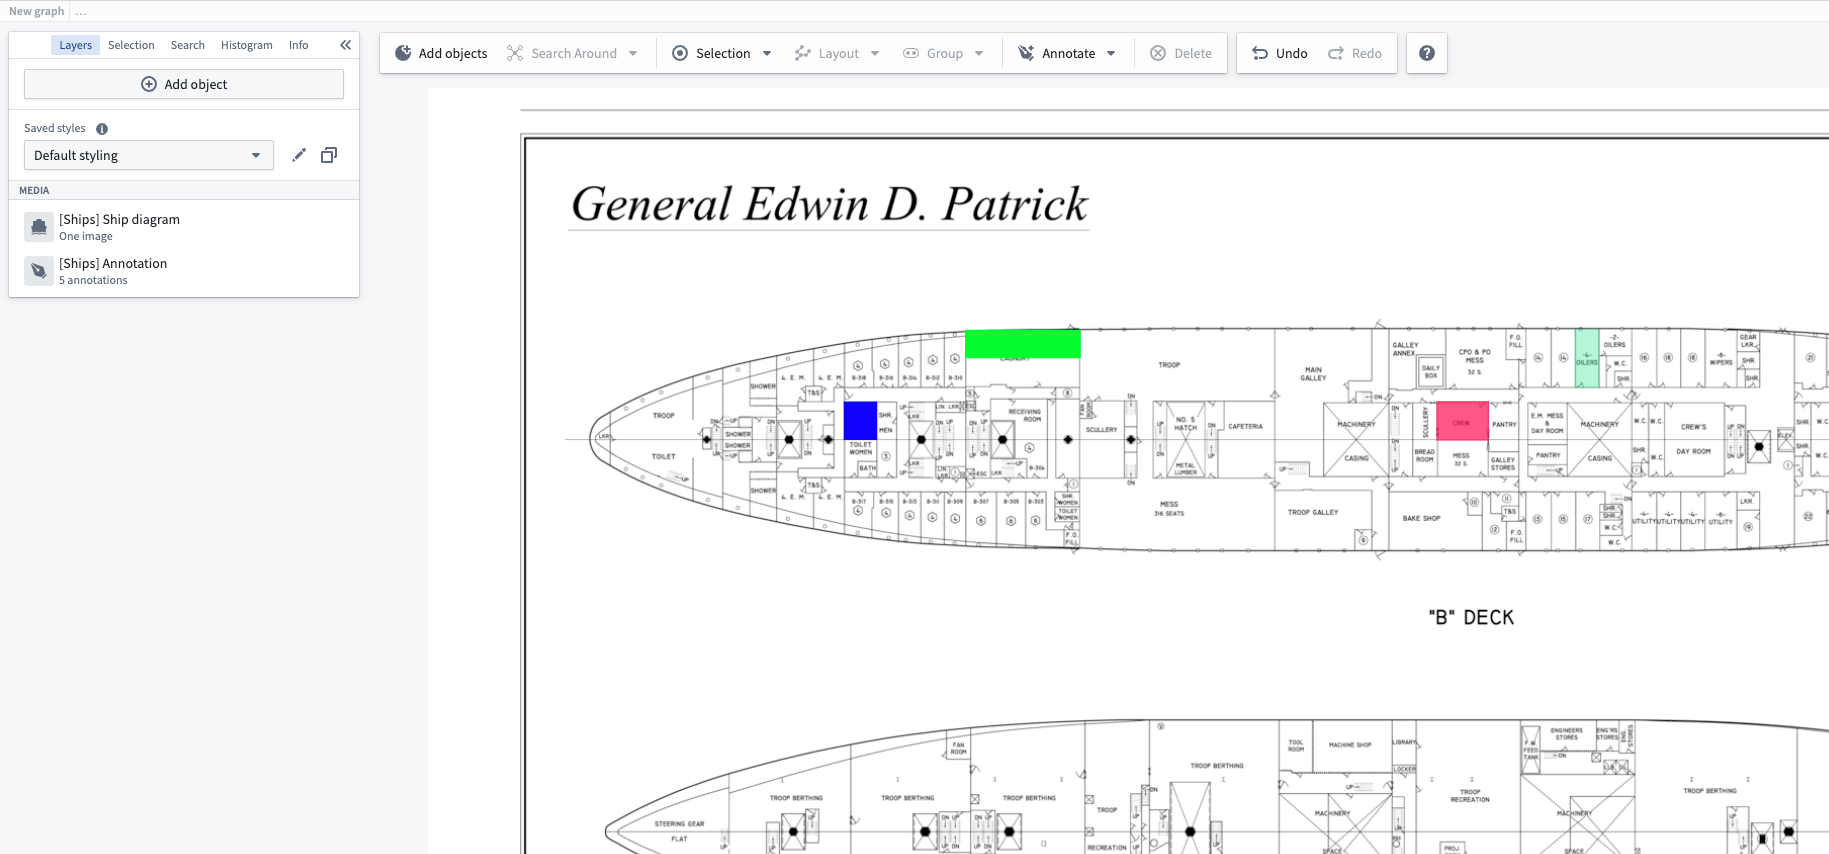
By the end of this example we will have an interactive ship diagram in Vertex with annotations that show a few of the rooms overlaid on the image.
Configuration
Pipeline Builder configuration
To get started using media in Vertex, ensure you have at least one object type with a media reference. For our example, we are using one object type created from a media set of images. We also have two object types that we will use to create annotations in our Vertex graph.
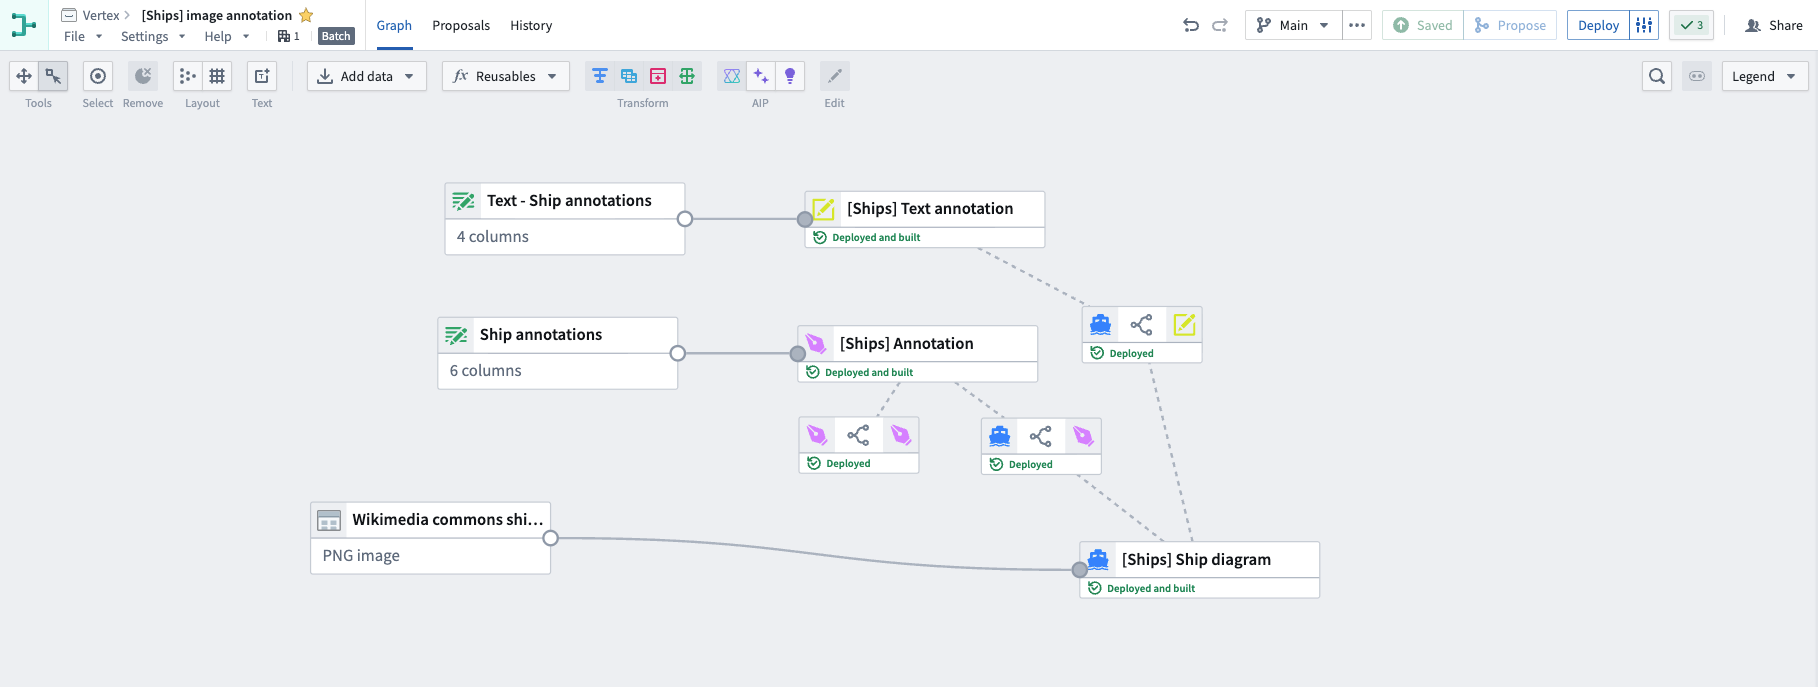
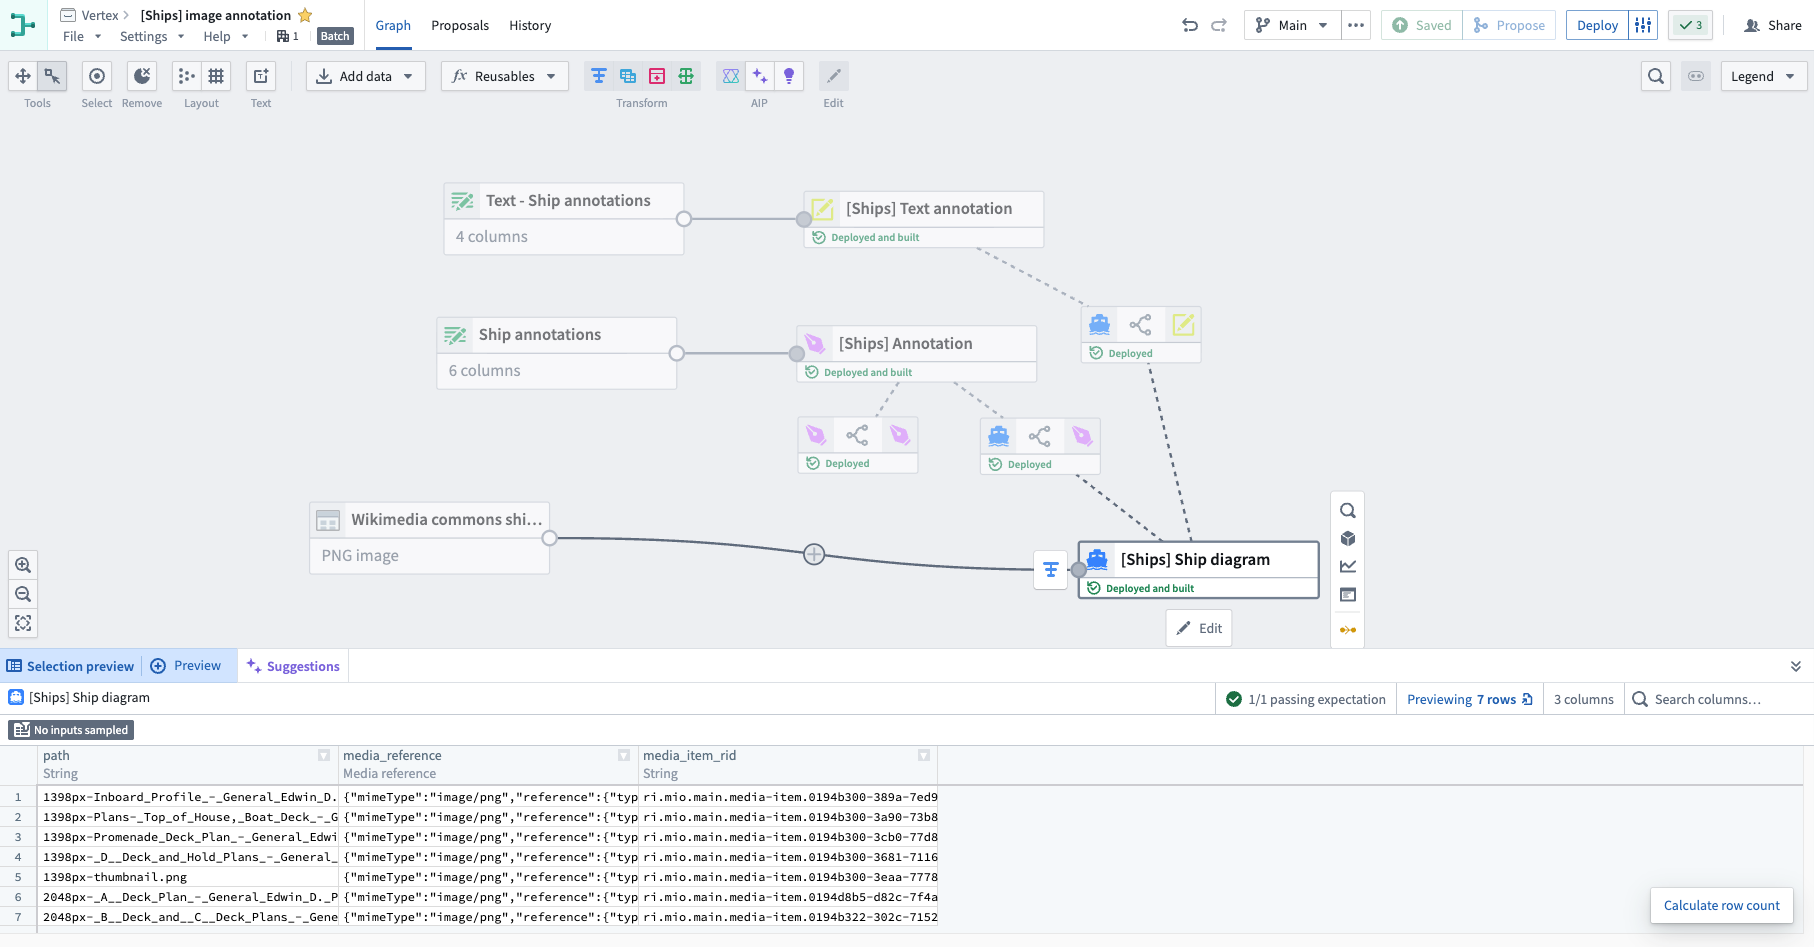
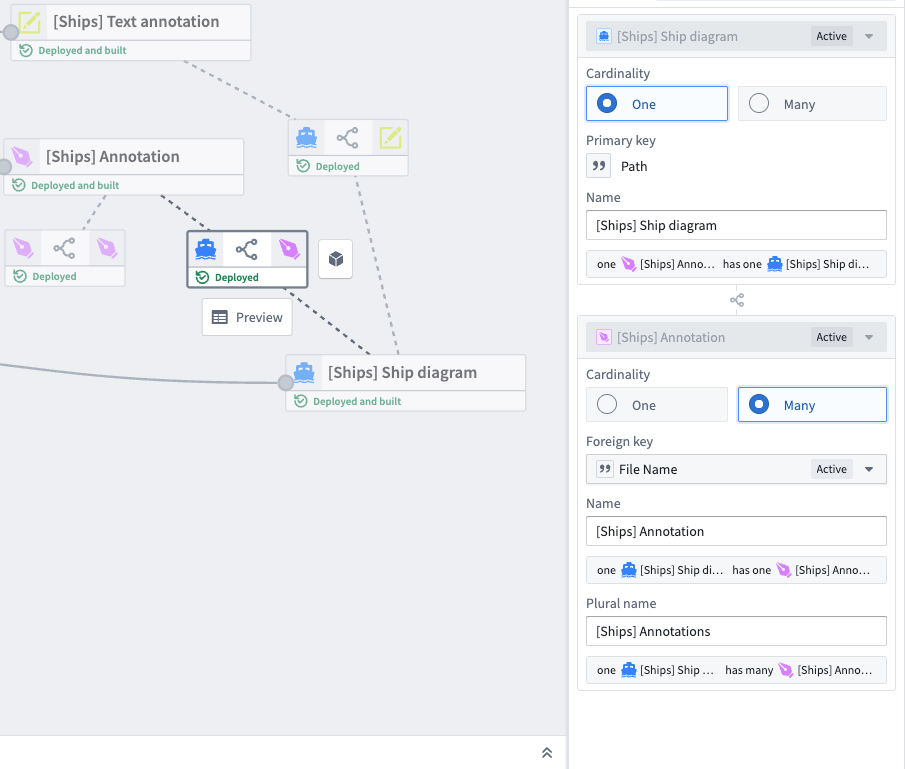
In the Pipeline Builder graph below, the Wikipedia commons... media set outputs the [Ships] Ship diagram object type. The Text - Ship annotations dataset outputs the [Ship] Text Annotations object type. Finally, the Ship annotations dataset outputs the [Ships] Annotation object type.
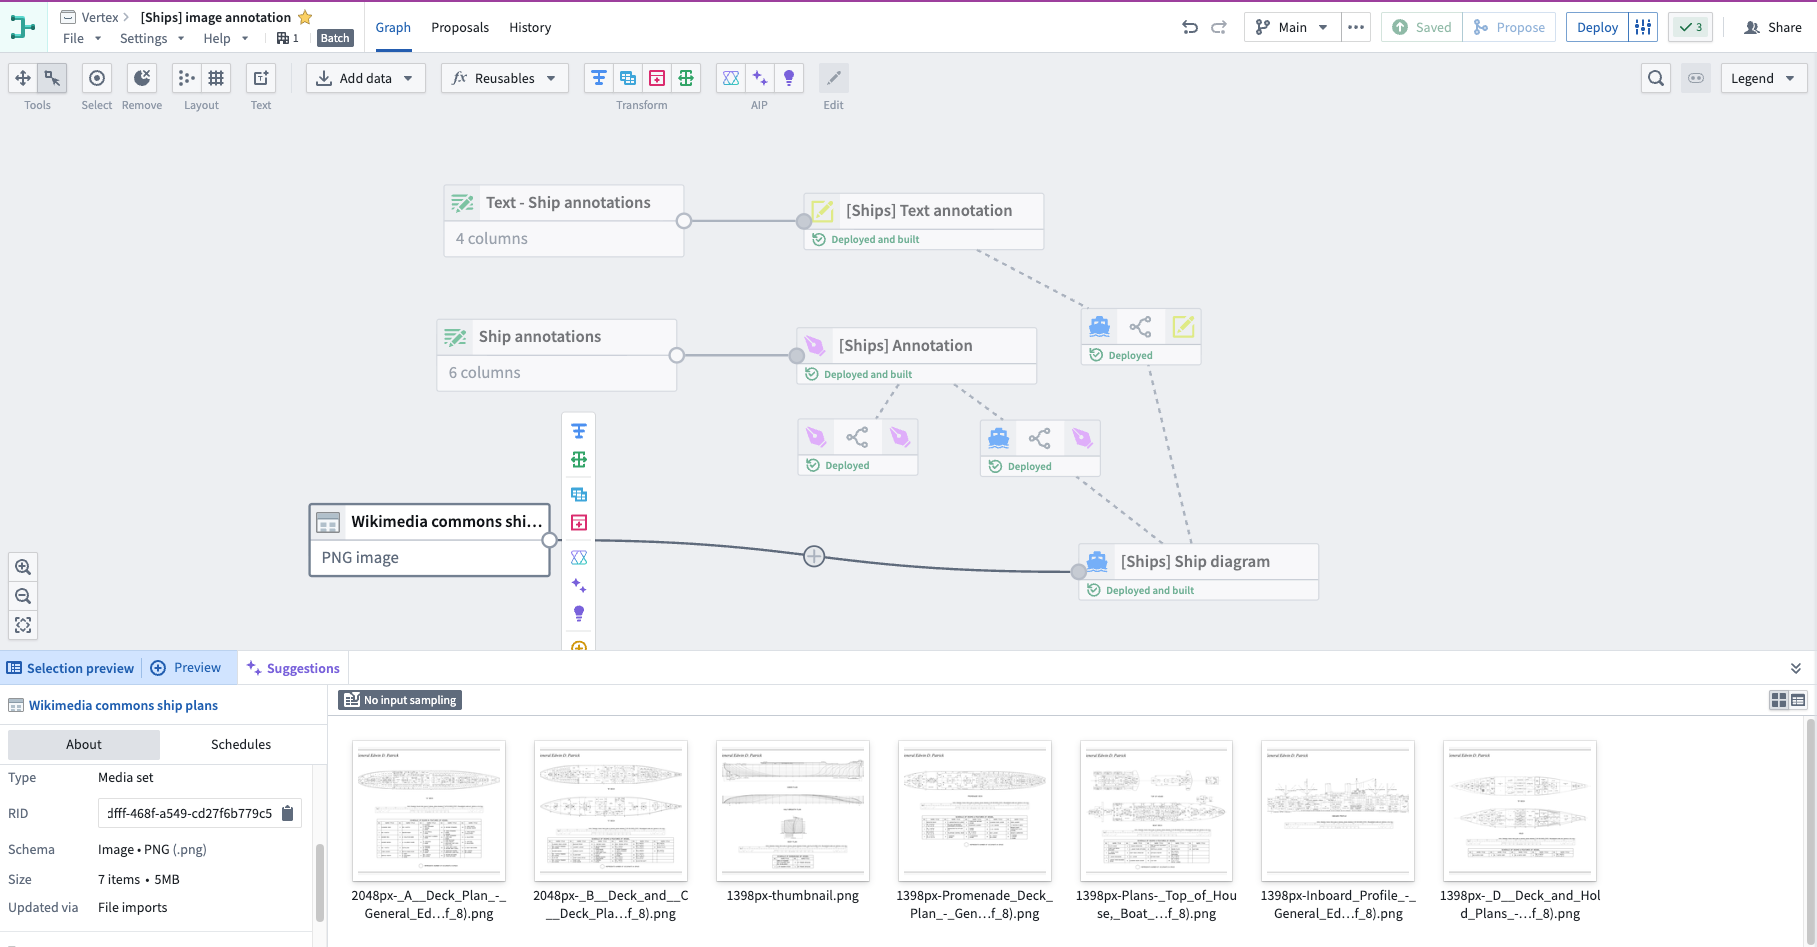
When selected, you can view the individual PNG images that make up the Wikipedia commons... media set in the preview panel.
Selecting the [Ships] Ship diagram object type reveals a preview of the image media references and RIDs.
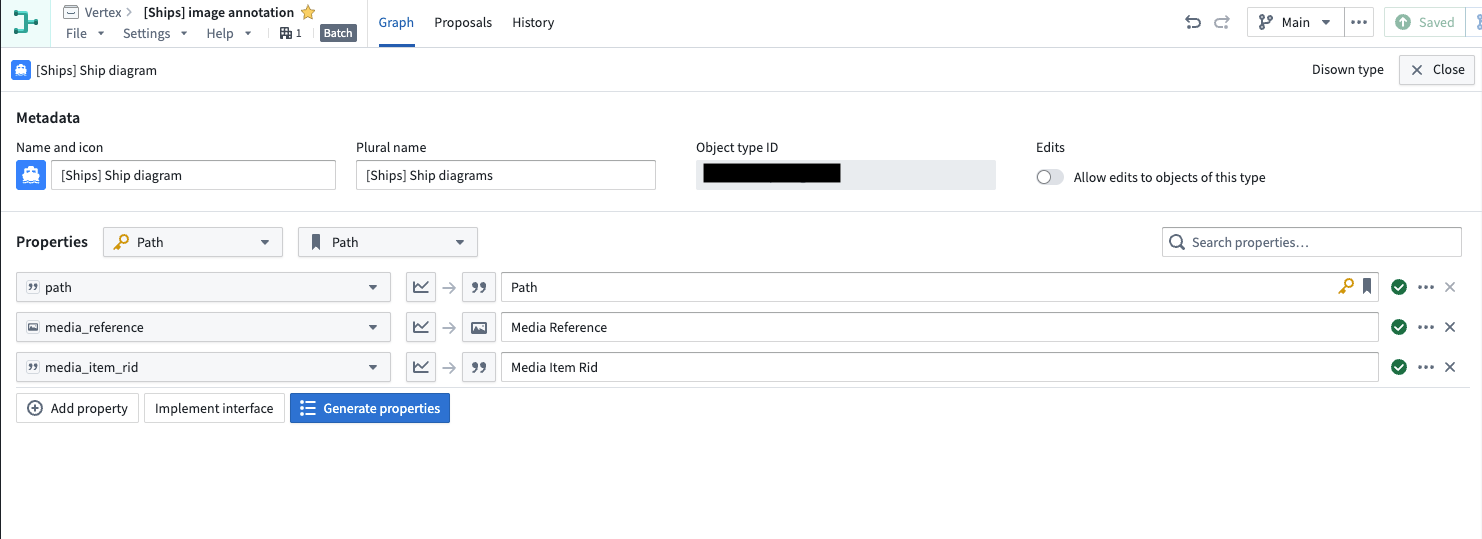
By double-clicking the same node, we can view the properties of the [Ships] Ship diagram object type that are derived from the columns of the source dataset.
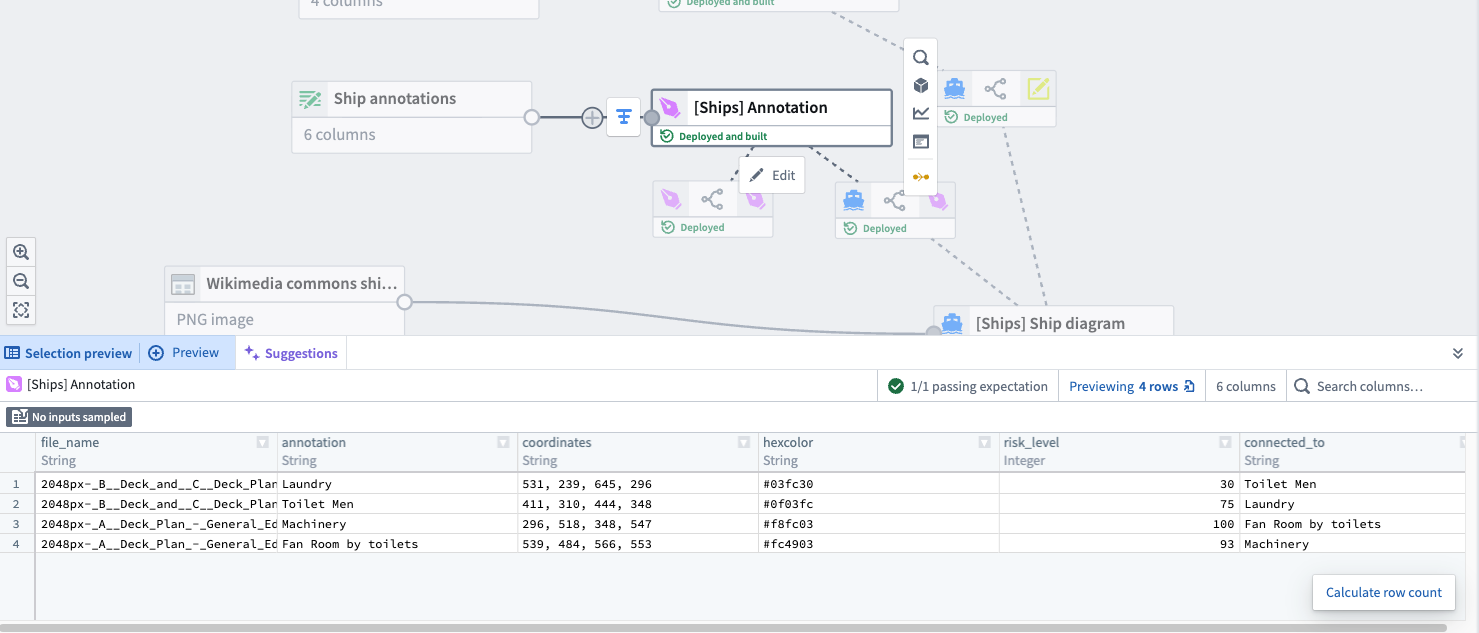
We can select the [Ships] Annotation object type to view a preview of the source dataset, which includes annotation, coordinates, and hexcolor columns.
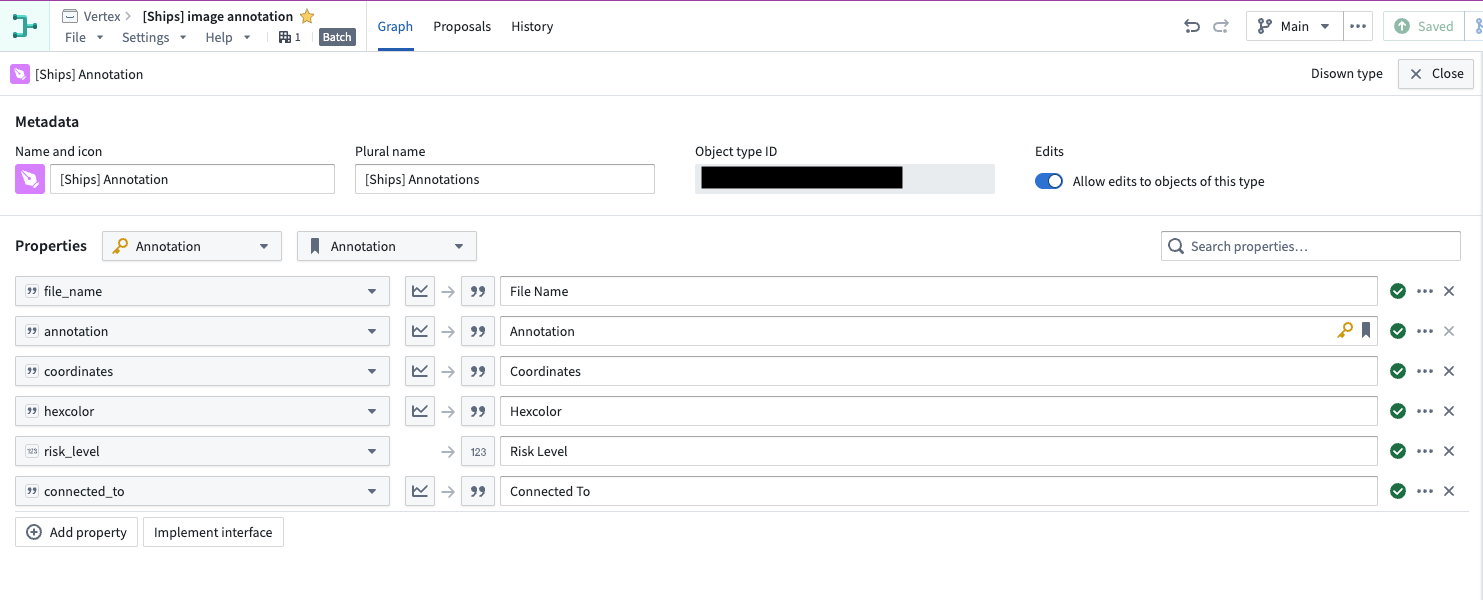
Double-clicking the same node will display the properties of the [Ships] Annotation object type that are derived from the columns of the source dataset.
We linked the Annotation and Text annotation object types to their related Ship diagram object types with the File Name foreign key property.
Now that we understand the relationship between our media-based object type and annotation object types, we can continue configurations in Ontology Manager to set default behaviors for our object types when used in a Vertex graph.
Ontology Manager configuration
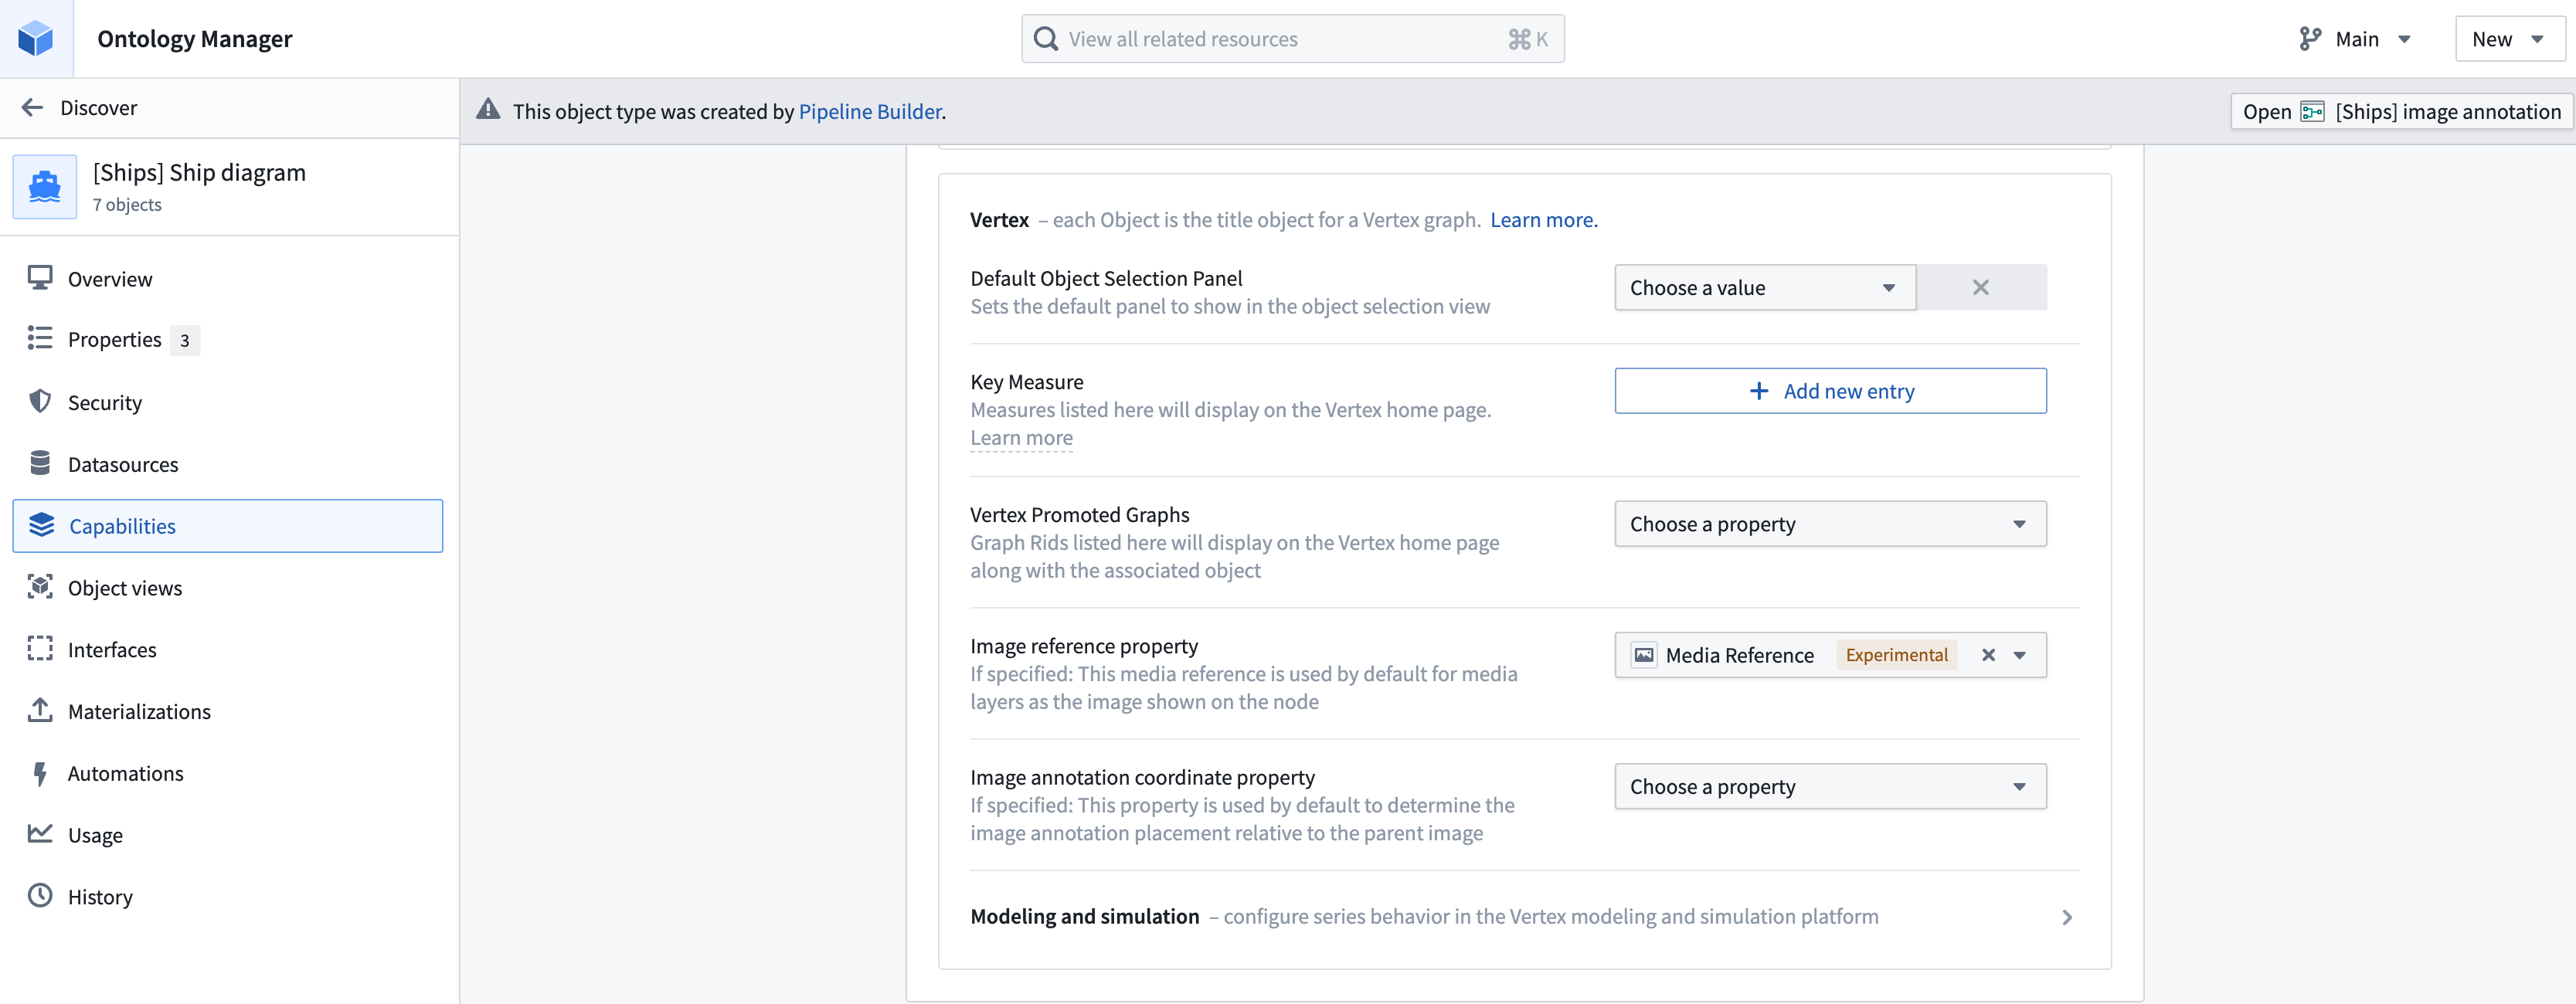
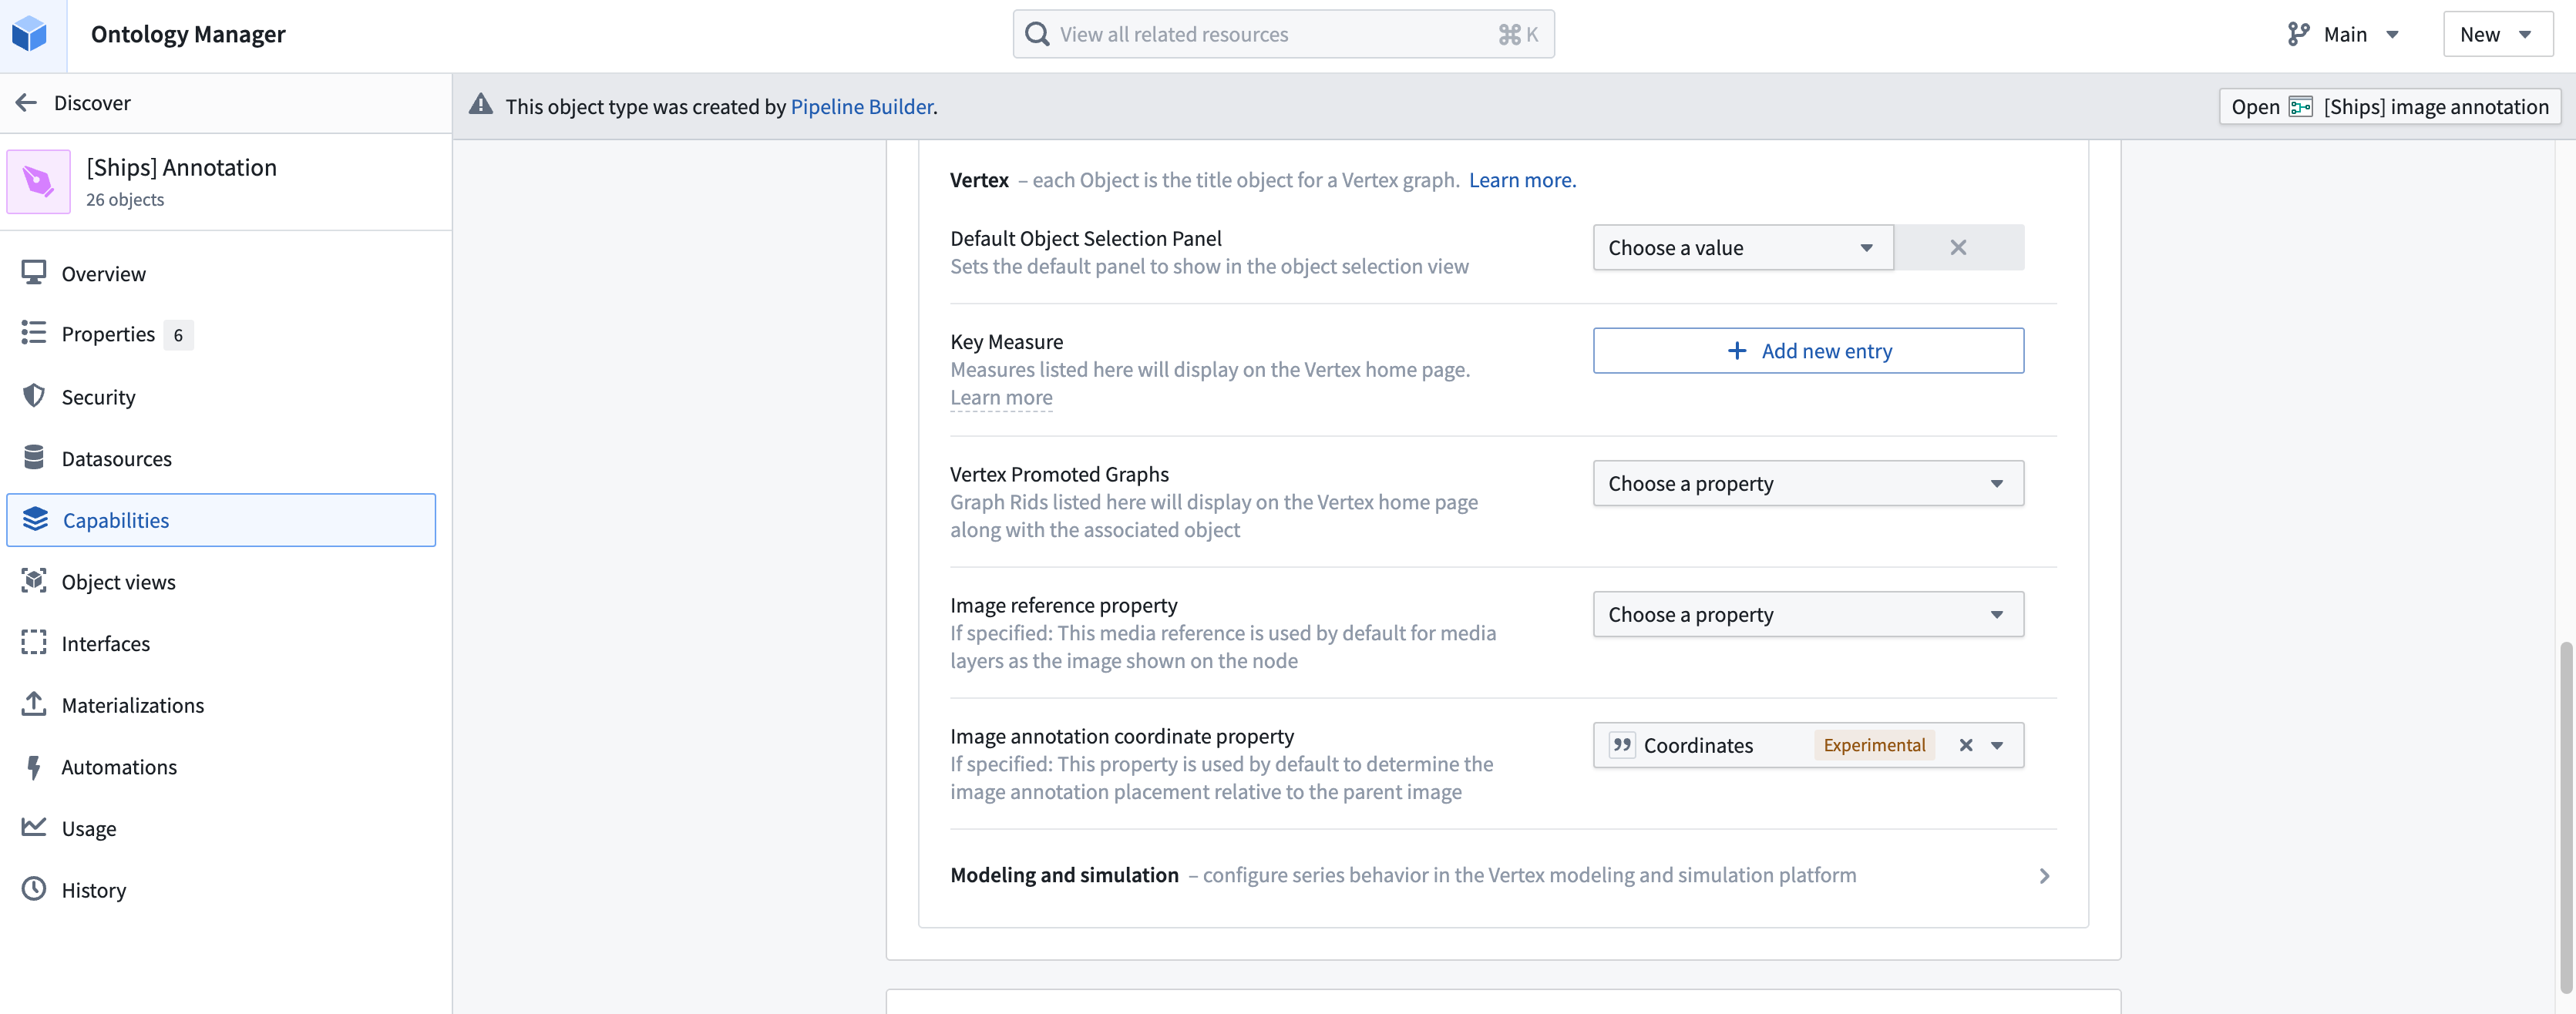
Navigate to your media-based object type in Ontology Manager. From the Capabilities tab, choose which image reference to use as the default image in a media layer. Select an option from the Image reference property dropdown menu.
Now we can configure the Annotation object type to define its behavior when used in Vertex.
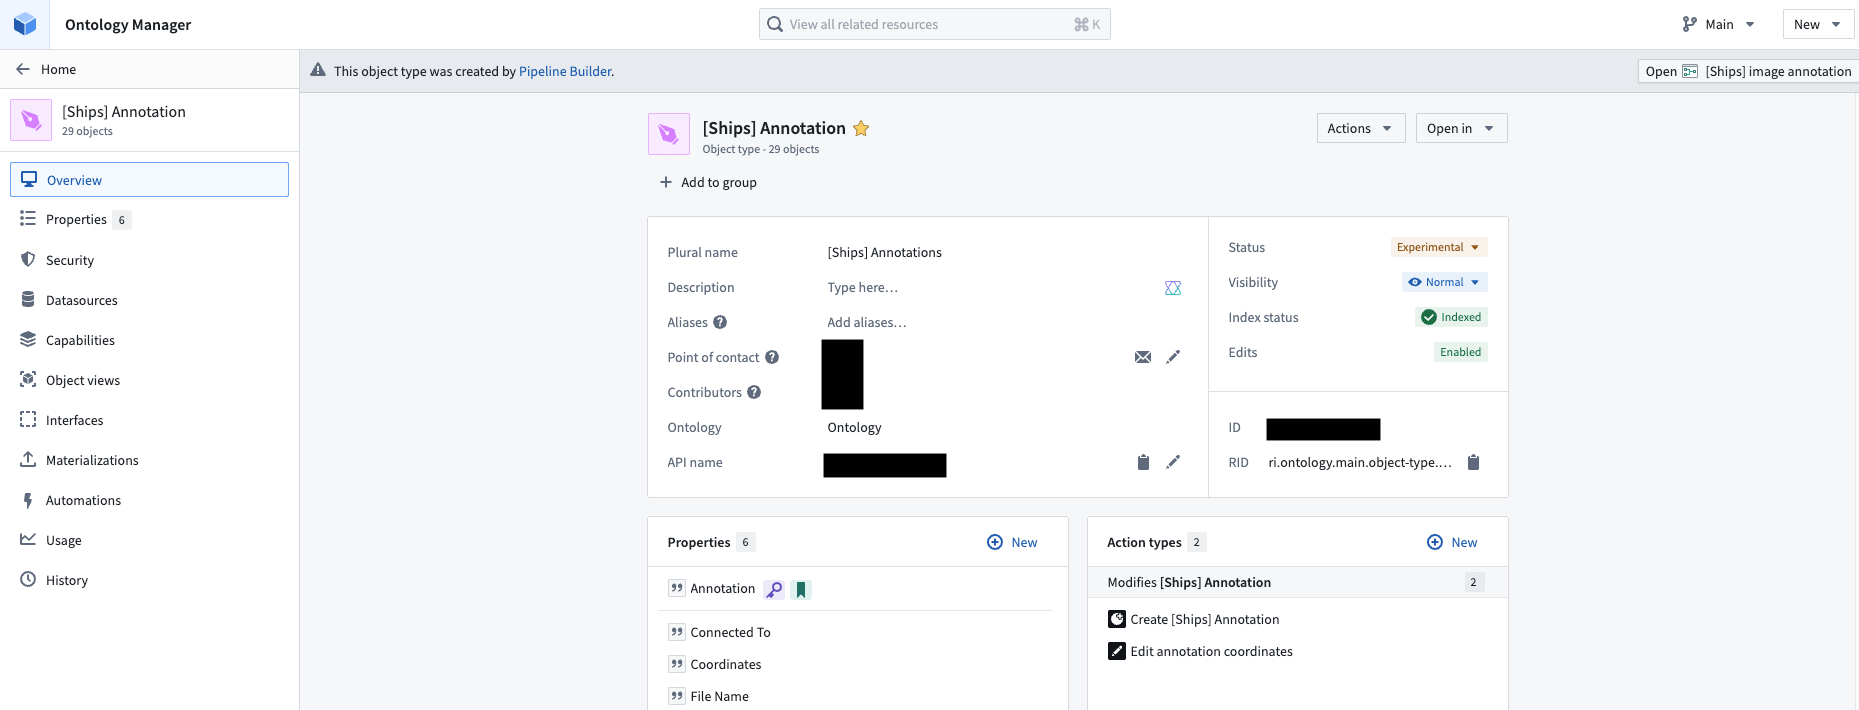
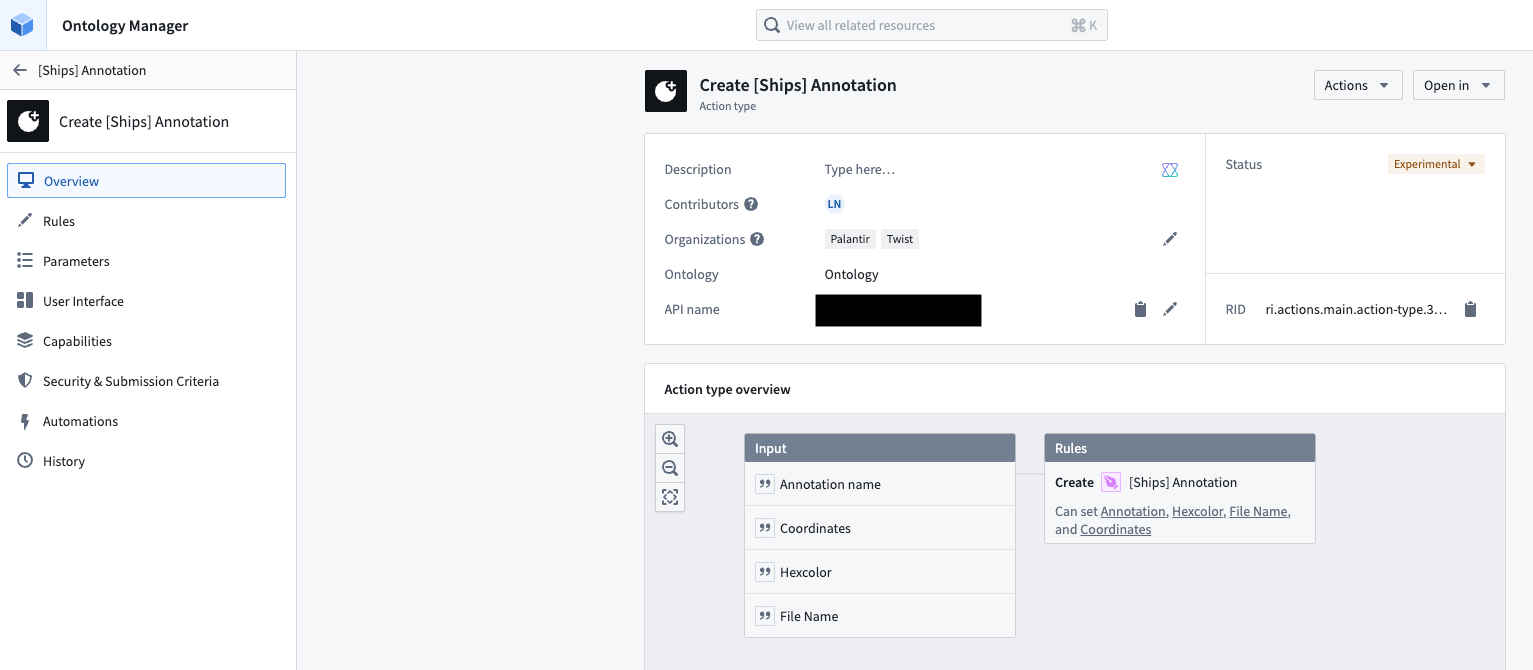
From the overview page, we can view two action types that we created to use on the Annotation object type: Create [Ships] Annotation and Edit annotation coordinates. We can use these action types in our Vertex graph to create or edit an image annotation.
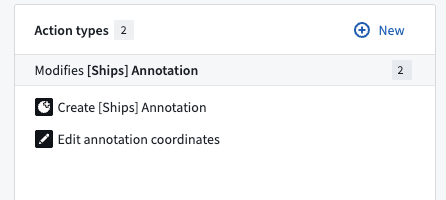
Select the action type to view its overview page. We can see that the Create [Ships] Annotation action type, for example, is set up to use the Annotation name, Coordinates, Hexcolor, and File Name properties when run.
You can configure which of the object type properties is used by default as the pixel space bounding box coordinates of your image annotations. In the same Capabilities tab, choose from the properties available in the Image annotation coordinate property dropdown menu. For our example, we are choosing the Coordinates property.
Add objects as media layers
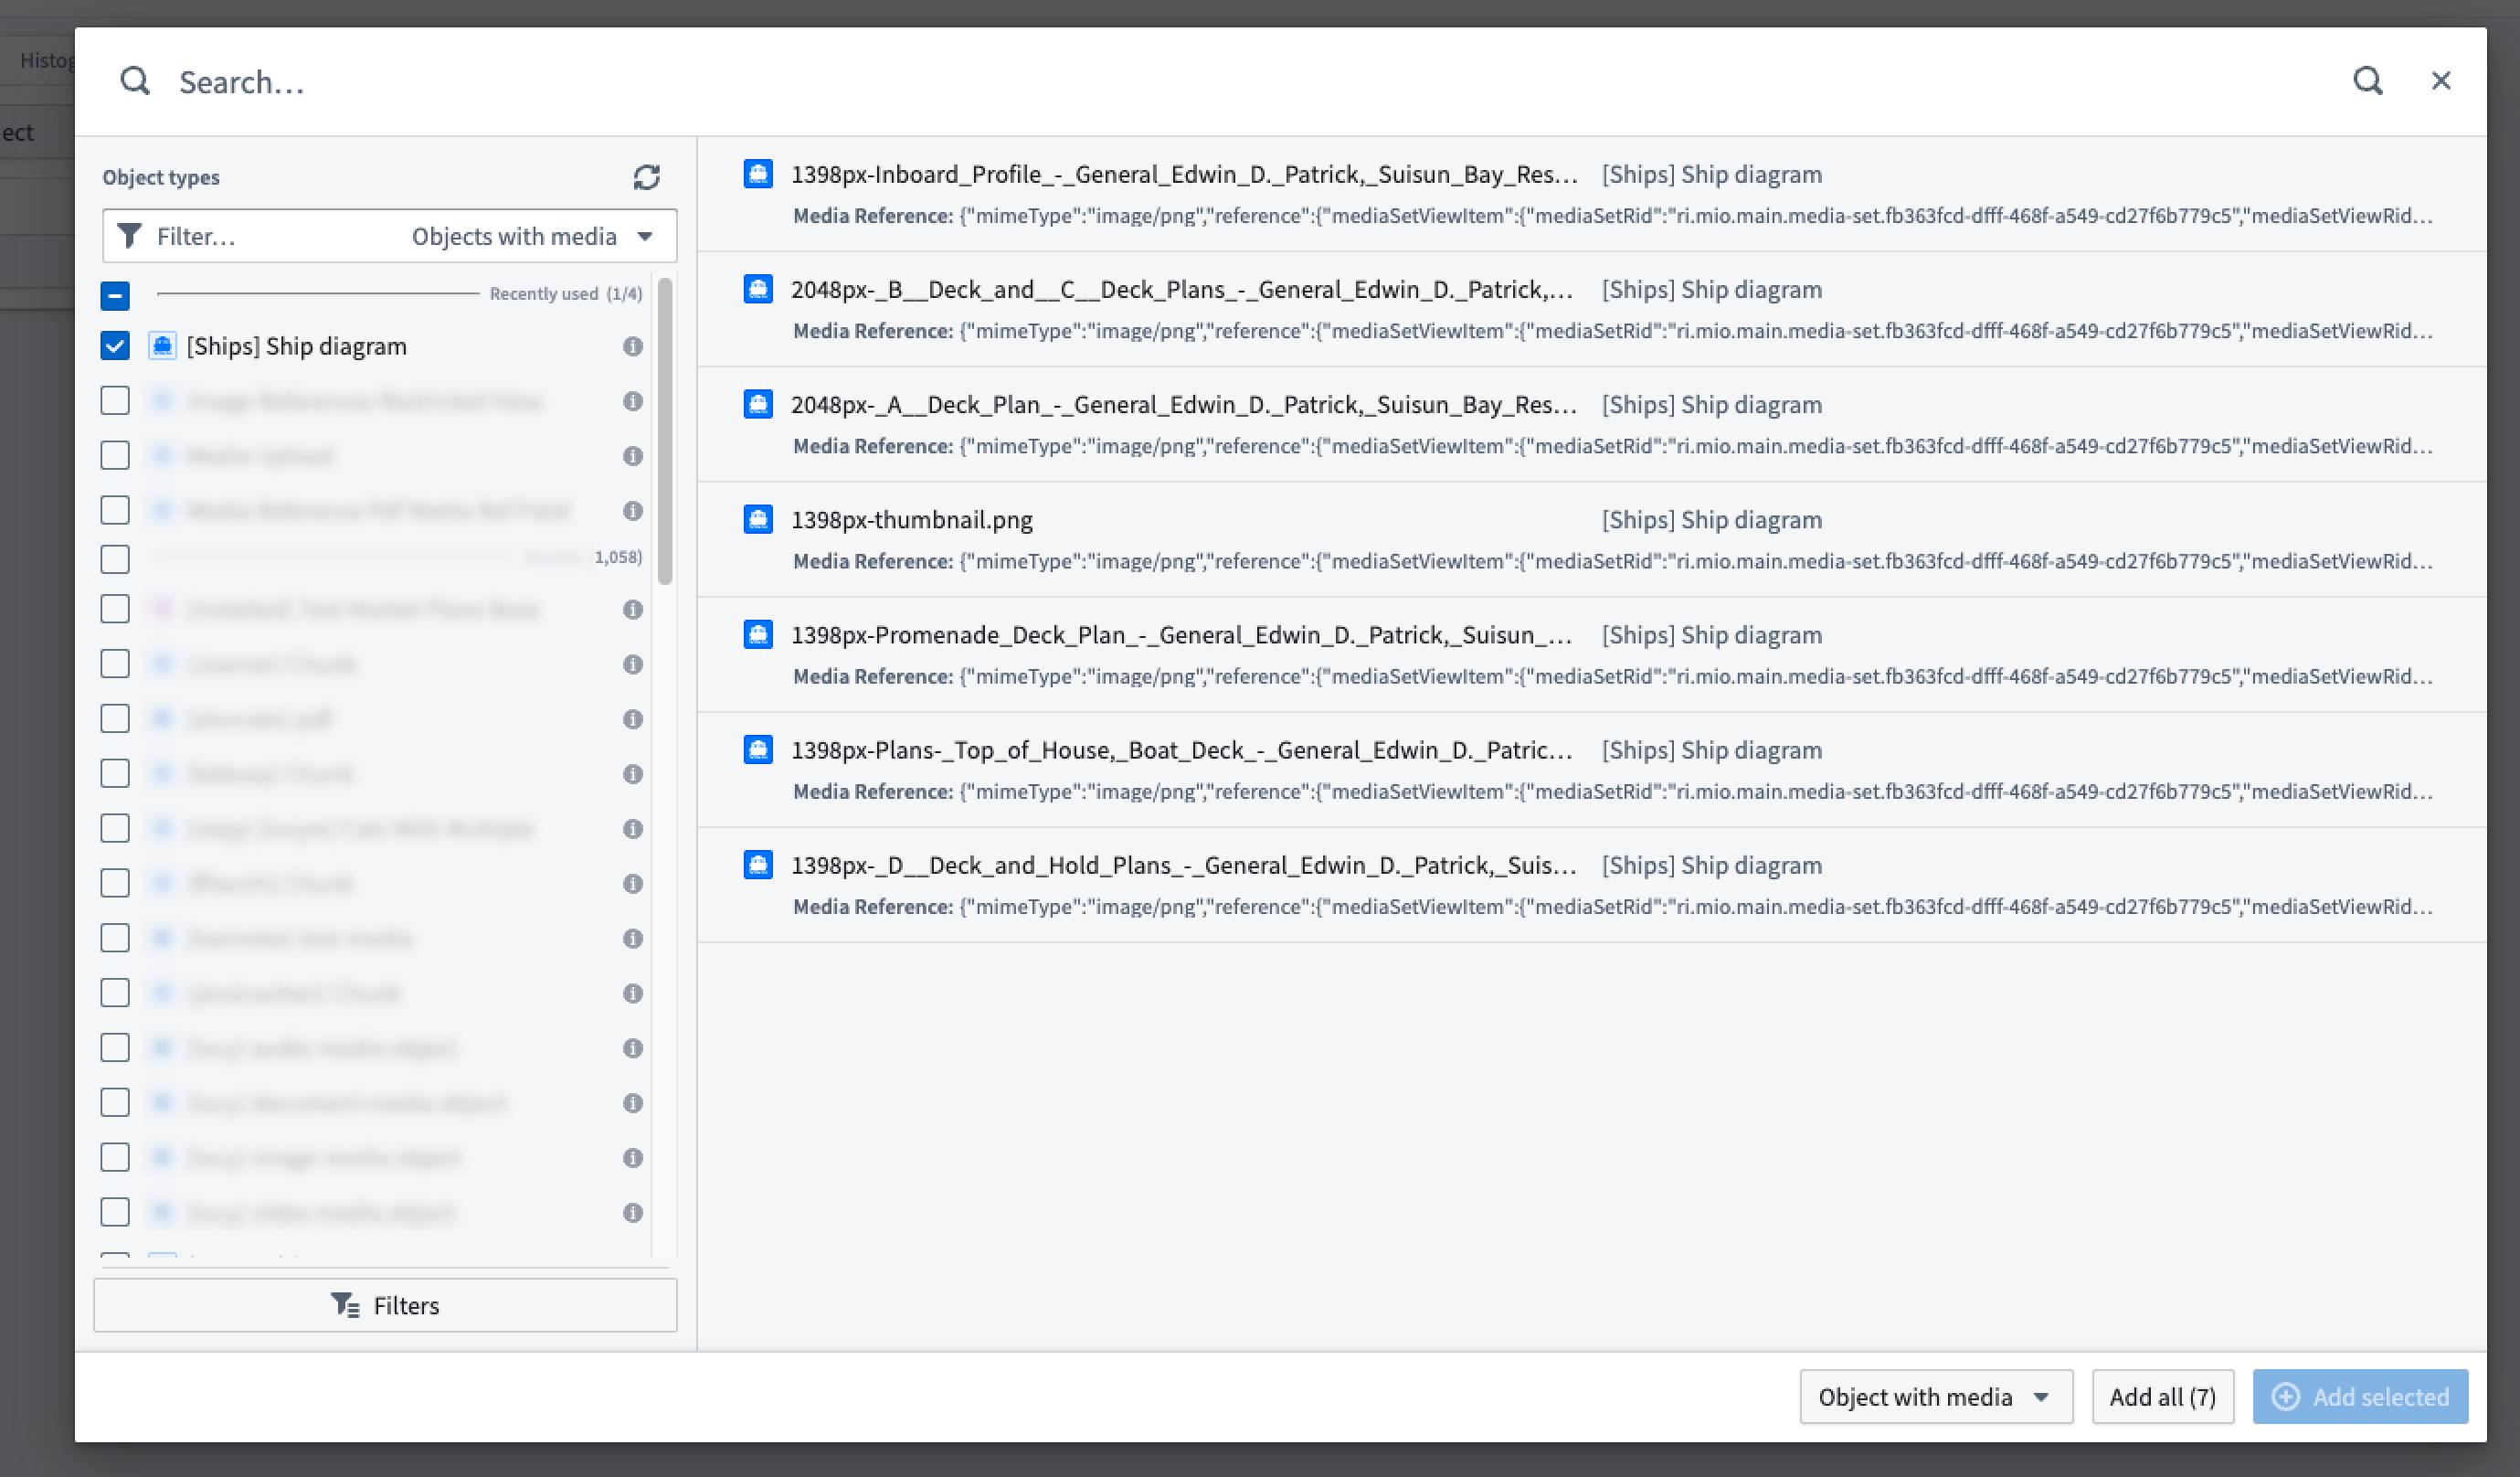
After confirming your configurations in Ontology Manager, you can add objects to your Vertex graph. Select + Add object to open the object search interface.
You can search by name, type, or other identifying properties. You can also filter down to object types that only contain media references using the dropdown menu.
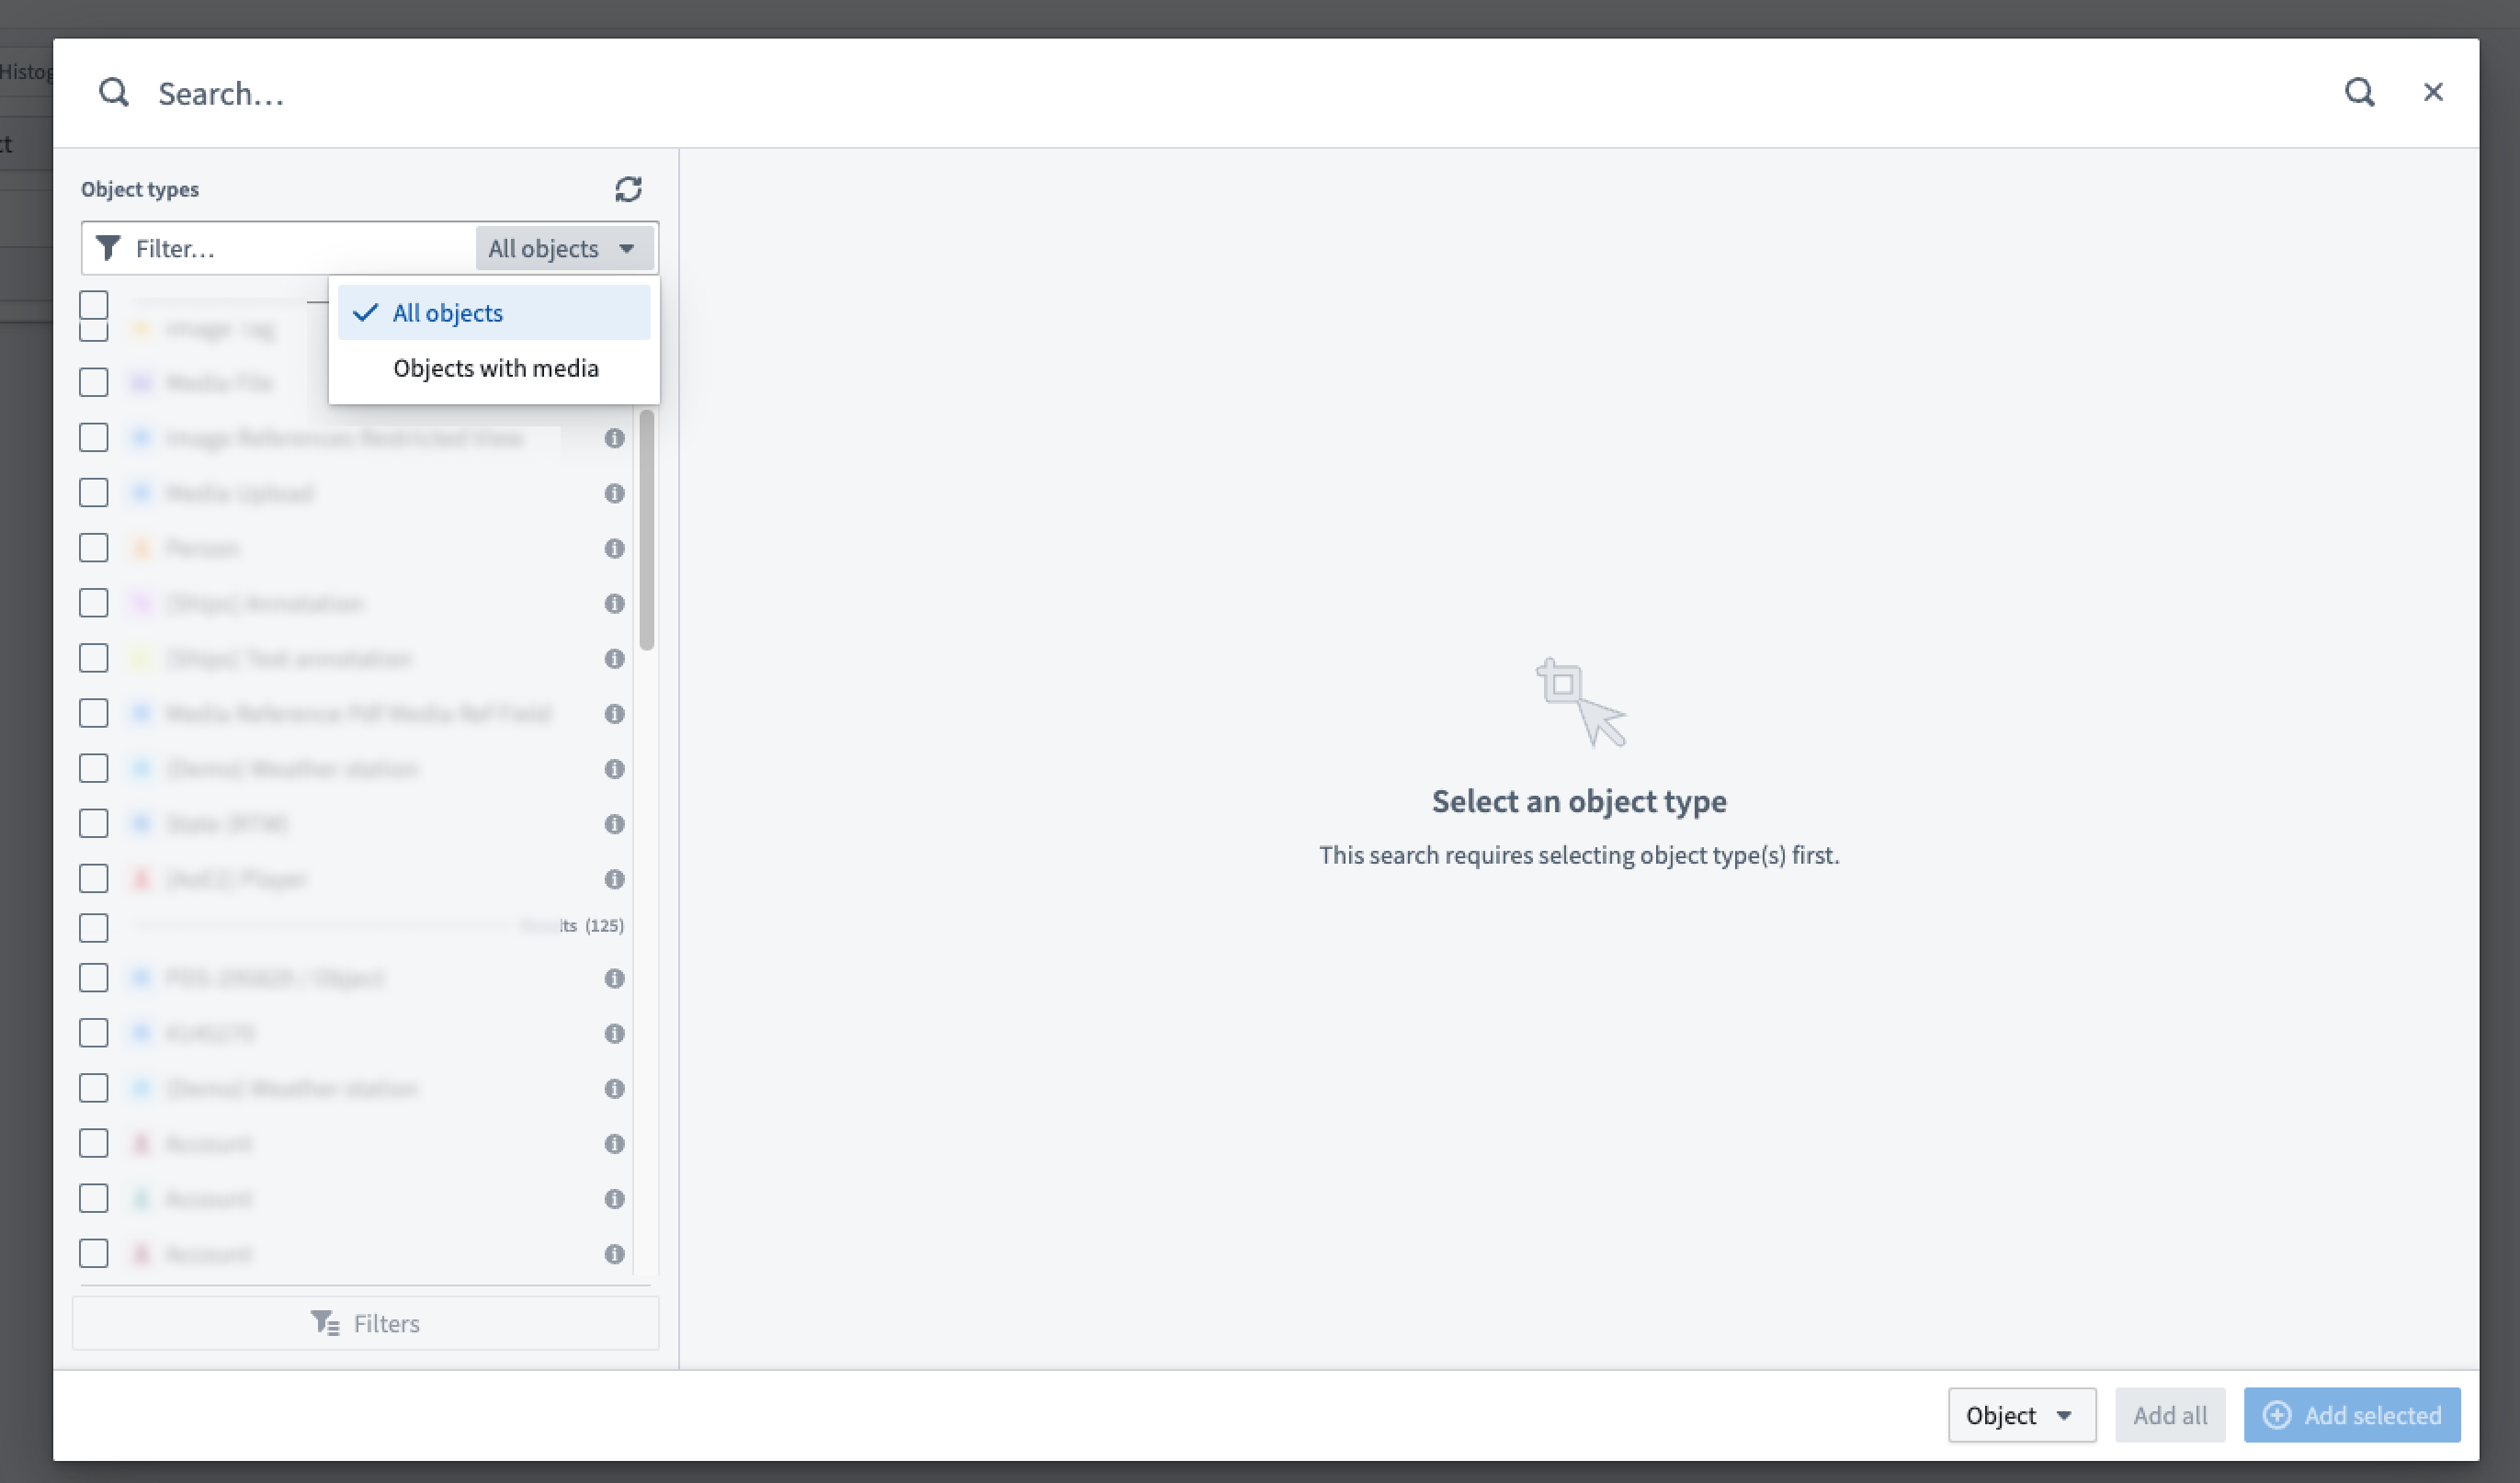
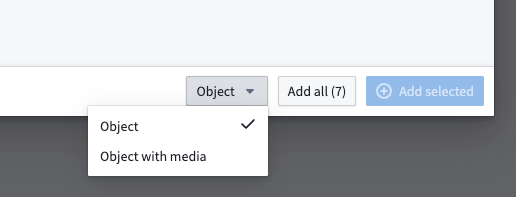
In the bottom right corner of the dialog, use the dropdown menu to specify how to add the object to Vertex. Object is the default option and will add the objects to the graph with their configured Ontology Manager object type icon and color. Choose the Object with media option to add and view annotations on the object.
Once you have selected all the objects you wish to add to Vertex, choose to Add all or + Add selected to add them to your graph where they will be displayed as a media layer.
Style and explore media layers
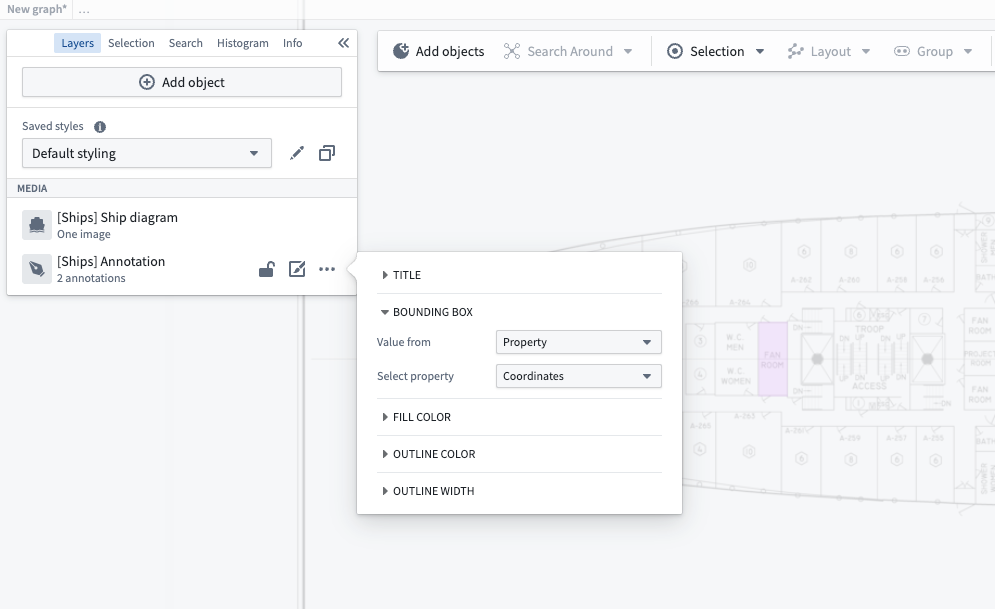
Unless otherwise configured in Ontology Manager, media layers will, by default, display the object using the first media reference. However, you can also customize the visual appearance of your media layer objects using the icon style options accessed from the Layers panel to the left. If the object you want to display has multiple media references, you can select which one to use.
![]()
Right-click on the graph to use the Search Around functionality to explore related objects and expand your media layer visualization with connected data.

If you did not configure the image annotation coordinate property for the object in Ontology Manager, you can also use the style options to choose which property is used as the pixel-space bounding box coordinates of your image annotations.
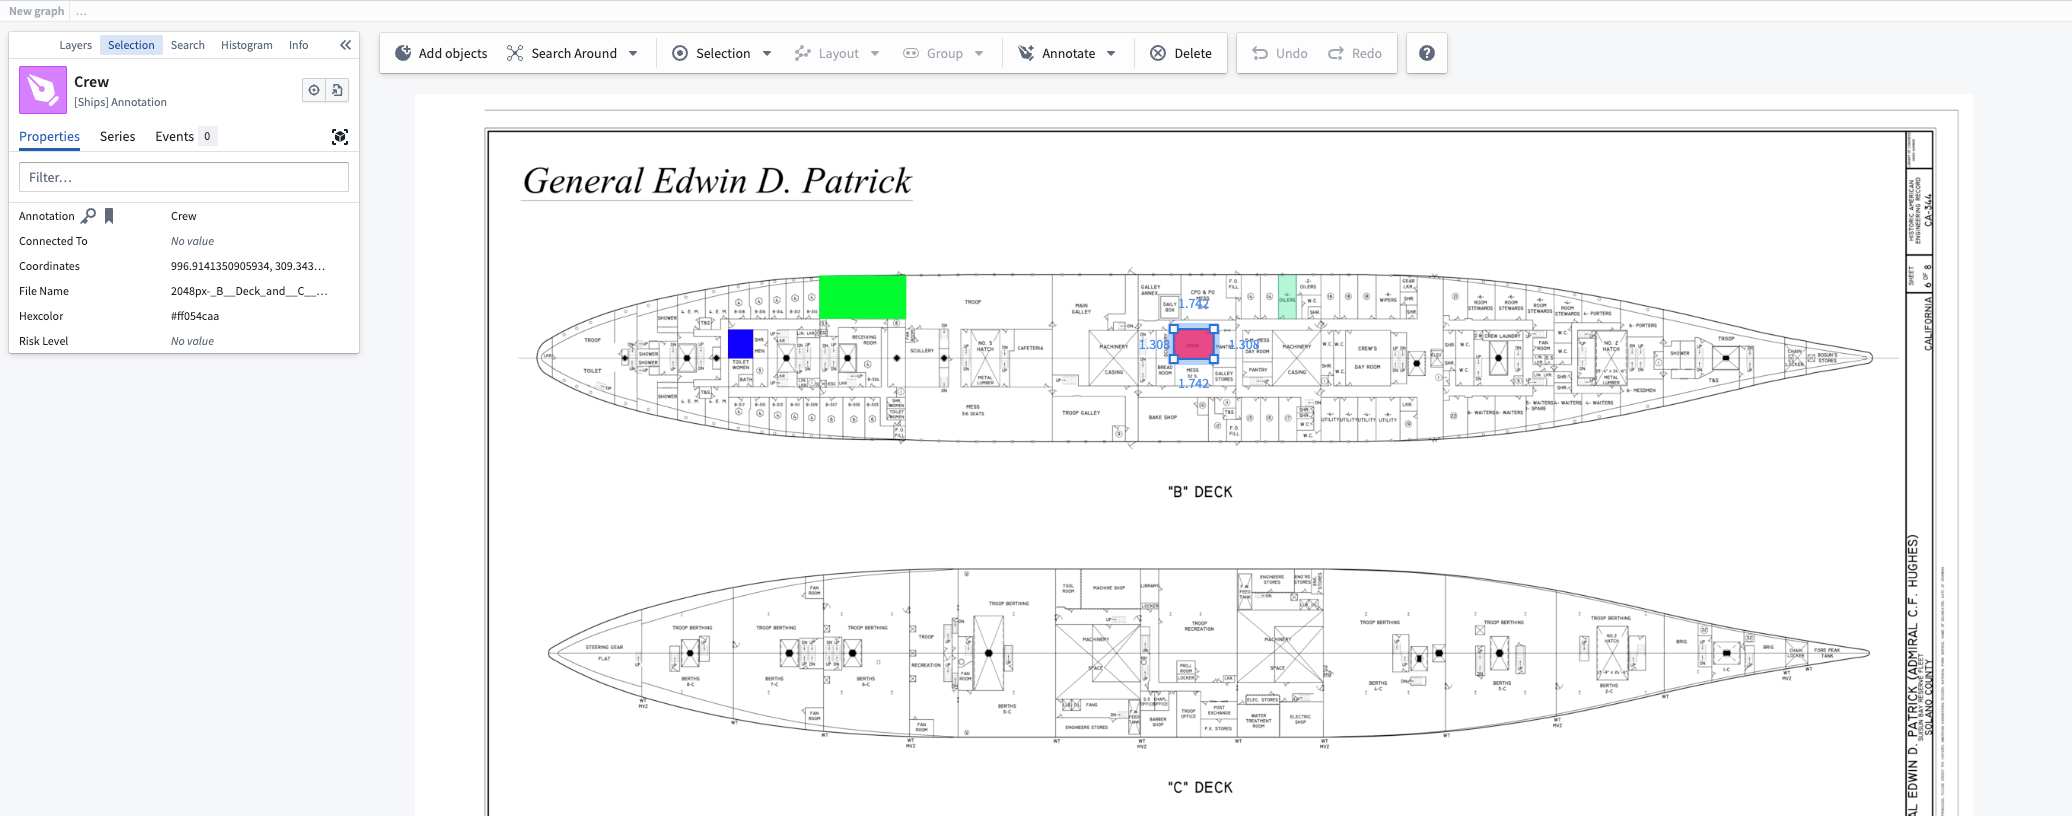
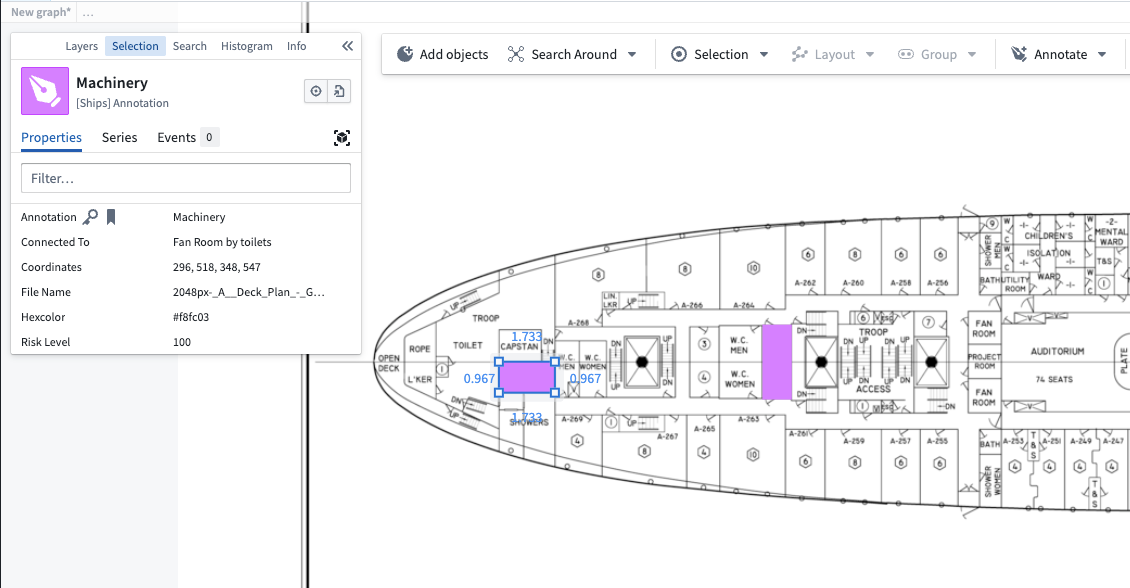
Select objects within your media layer to view and interact with their properties. The selection will highlight the chosen object and display relevant information.
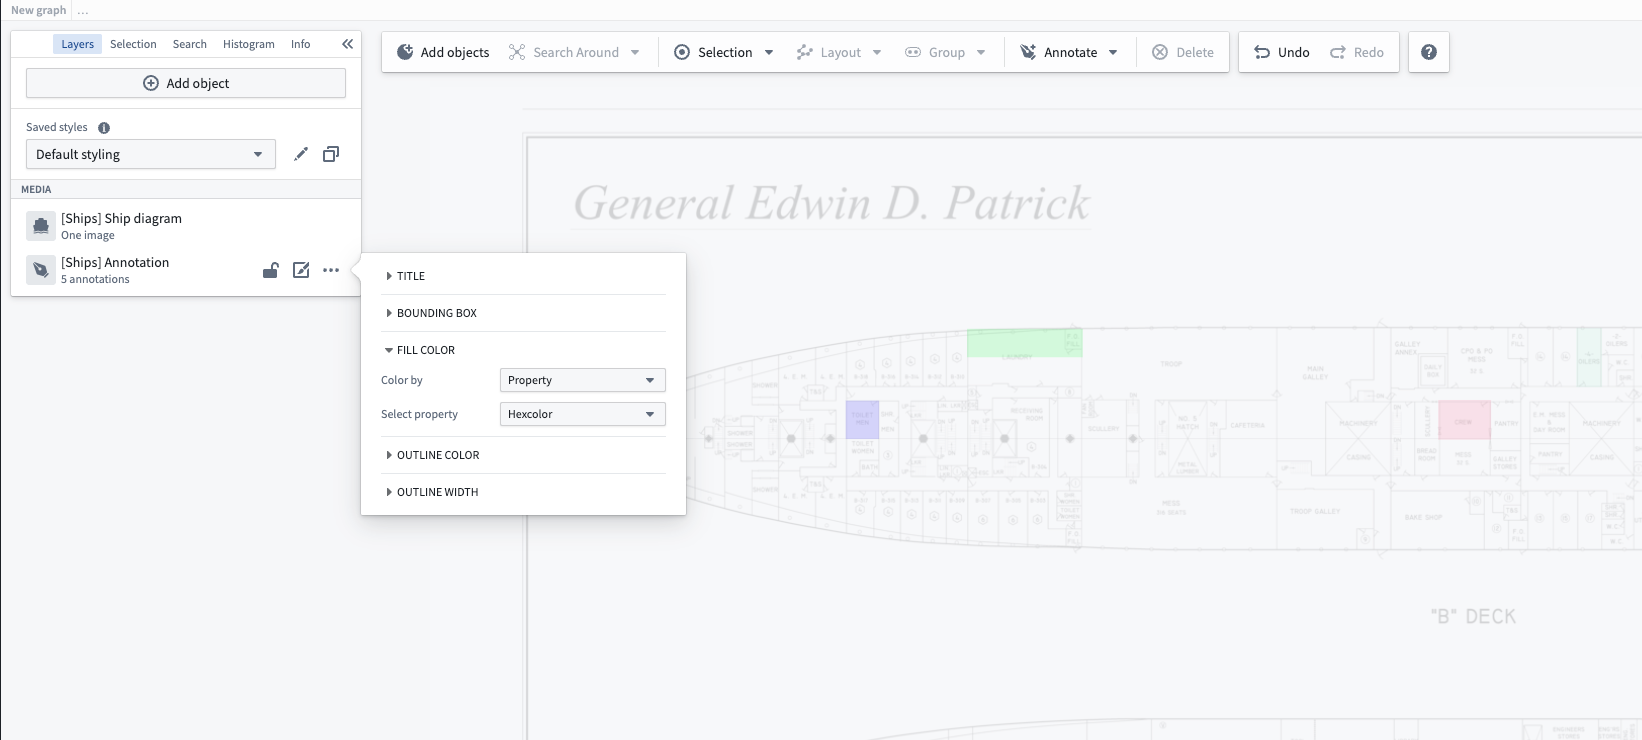
Style the annotations, including the fill and outline colors, using the annotation layer style menu.
Create image annotations
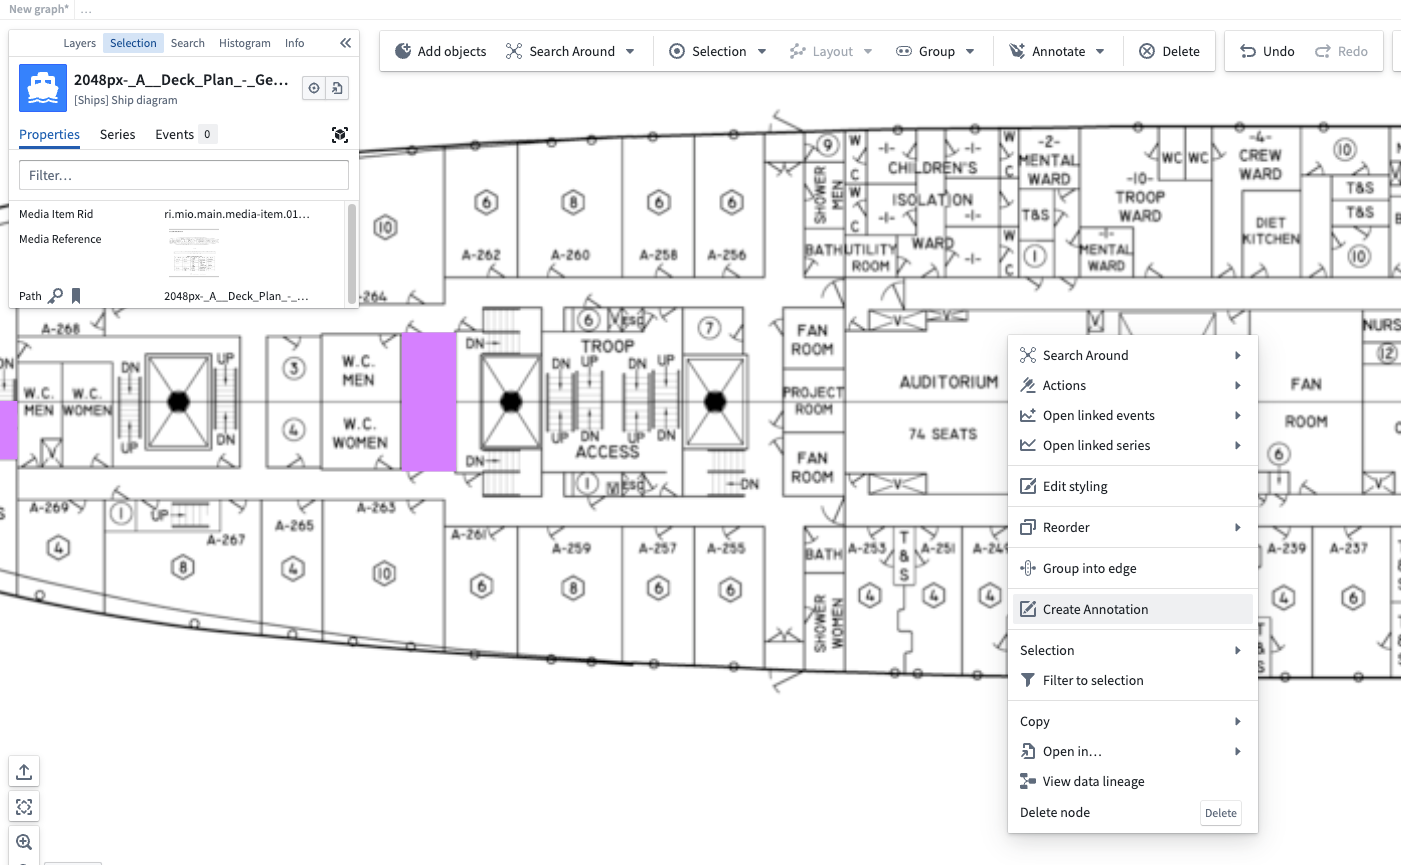
Annotations allow you to mark specific areas or features within your media layer. To create a new annotation, right-click on a media layer object to open the context menu and select Create Annotation.
Draw your annotation directly on the image, dragging to define the shape. You can resize and move the annotation after you draw it.
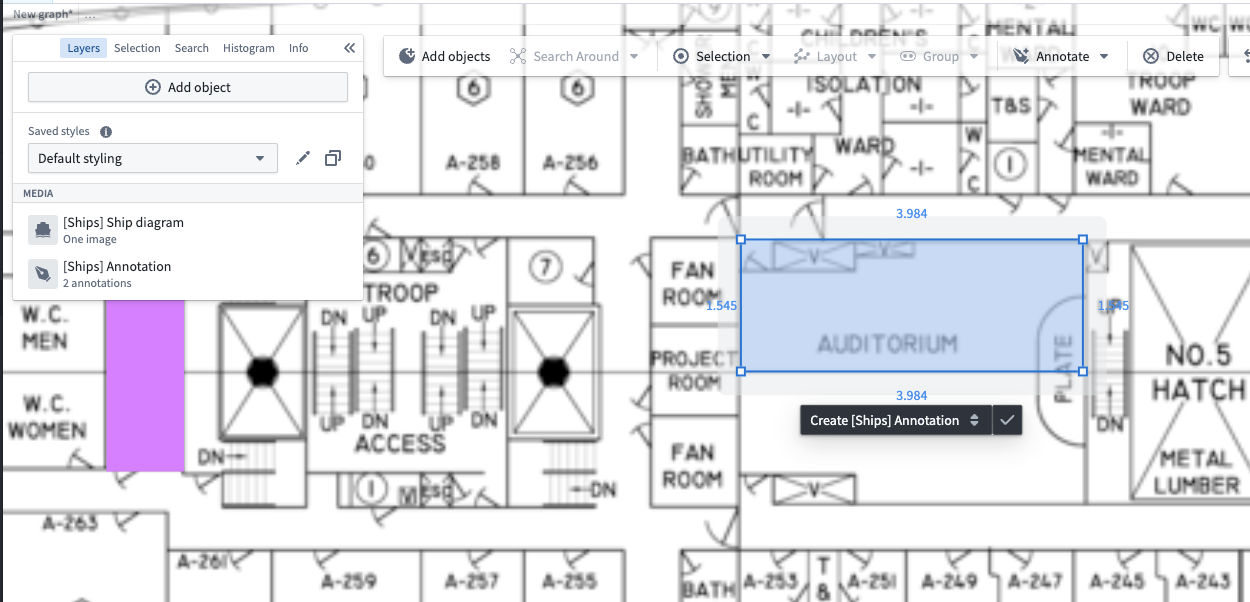
If you configured action types to create annotations for objects linked to the object type of the media, you will see the options to run those actions in a dropdown menu. In our example, we can see both the Create [Ships] Annotation and a Create [Ships] Text annotation.
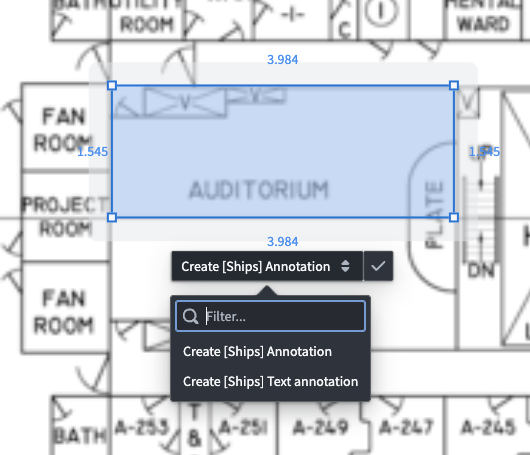
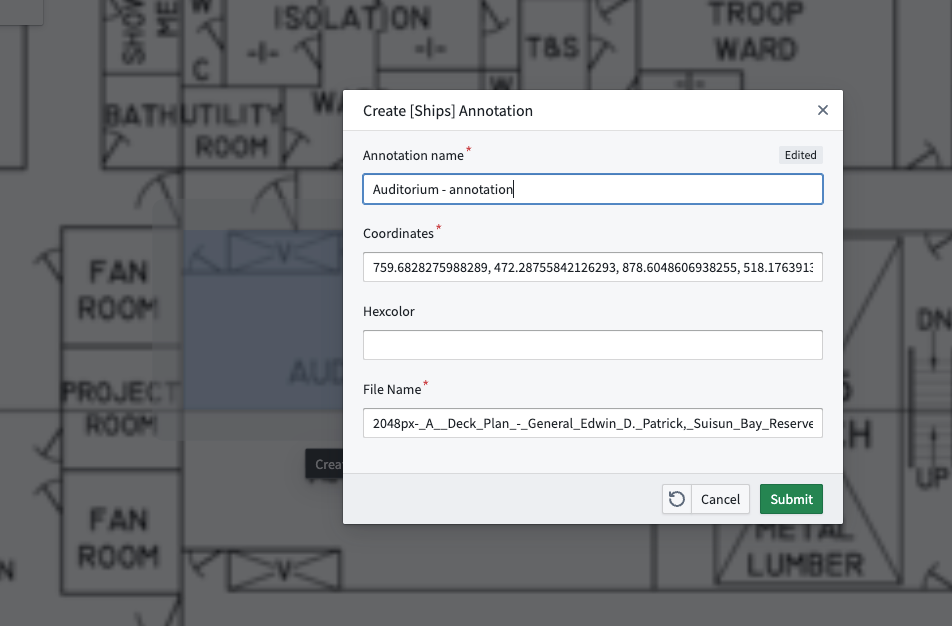
Select the action type you want to run, then fill out the form to name your new annotation object. Notice that the coordinates of the annotation will be used as the bounding box coordinates for the new object, which will vary depending on how you configured the action for your object type.
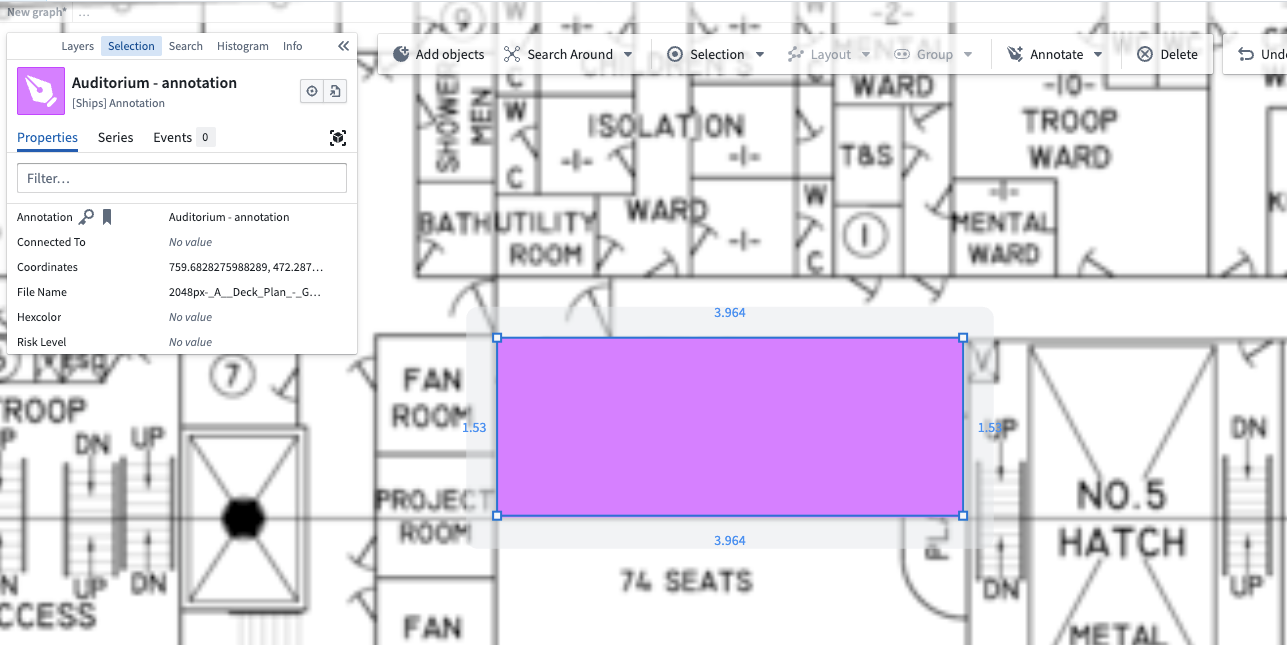
You can now view the object with its associated annotation in the media layer of your graph.
Modify existing annotations
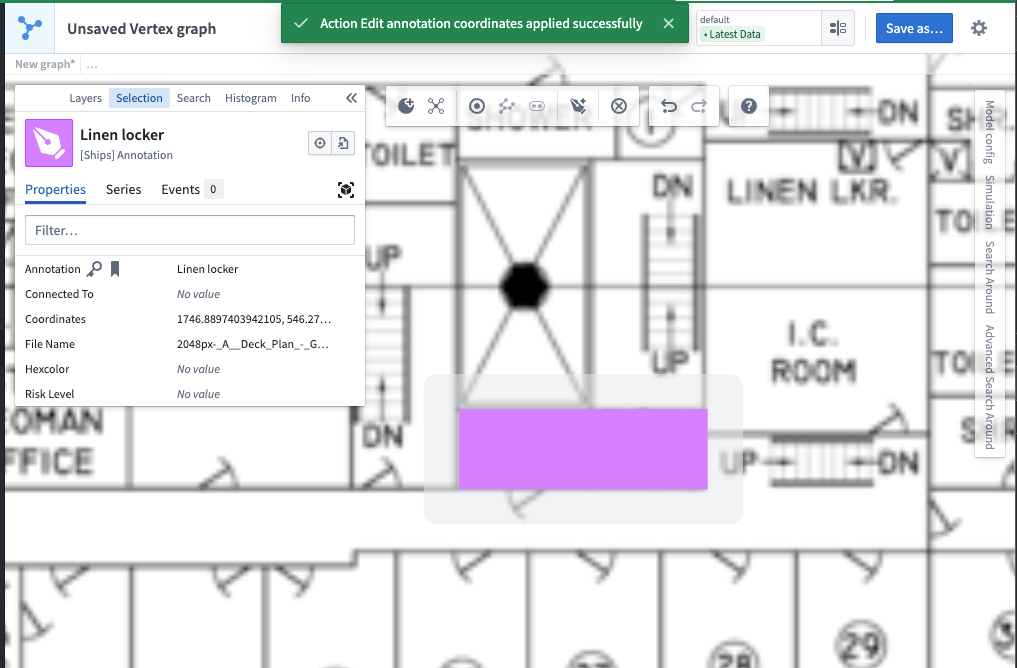
To modify an existing annotation, locate and select the object you want to edit. In this example, we are working with a Linen locker object that was previously annotated.
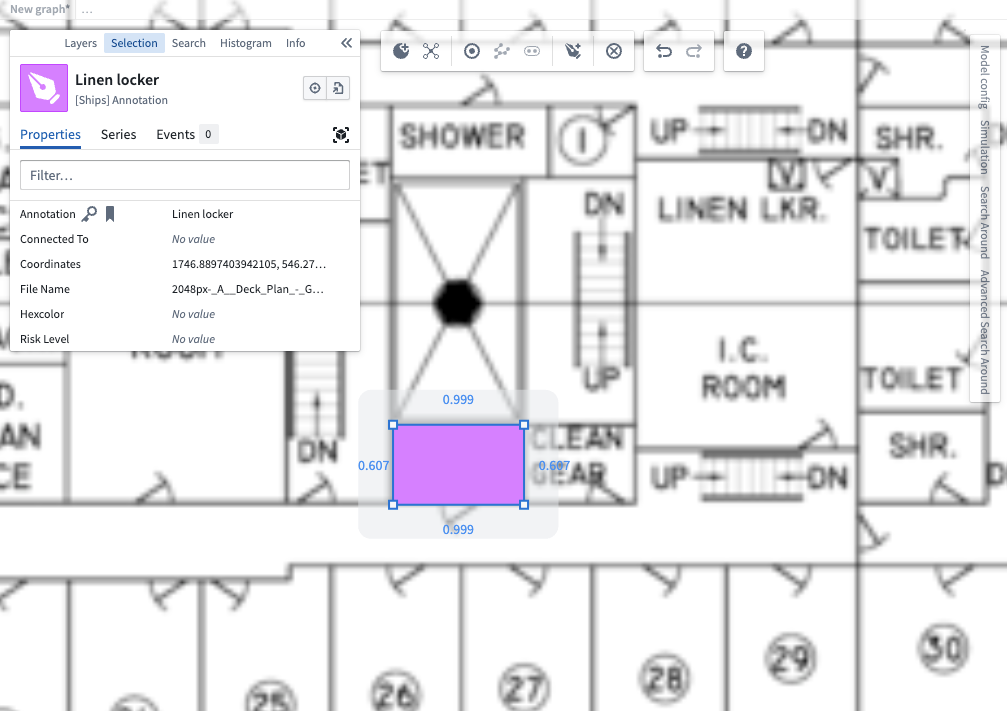
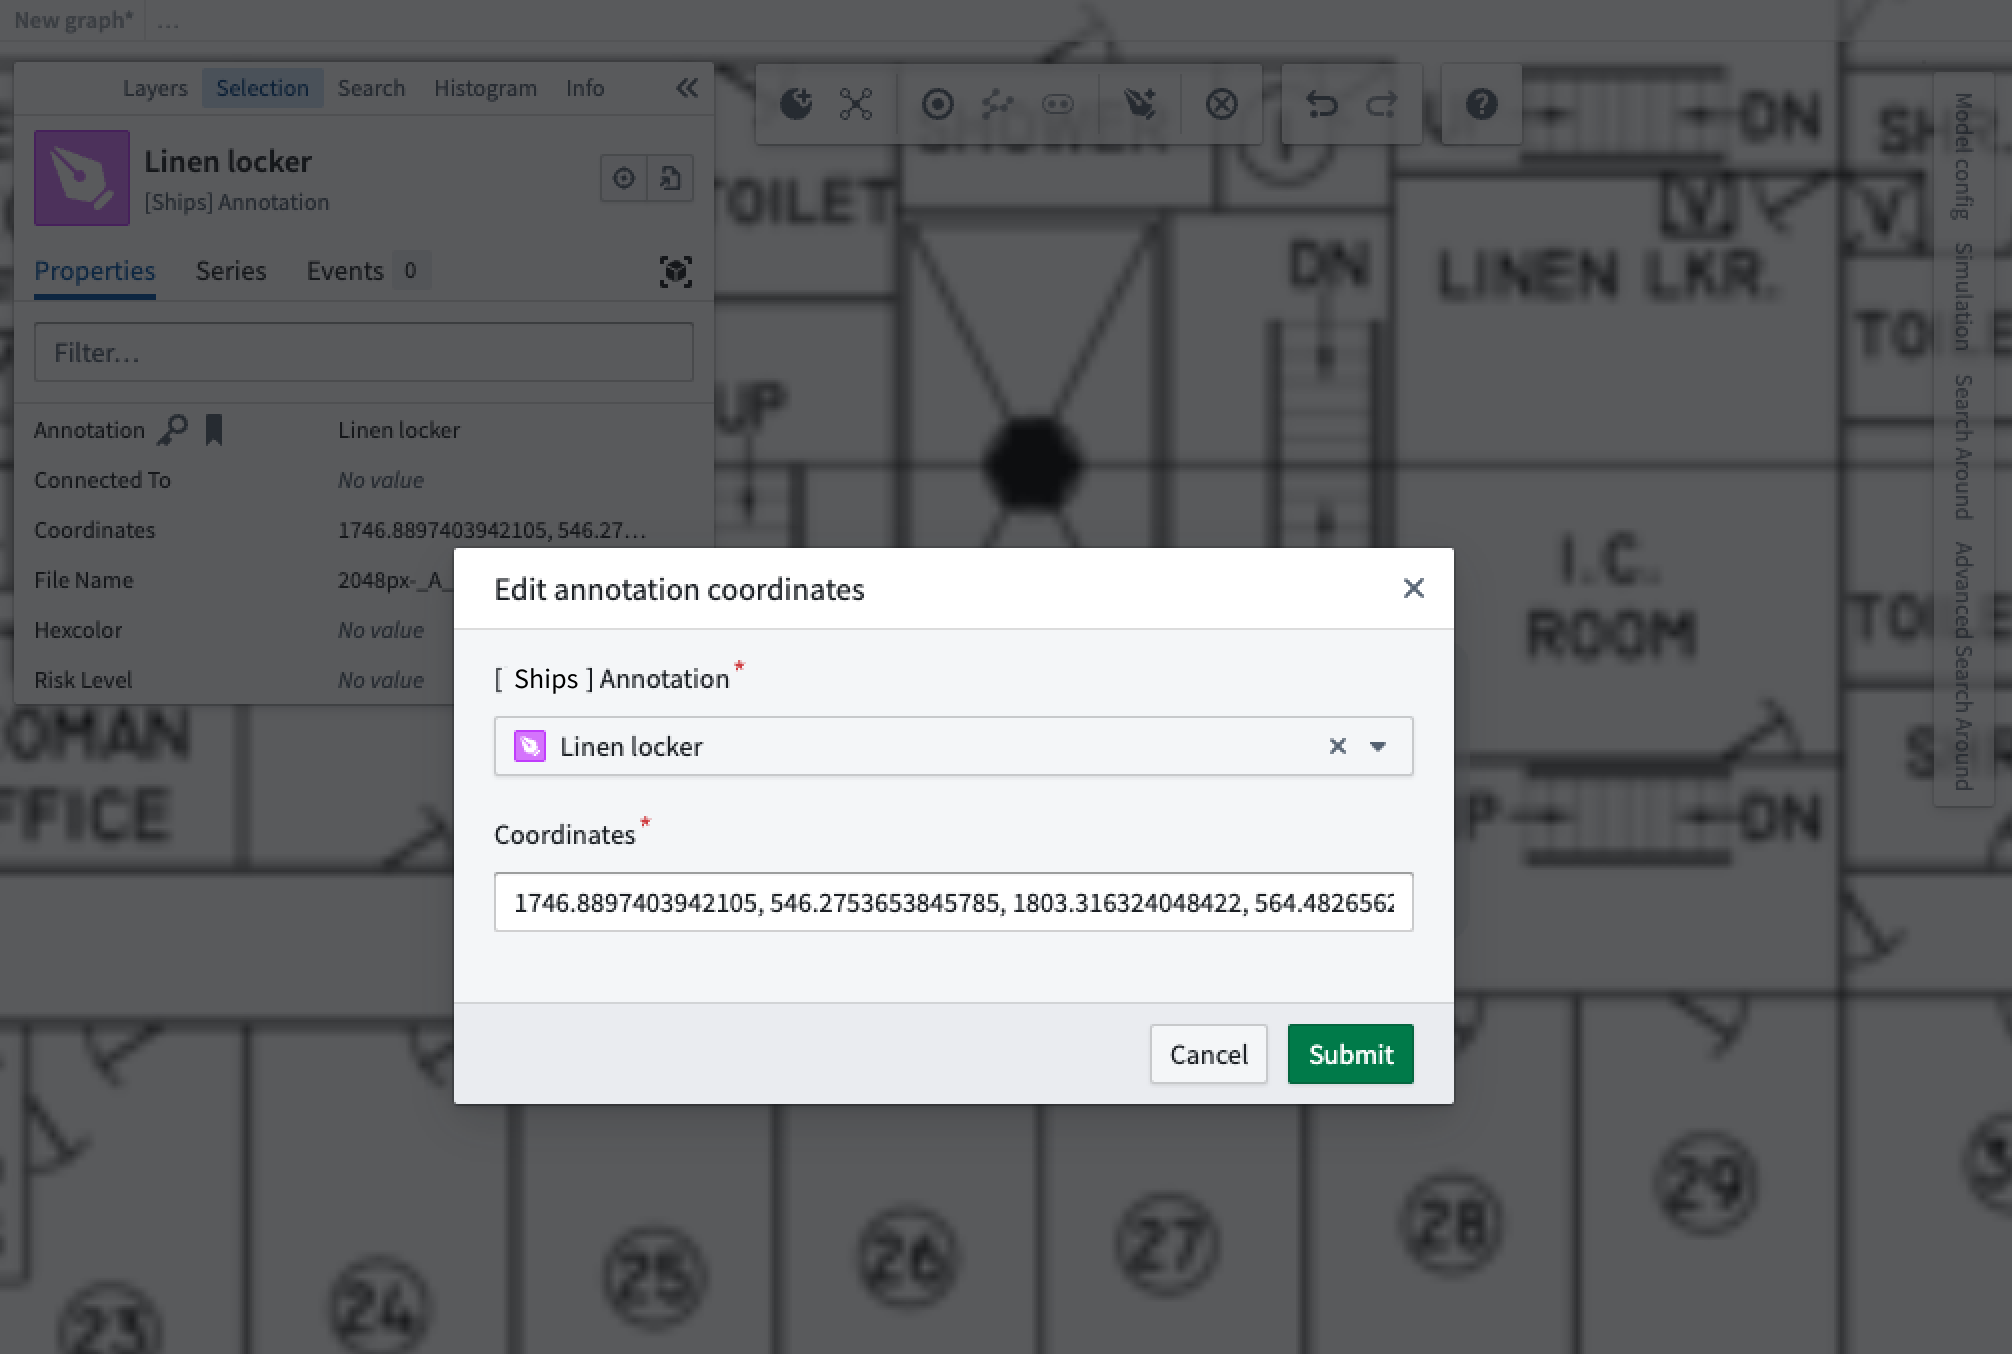
When you move or resize an annotation, any action types that can modify the object type will appear below the annotation. In our example, we can run an Edit annotation coordinates action type to update the new location of the annotation.
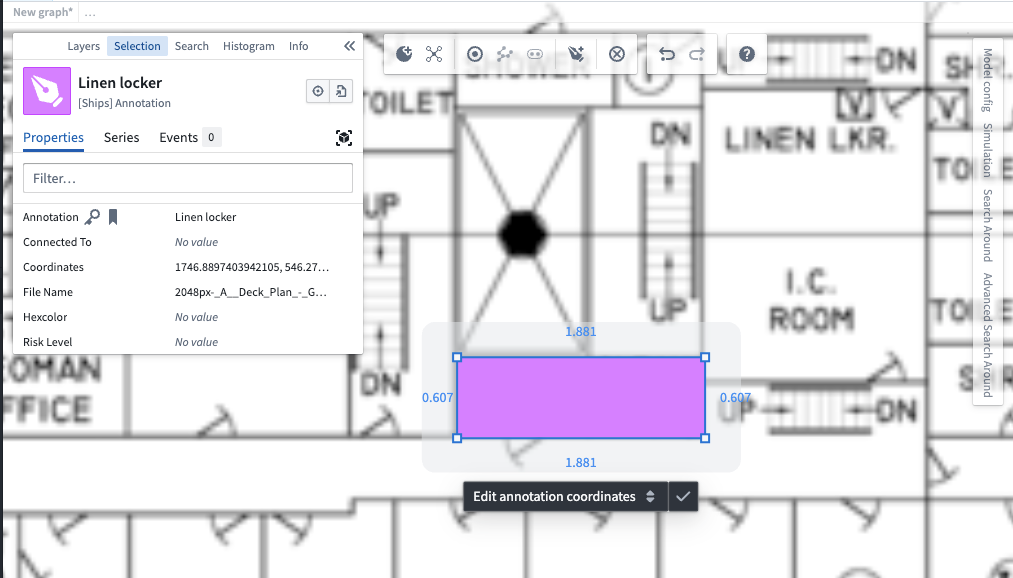
Use the edit form to update the object's pixel space bounding box coordinates, which is populated by the shape we just drew.
After making your changes, review the updated object to ensure your modifications were applied correctly. The edited annotation will reflect your changes in the media layer.