- Capabilities
- Getting started
- Architecture center
- Platform updates
Models backed by compute modules
Compute-module-backed models allow you to host a large language model server in a compute module and register it as a first-class model in AIP. The registered model appears in the model selector across all supported applications, just like a Palantir-provided model or a REST API registered model.
This approach is suited for two primary scenarios:
- Self-hosting models on your own compute: You can use models backed by compute modules to run open-source or custom models on your own GPUs for data sovereignty, on-premise or air-gapped deployments, cost control, or early access to newly released models.
- Building a custom proxy or federation layer: You can use models backed by compute modules to remap API formats, inject prompts, redact data before it reaches an external provider, or federate requests across multiple providers behind a single registered model.
Prerequisites
Your compute module application must meet the following requirements before you register it as a model source:
-
Serve a supported provider API format: Your container must expose an API that conforms to one of the supported provider API formats. Inference servers such as vLLM and Ollama expose a compatible API by default.
-
Set the application port: You must add an
application.portlabel in your Dockerfile pointing to the port your model server listens on. For exampleLABEL application.port='8000'. For general container guidance, review the compute modules containers documentation.
-
Set minimum replicas to at least one: Configure your compute module with a minimum of one replica. Review the documentation on minimum replicas for details.

Register and use the model
You must be an Enrollment administrator to register a model.
After your compute module is running, register it as a model in Control Panel:
-
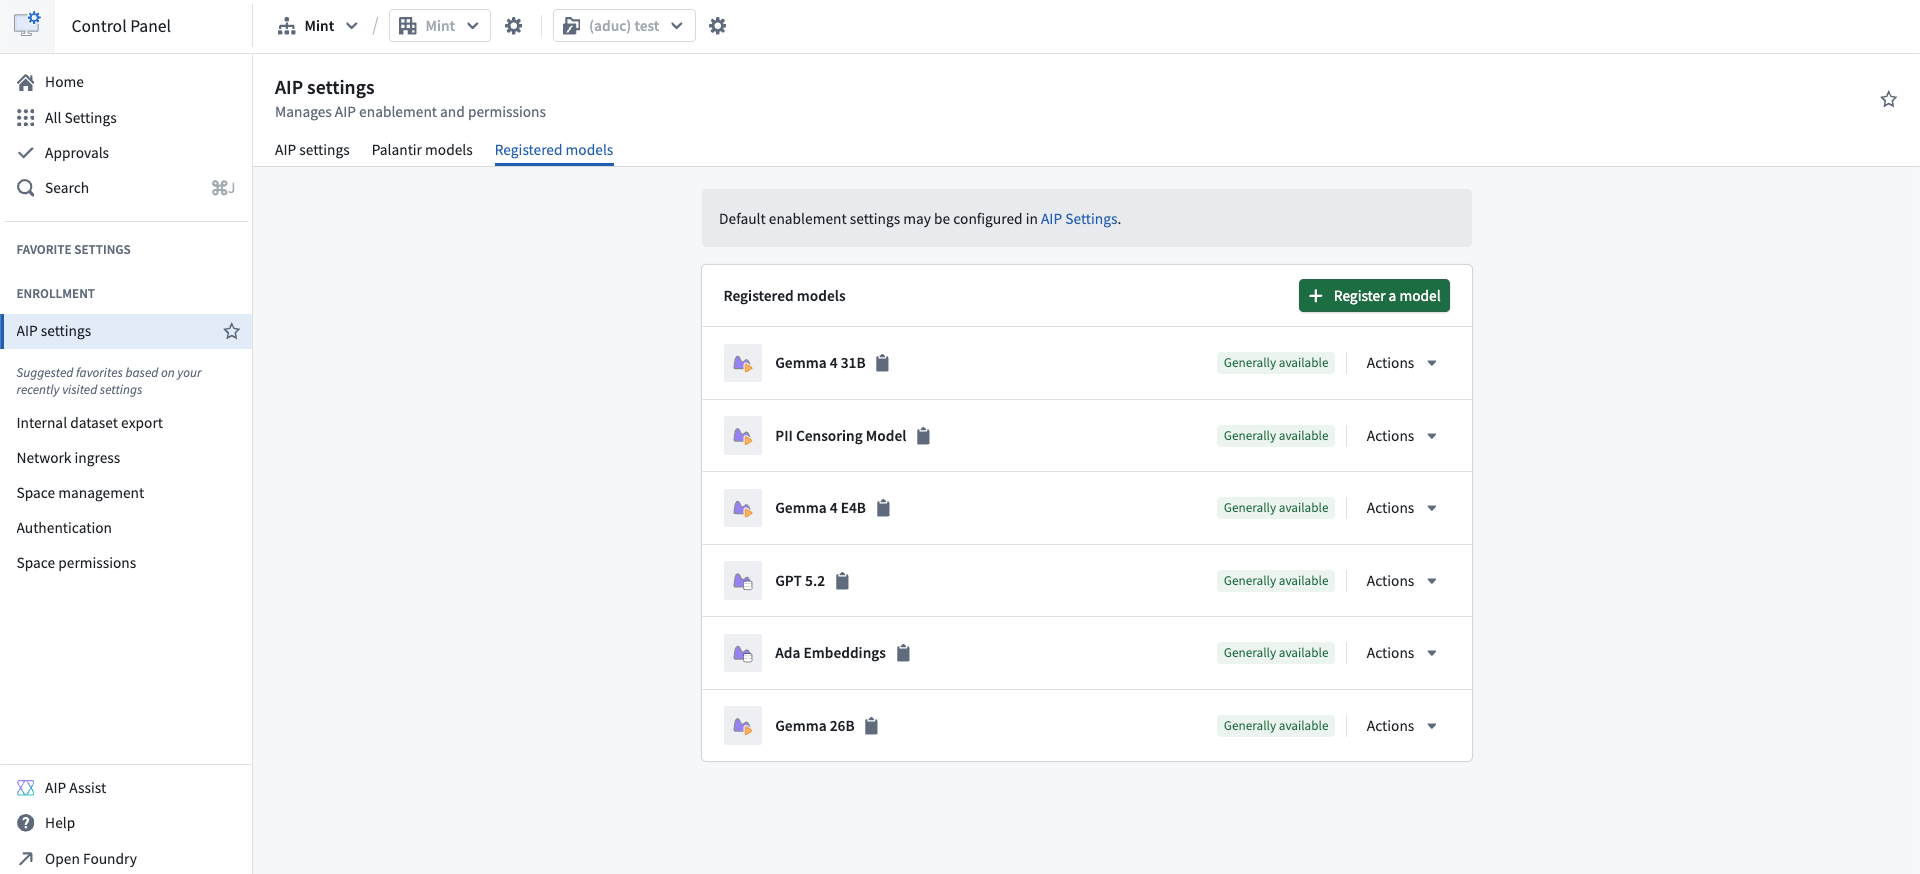
Navigate to the AIP settings extension and select the Registered models tab.
-
Select Register a model.
-
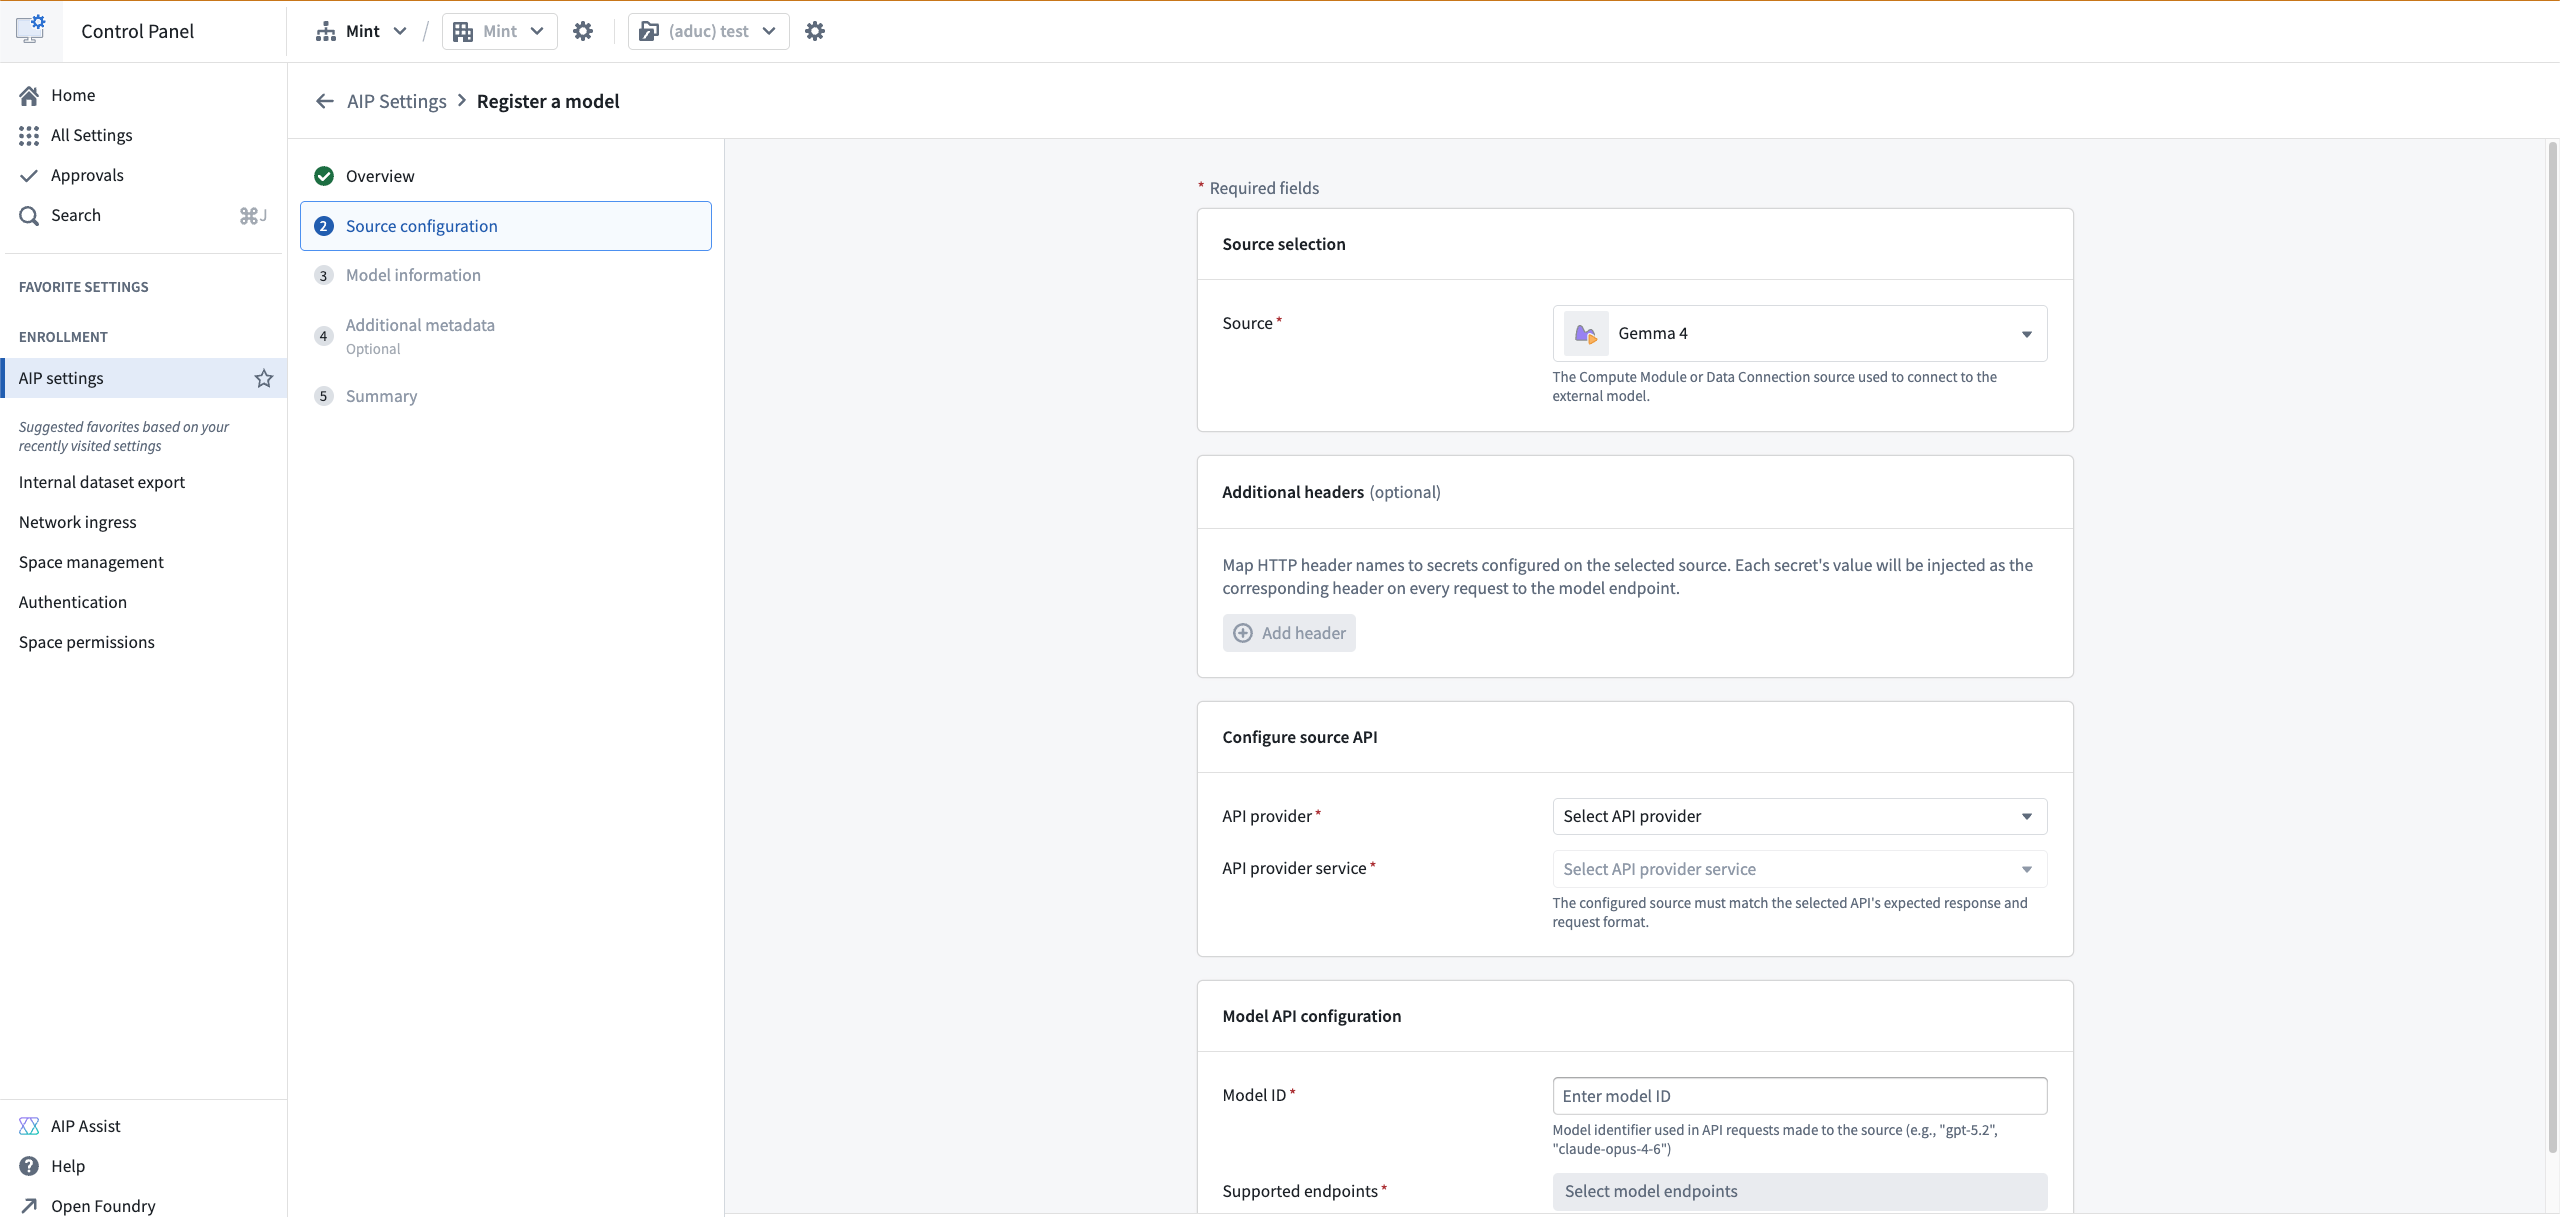
Choose your compute module as the source.
-
Configure the Model ID. Set this to the identifier your model server expects, such as the model name used by your inference server.
-
Define the model's capabilities. Enabling Reasoning, Structured outputs, and Tool calling ensures AI FDE and AIP Analyst can use the model.
-
Optionally, configure the model's Data access policy. If you leave this policy unconfigured, the enrollment policy applies. A model-specific policy completely replaces the enrollment policy. Review how to control LLM data access with mandatory Markings.
-
Define rate limits for the model. Review Features supported for registered models for details on enrollment and user rate limits.
-
Enable registered model access for your enrollment or for specific user groups.
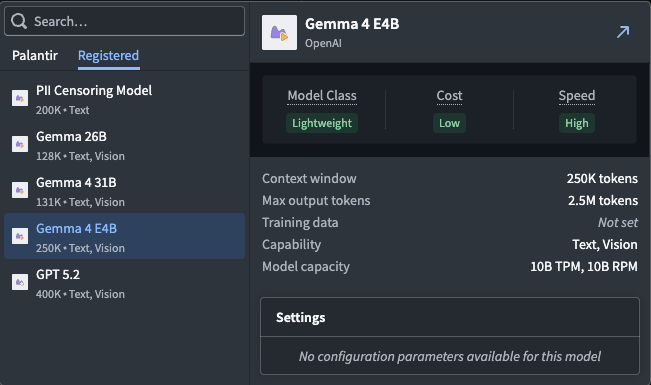
Your registered model will now appear in the model selector across all supported applications.
Next steps
Now that you have a registered model backed by a compute module, you can use the compute module to self-host a model with AIP, or you can use the compute module to build a proxy or federation layer.