- Capabilities
- Getting started
- Architecture center
- Platform updates
Deploy AIP Chatbots to AIP Assist
Serving custom content sources with AIP Assist dramatically expands the application assistance available to users. This feature also integrates with AIP Chatbot Studio (formerly AIP Agent Studio), allowing users to set up dedicated LLM-powered assistants, which use custom content sources, context from the Ontology or tools such as functions. Developers can now create custom-made assistants, without coding or LLM expertise.
As a sample use case, imagine developers are building an application that needs to be rolled out to hundreds or thousands of users. With the integration of AIP Chatbot Studio and AIP Assist, developers can now quickly configure and ship custom LLM-powered assistants, or AIP Chatbots, to provide immediate, interactive support based on custom content sources.
AIP Chatbots and Chatbot Studio
To understand this feature, familiarize yourself with the concept of an AIP Chatbot and the AIP Chatbot Studio application:
AIP Chatbots: Interactive, LLM-powered assistants equipped with enterprise-specific information and tools.
AIP Chatbot Studio: Allows users to build no-code AIP Chatbots and deploy them internally in the Palantir platform and externally with our OSDK.
Create content and register custom sources
The first step to creating custom source-backed AIP Chatbots is getting your custom content onto the Palantir platform. There are currently two methods of adding custom content sources that can be registered with AIP Assist:
- (Recommended) Notepad documents
- In-platform custom documentation (Markdown files in a
documentationtype repository in Code Repositories).
For this tutorial, we will explore the first option. For more information on this functionality refer to register content sources with AIP Assist.
This feature may not currently be available on all enrollments. If you do not see the option to add Notepad documents to AIP Assist, contact your Palantir representative to find out if your enrollment is eligible.
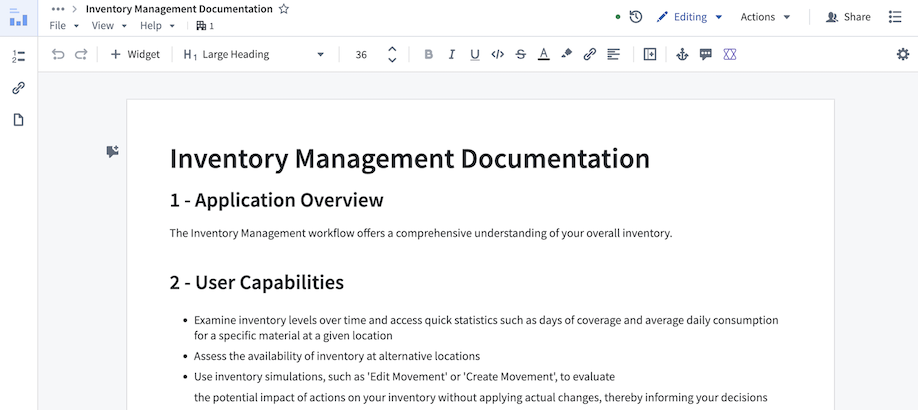
- In Notepad, create a new document by selecting + New document. Write or paste your content and give your document a title and a brief description of its contents. In the example below, we added information about our example application - the Inventory Management Application.
-
Make sure to organize your content into headings and subsections. Having a heading structure significantly improves the accuracy of responses, as content is segmented based on headings. Refer to the custom content source best practices for more information.
-
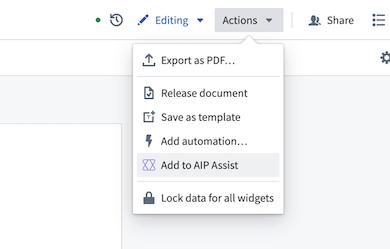
Register your content with AIP Assist. You can do this by selecting Actions > Add to AIP Assist. Note that it may take some time for this to appear as the document becomes discoverable to AIP Assist.
- Give your document a title and description briefly explaining the contents of the document, and save. AIP Assist and AIP Chatbots will now be aware of this document.

Note: This will not affect the behavior of AIP Assist or AIP Chatbots in any way. This just makes content available to AIP Assist. You still need to build and deploy an AIP Chatbot that leverages it.
Create an AIP Chatbot and deploy it to AIP Assist
-
Navigate to the AIP Chatbot Studio application and select + New AIP Chatbot.
-
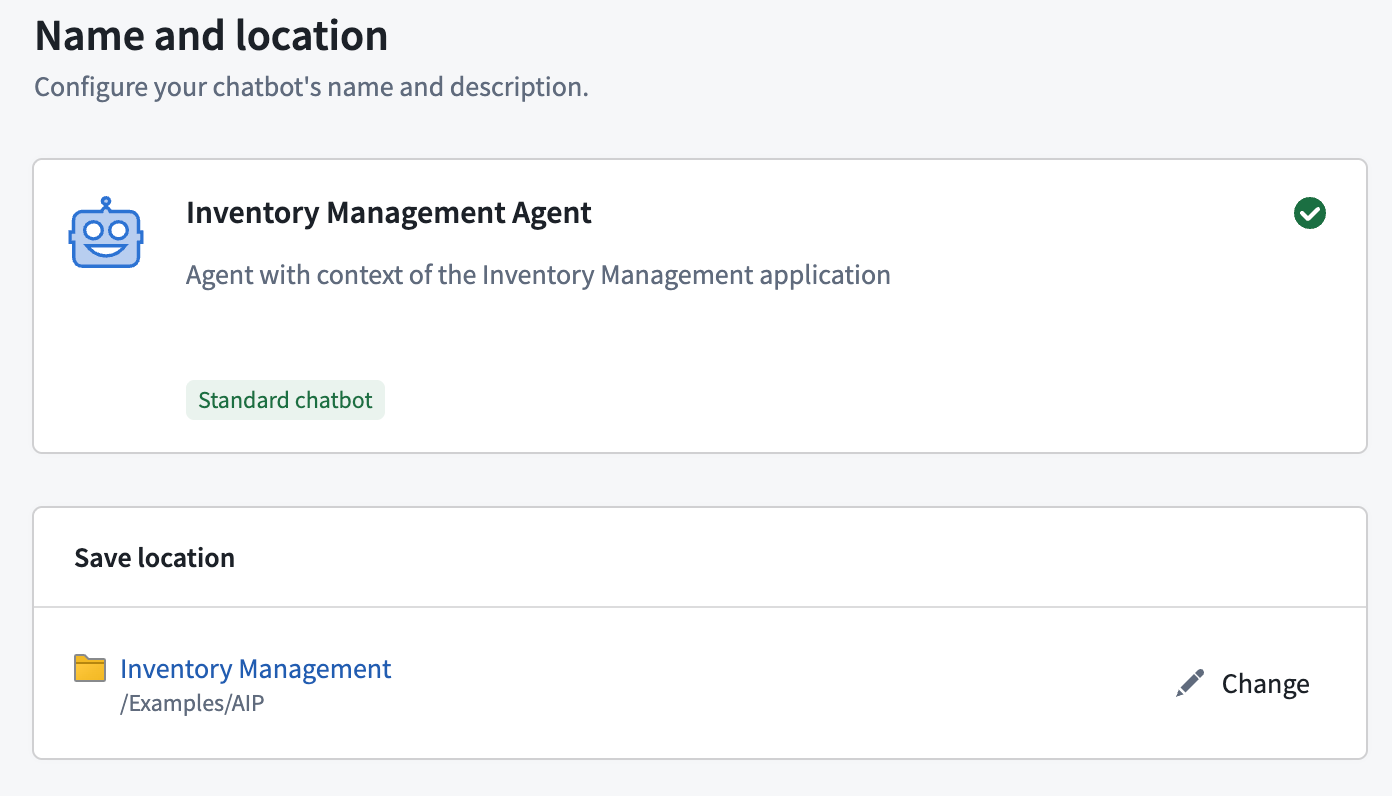
You will be presented with a setup wizard to assist with AIP Chatbot creation. Start by giving your chatbot a name and a description. These will show up for users when discovering and using your chatbot, so make sure to make it descriptive. You may also provide an icon for your chatbot to help with discovery:
Note: AIP Chatbots are Palantir filesystem resources. They will be permissioned down to the filesystem location where they are saved. Users will only be able to access your chatbot if they have read access to the location where it is saved and access to the custom content source backing it.
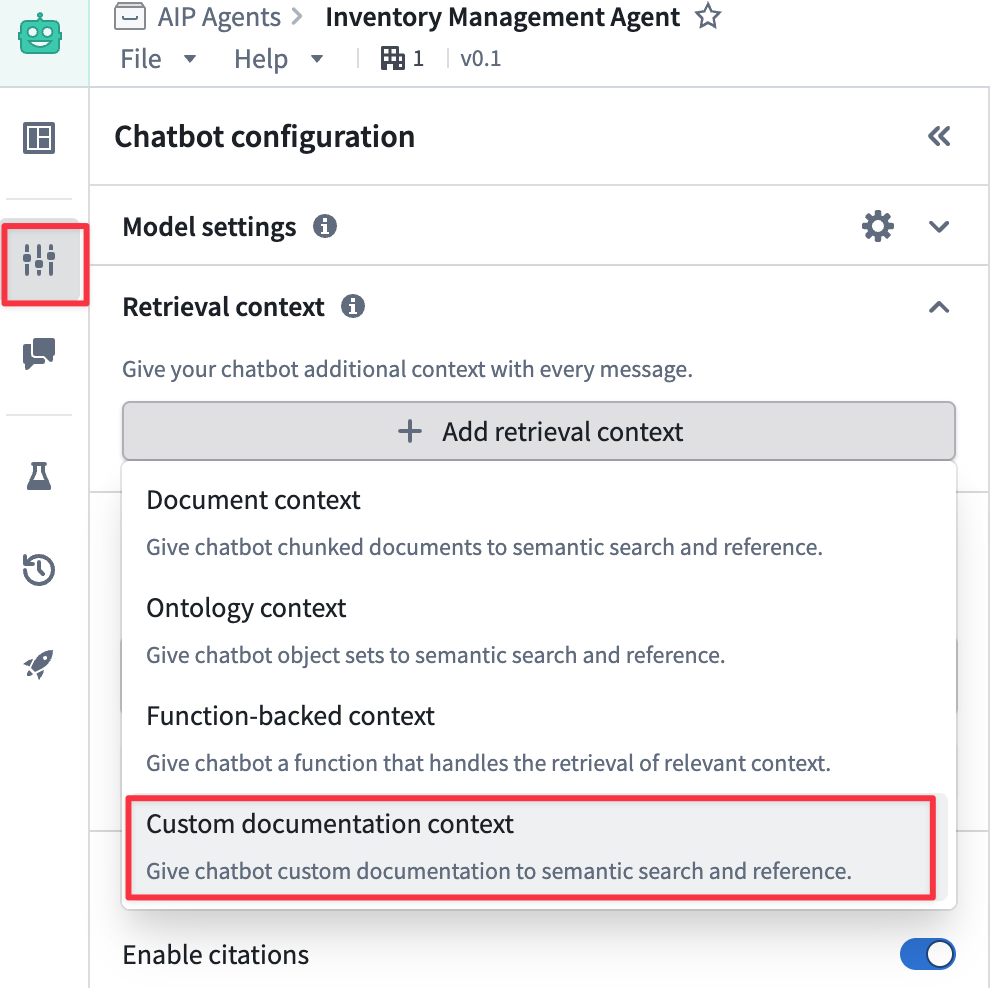
- After saving the chatbot, you will be redirected to the AIP Chatbot Studio editor. Navigate to the Chatbot configuration section, and under Retrieval context select Custom documentation context and choose your previously indexed document. If it does not appear in the list, go back to step one and ensure that you added it to AIP Assist. You can choose many different documents to serve as the search context for your AIP Chatbot. See AIP Chatbot Studio documentation for more information on other AIP Chatbot features.
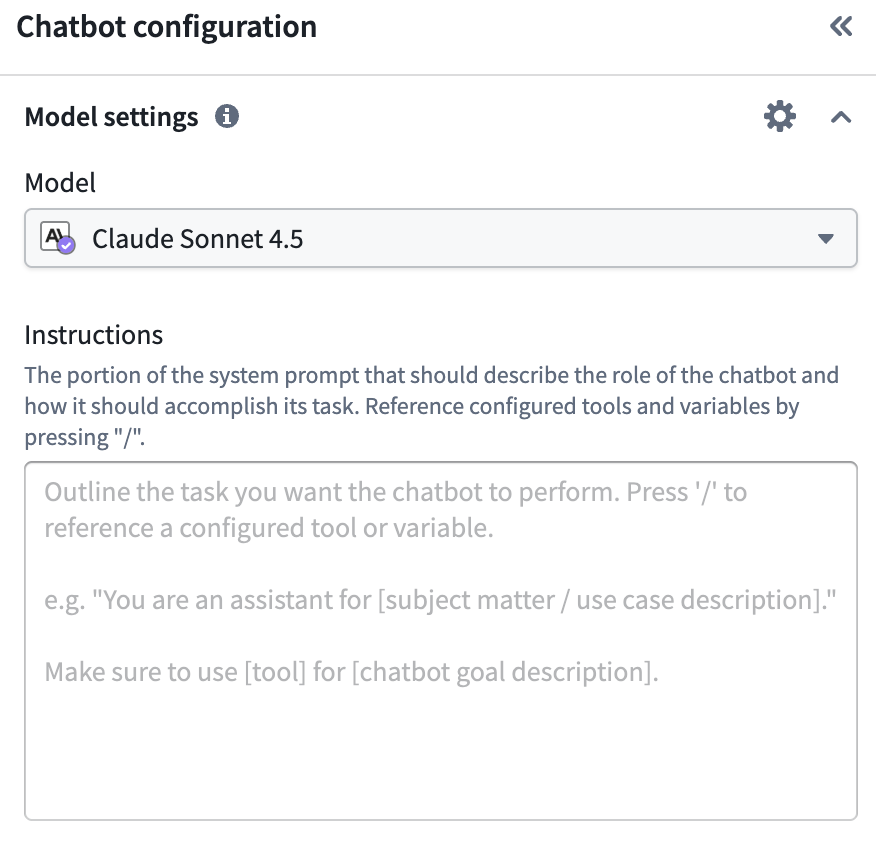
- You can also choose which model you want the chatbot to use. Users of your chatbot should have access to this model. Additionally, you can customize the AIP Chatbot behavior by providing custom instructions.
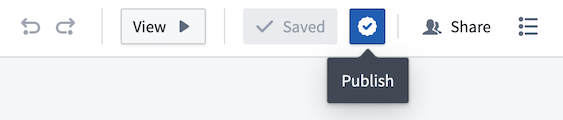
- Publish your AIP Chatbot by selecting the blue checkmark icon at the top right to publish. This will publish the first version of your chatbot (1.0). Any changes you make from here will require you to publish a new version for them to take effect.
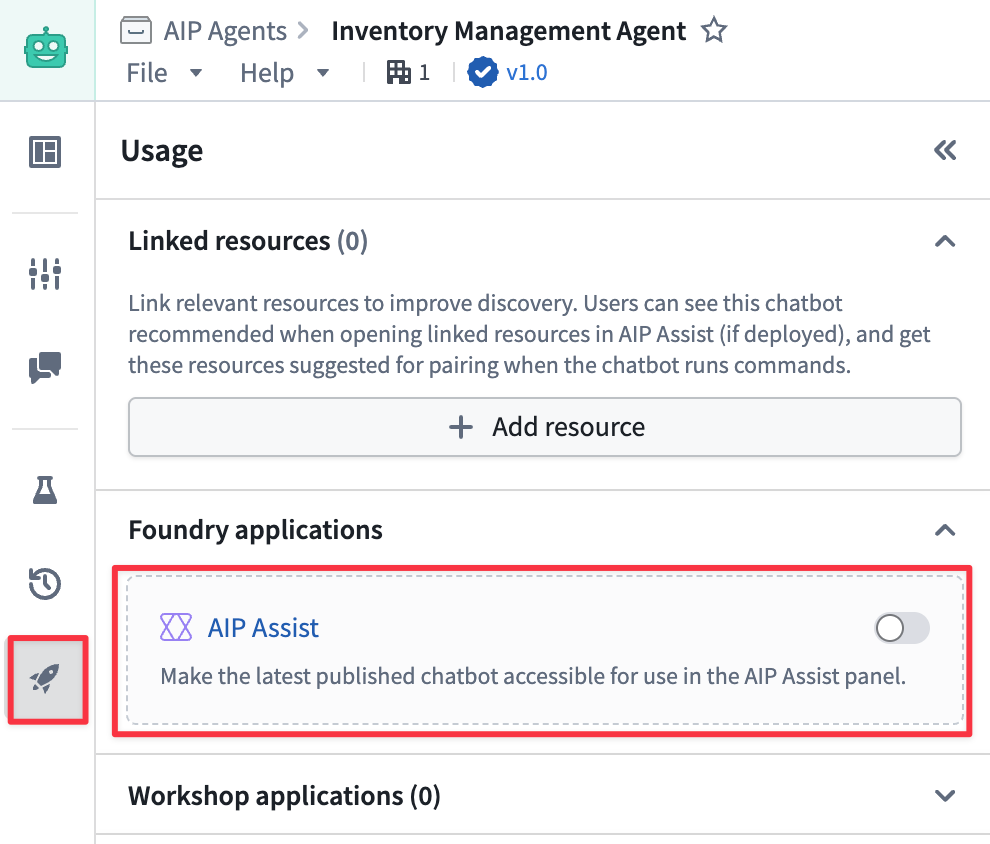
- Make the chatbot available for use in AIP Assist. To do this, open the Usage section, and enable the AIP Assist toggle.
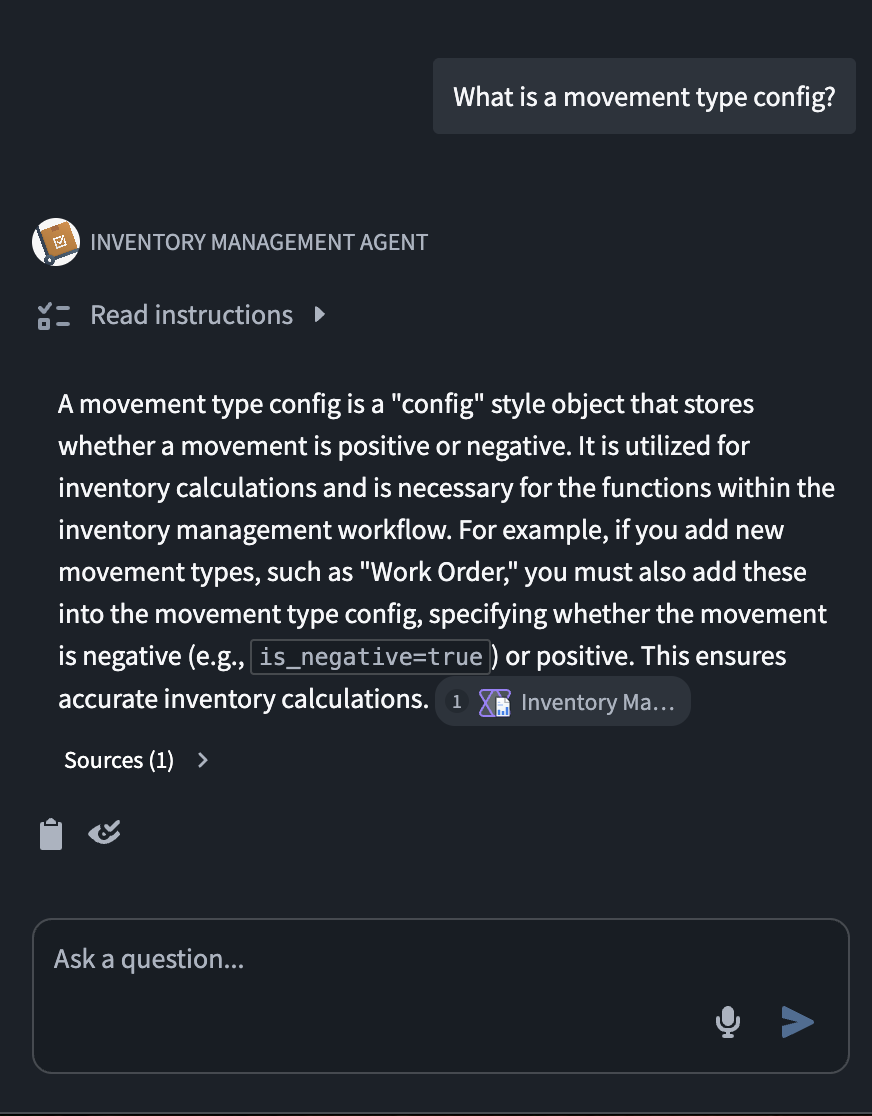
Interact with your new AIP Chatbot
Now that you have created an AIP Assist Chatbot and provided it with access to your Notepad content, you are ready to start interacting with it in AIP Assist.
- Start a new conversation in AIP Assist. You should see your new chatbot available in the AIP Assist Modes selector.
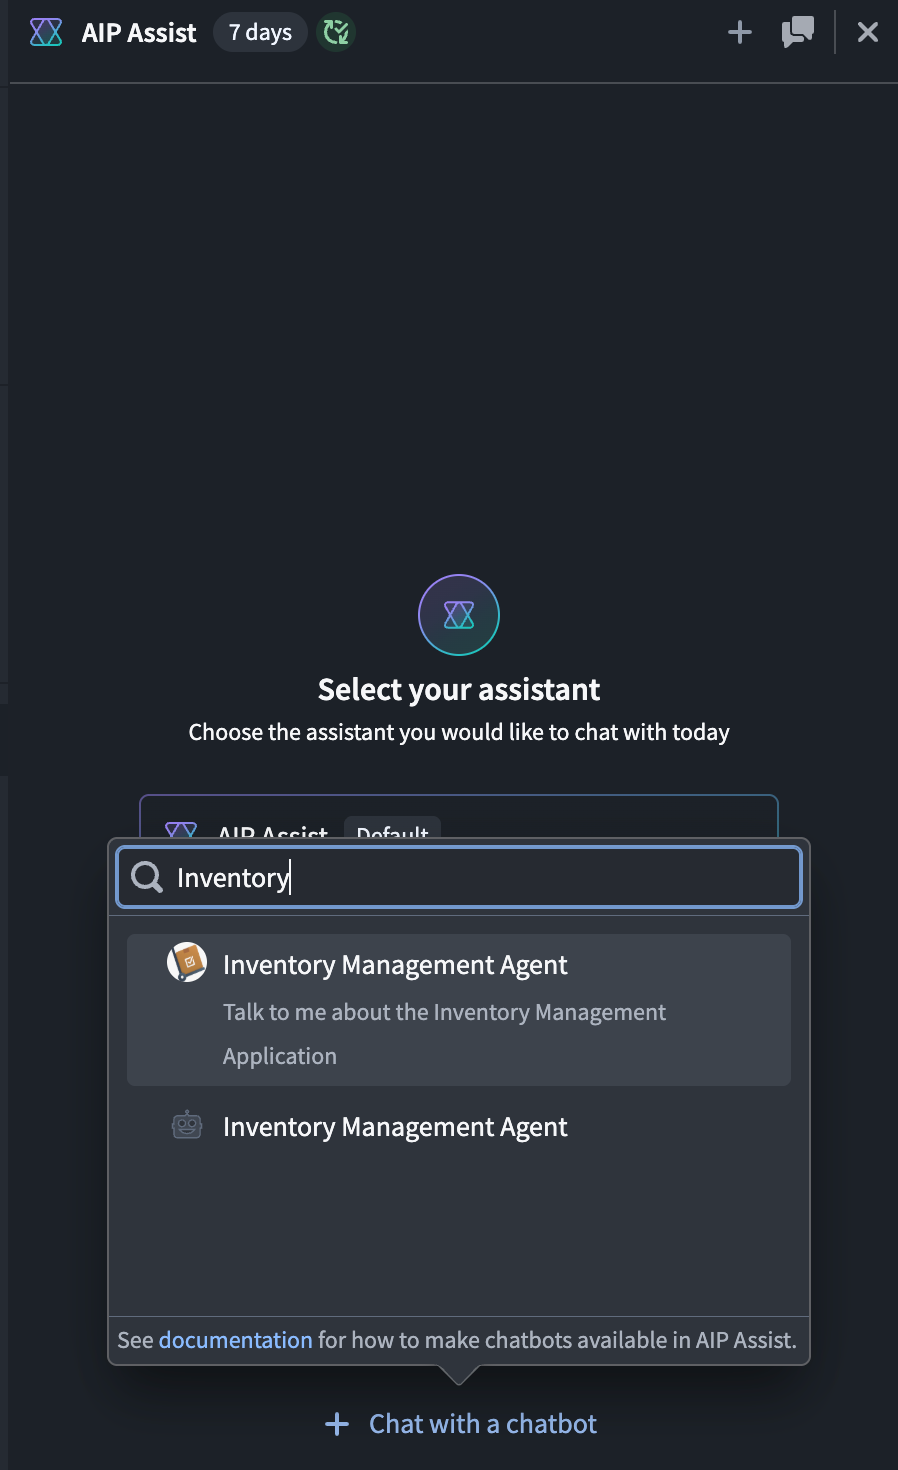
- Select your chatbot and fire off your first question!