- Capabilities
- Getting started
- Architecture center
- Platform updates
Create an AI-powered Slack bot with listeners
You can use event listeners in Foundry to create AI-powered bots that can interact with chat workspaces outside of Foundry. This guide provides an example using Slack, but you can use similar methods to connect with other platforms, such as Microsoft Teams (via the Microsoft Bot Framework).
Overview
In this tutorial, you will build "Tennis Bot", an AI assistant that helps Slack users learn more about tennis.
This example Slack bot comprises the following components:
- A Slack listener to receive chat events.
- A Slack source to write back responses to the Slack API.
- An AIP agent to act as the "brain" of the bot.
- A TypeScript function to perform event processing.
- An automation to execute new events.
Step 1: Set up Slack listener
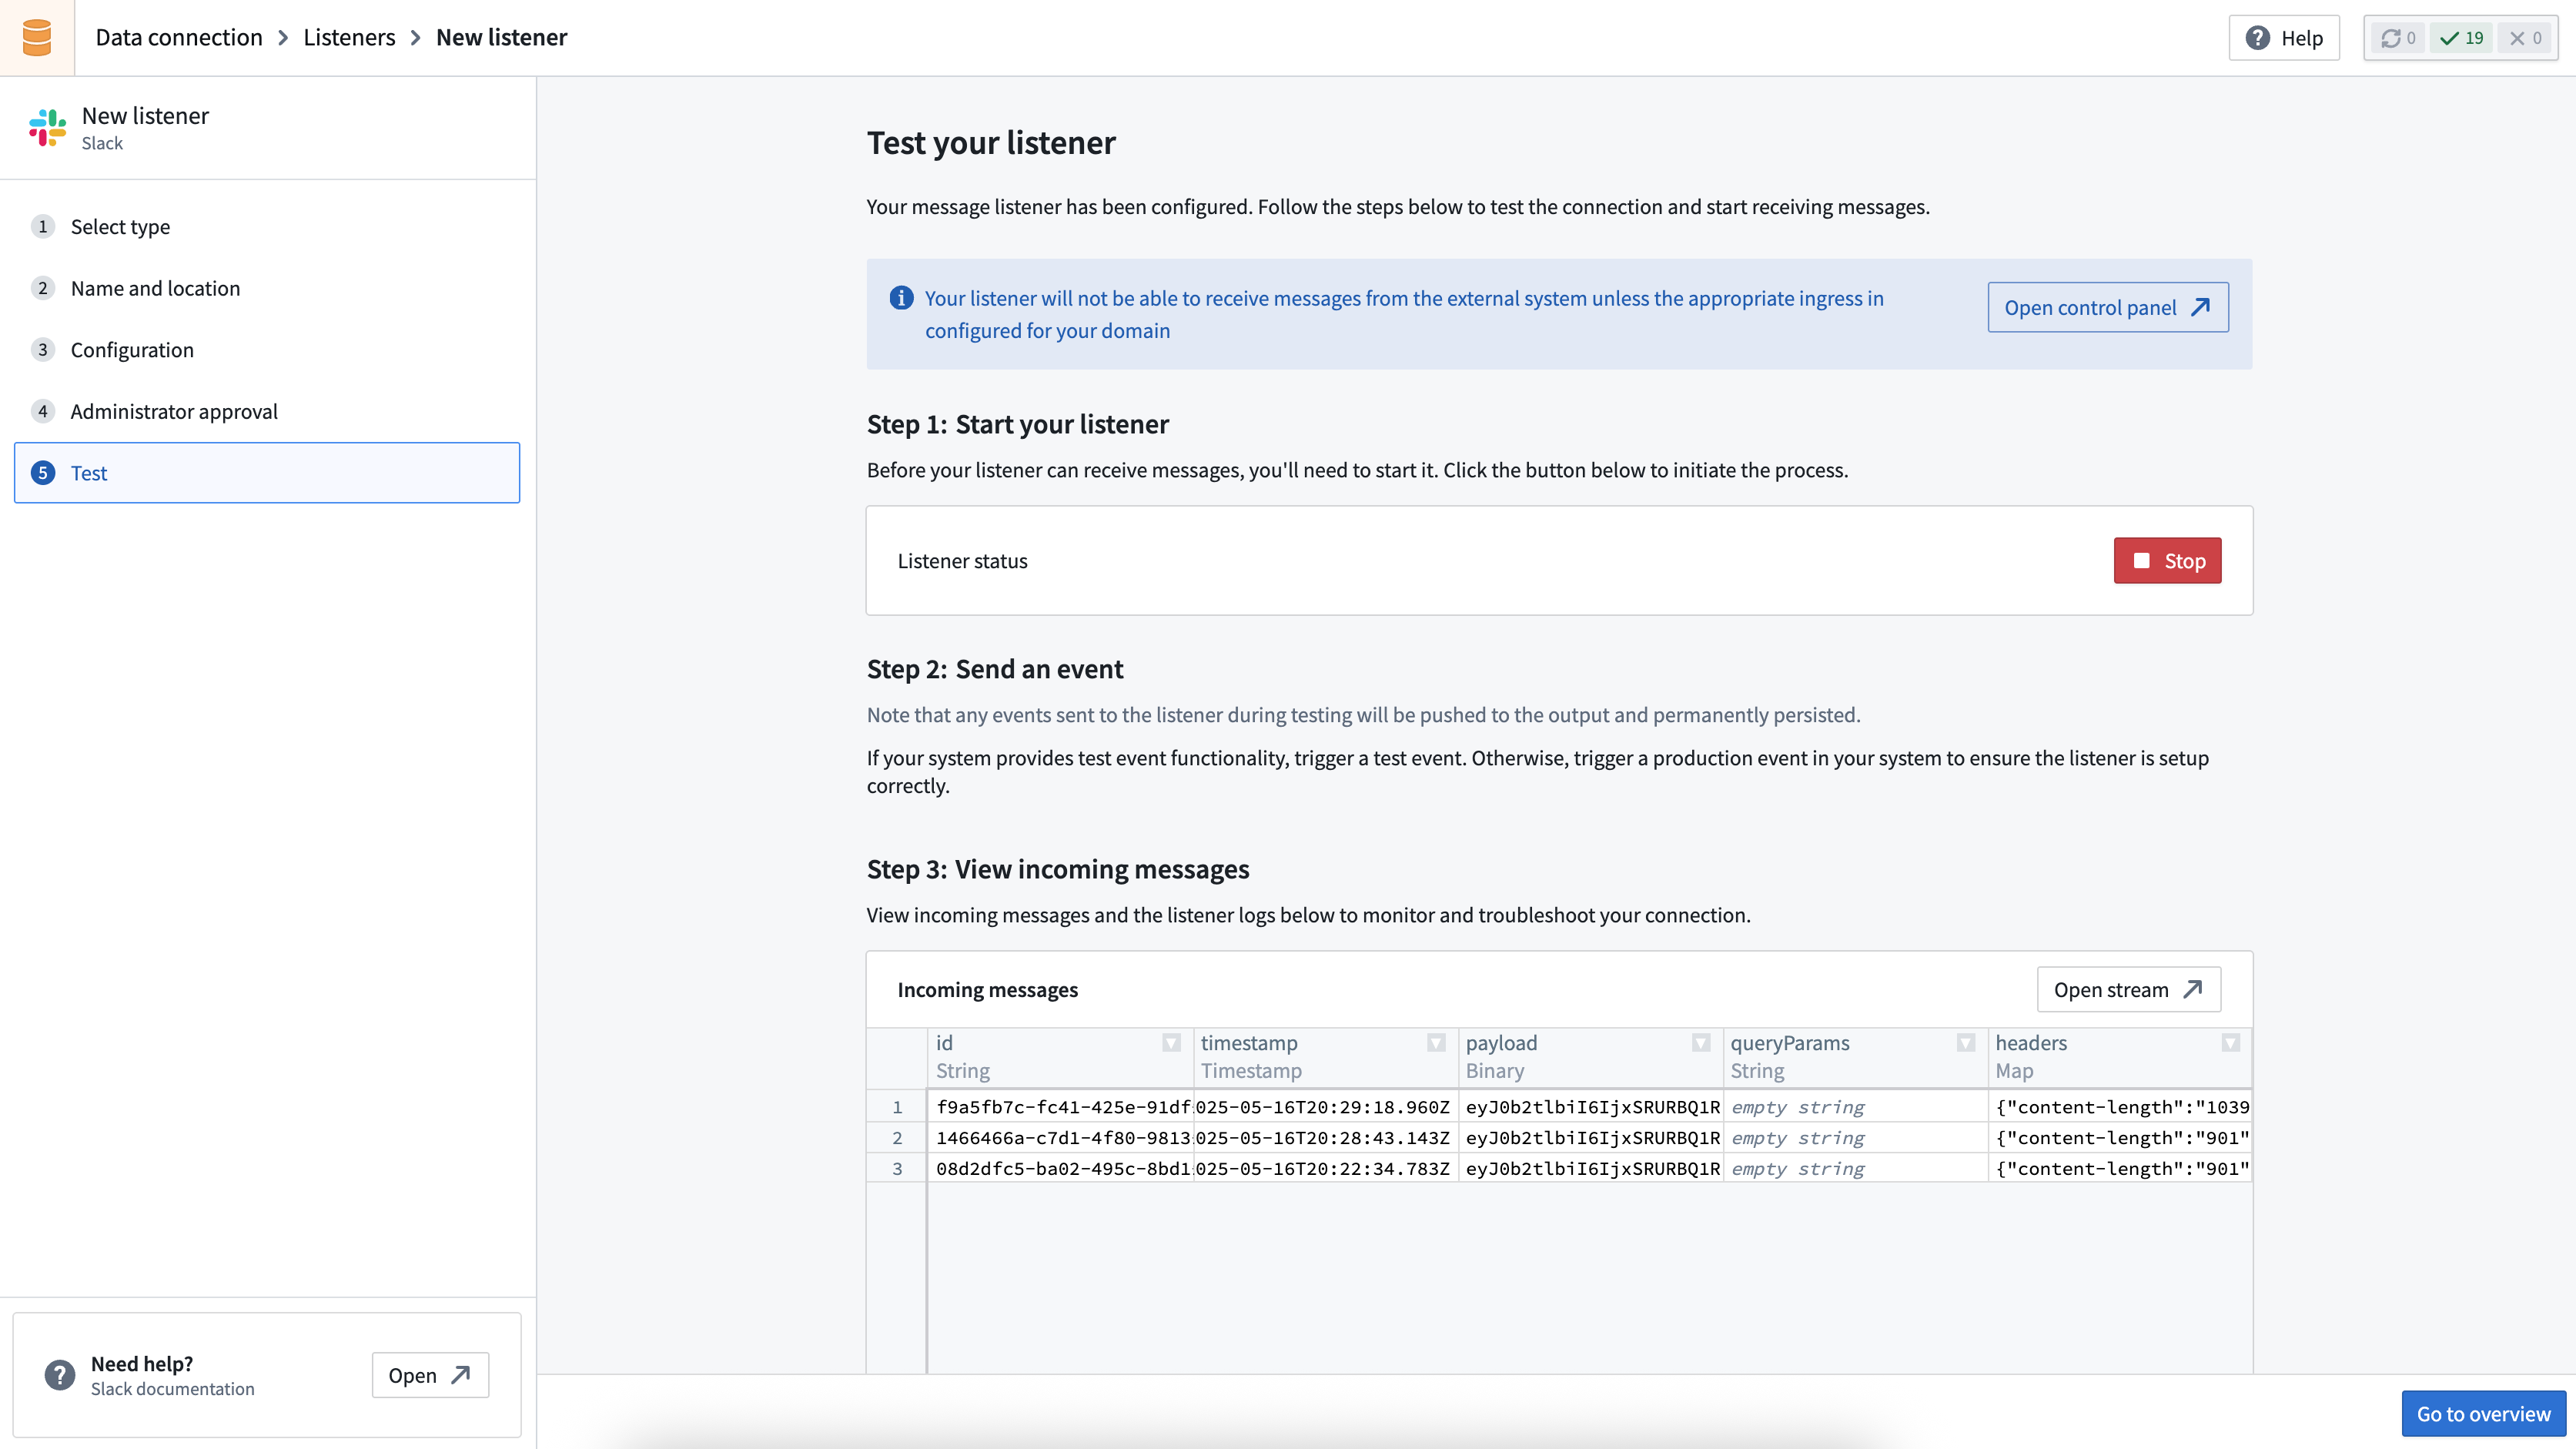
The first step is to create your Slack app, install it into your Slack workspace, and start ingesting chat events with a listener. Follow the Slack listener setup guide to create the Slack listener.
Since users will directly message the Tennis Bot with questions, you will need to add the relevant scopes, events, and configurations in the Slack app. For more information on configuring Slack apps, see the official Slack documentation ↗.
Add the im:history and chat:write scopes for your app.
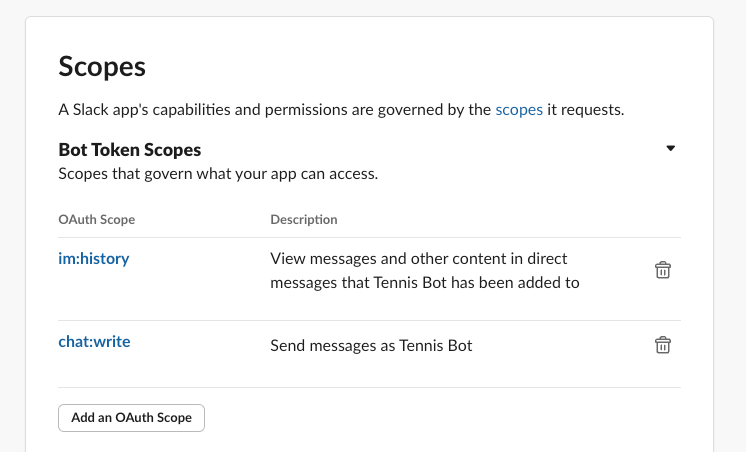
Additionally, subscribe your app to the message.im event.

You will also need to allow users to directly message the bot. This setting can be found in your Slack app settings under Features > App Home.

After you have configured the listener, you will be able to verify that the listener is correctly configured in the Test tab of the listener setup wizard.
Step 2: Set up Slack source
Next, you will need to create a new Slack source with credentials to write back to your chat platform.
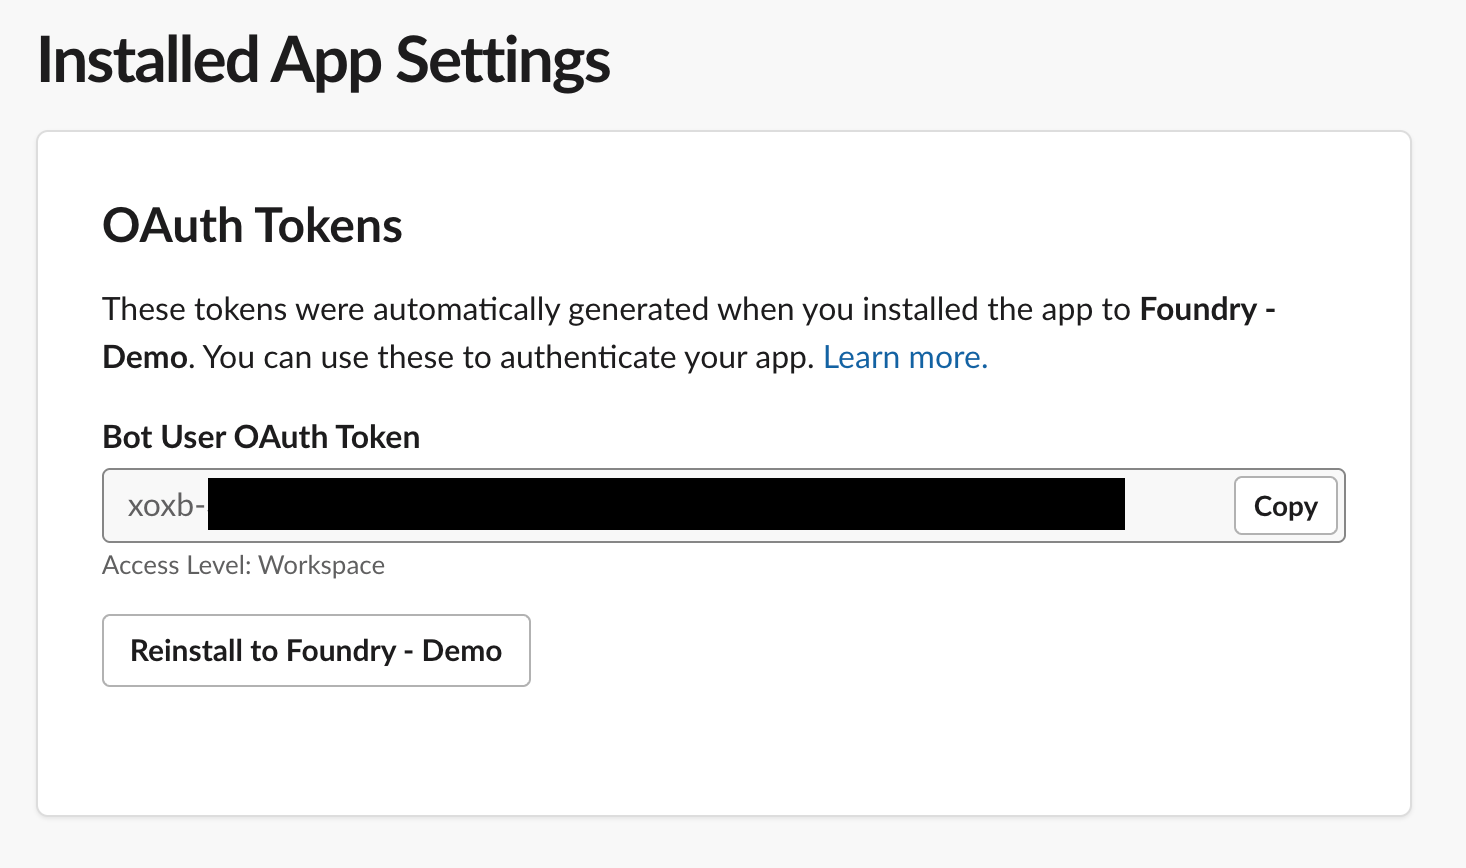
After installing your Slack app into your workspace, you can find the bearer token to configure your source within Installed App Settings.
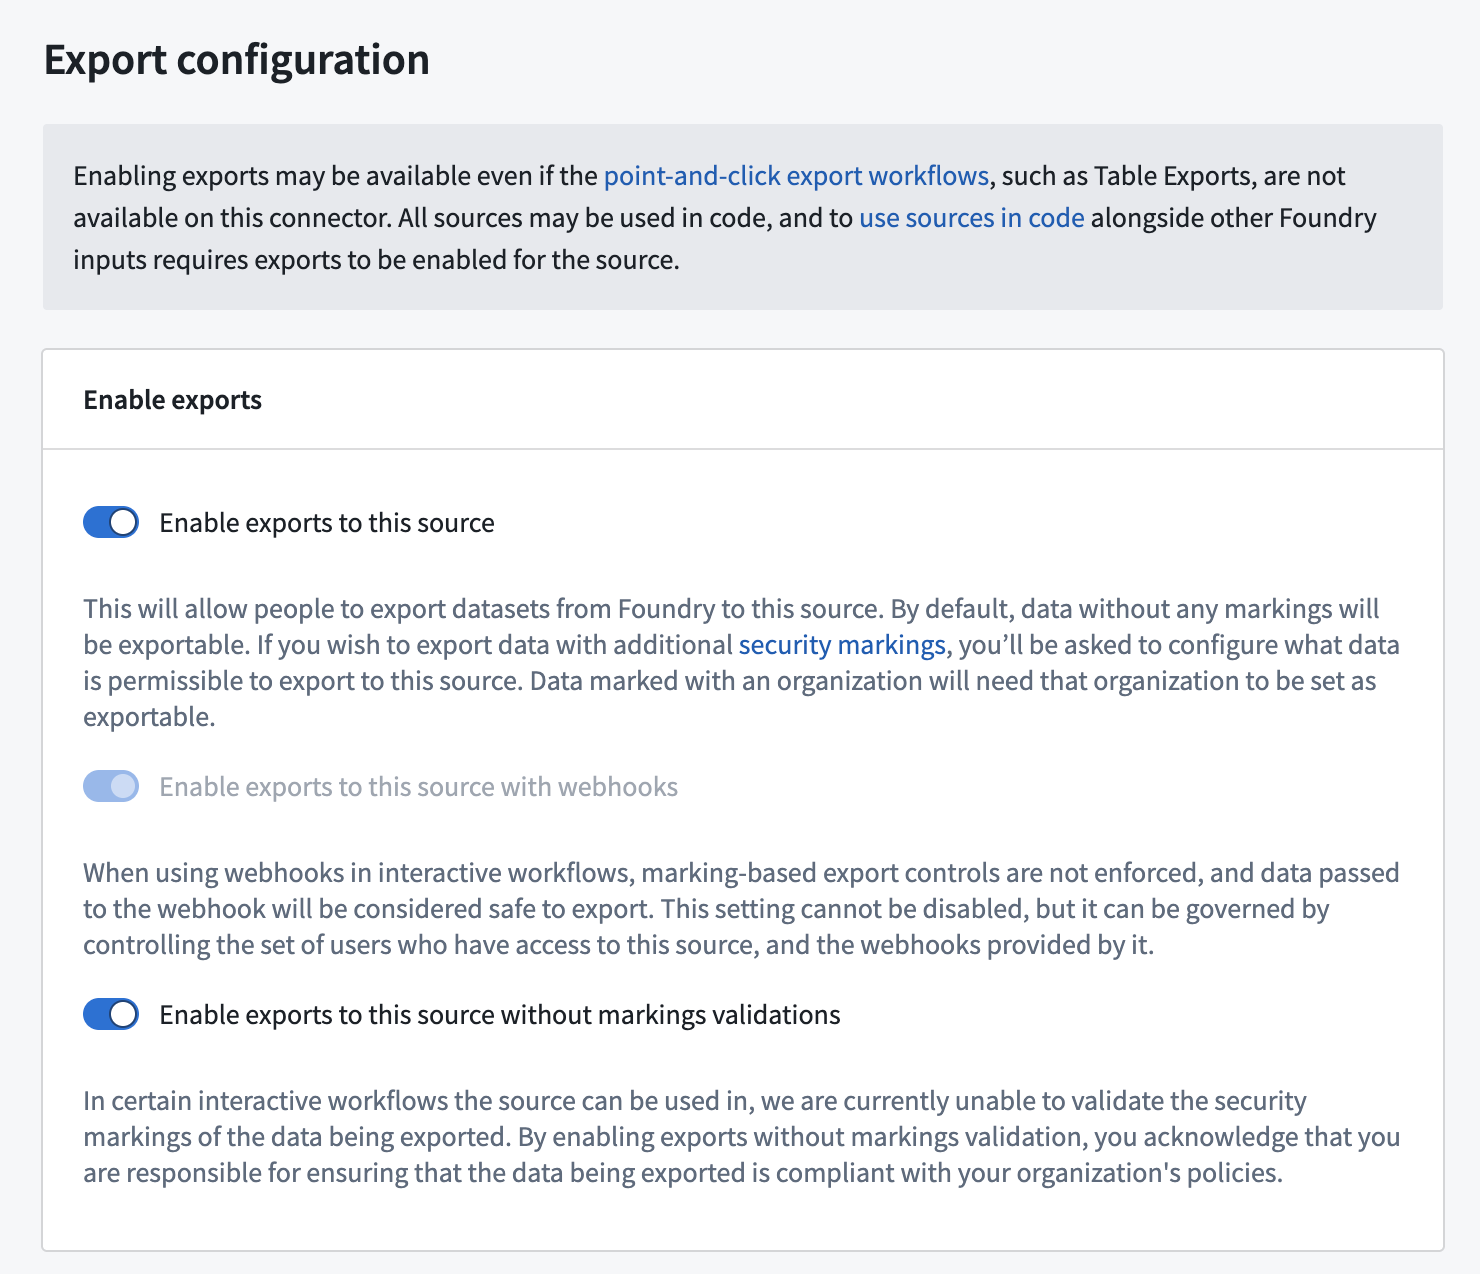
You will need to enable exports and code repository imports for your source by navigating to Connection settings.
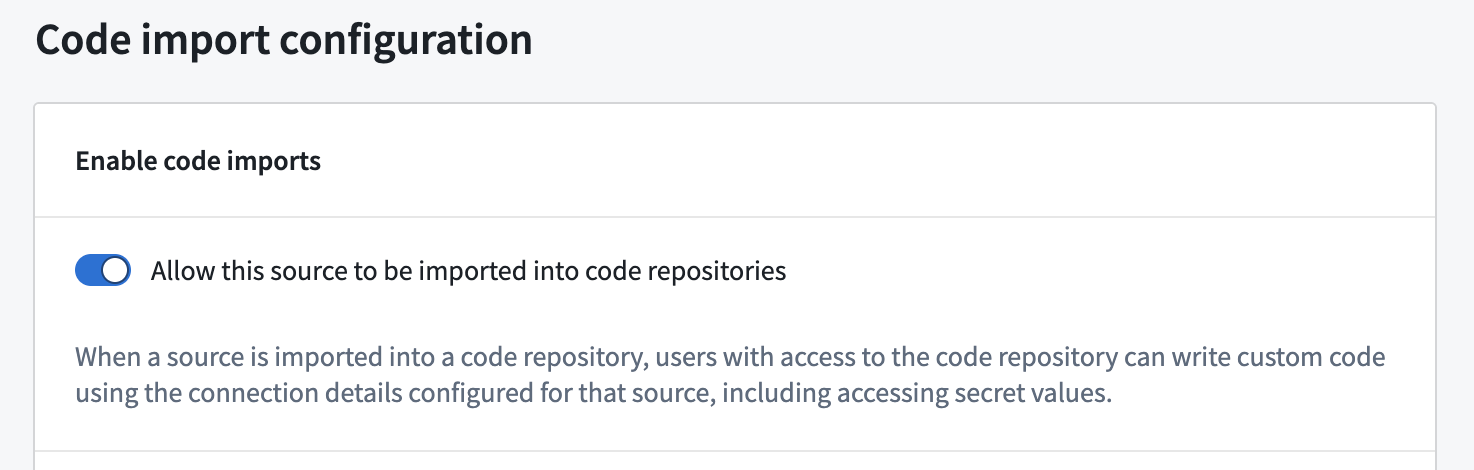
Additionally, you must configure an API name for your source so that the source can be referenced from code. The API name configuration can be found under Connection Settings > Code import configuration.
Step 3: Set up AIP agent
In this step, you will create a new AIP agent in Agent Studio. You will need to configure instructions and retrieval context for the agent.
Specify agent instructions
To teach the agent how to respond as a tennis information bot, you can provide some task-specific instructions for the agent. An example prompt is:
You are an assistant for answering questions about tennis.

If a query is not related to tennis, you should respond politely and explain that your purpose is only for answering questions about tennis, and suggestion some possible topics the user may like to ask about related to tennis.

Keep your responses concise and friendly.
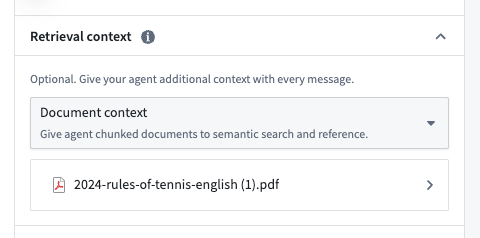
Provide retrieval context
To give the agent a source of information about tennis, you can provide a PDF with the rules of tennis as document context to the agent; the agent will then be able to use this context to answer user queries.
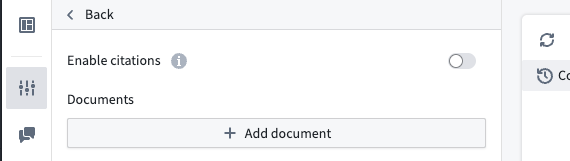
Ensure that you disable citations to avoid the agent including XML citations in its response; this will prevent the agent from including links back to the document in its Slack responses.
You can additionally test your agent to ensure it responds in an appropriate manner. Use Agent Studio for ad-hoc testing, or use AIP Evals to test against a full evaluation suite.
When you are satisfied with the agent's performance, publish the agent as a function so that you can use the agent in your event processing workflow.
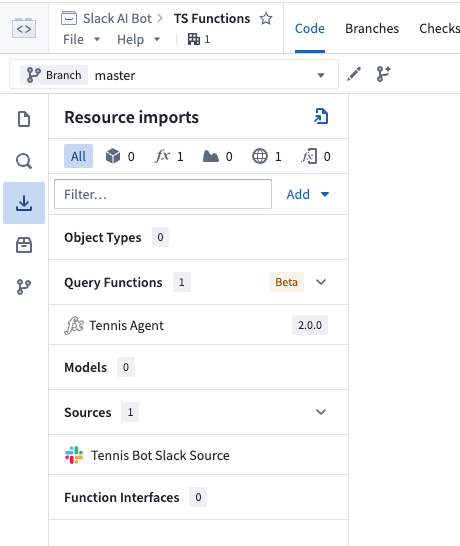
Step 4: Import your source and agent function into a code repository
Once you have set up the agent, you will need to enable the agent to interact with Slack. First, create a new code repository for writing TypeScript functions. Once created, import both your created source and the published agent function into the repository.
Step 5: Set up listener event payload processing
To respond to messages, the bot will need to be able to process incoming listener event payloads. Create a TypeScript function to enable listener event payload processing.
Copied!1 2 3 4 5 6 7 8 9 10 11 12 13 14 15 16 17 18 19 20 21 22 23 24 25 26 27 28 29 30 31 32 33 34 35 36 37 38 39 40import { OntologyEditFunction } from "@foundry/functions-api"; import { Queries } from "@foundry/ontology-api"; import { ExternalSystems } from "@foundry/functions-api"; import { TennisBotSlackSource } from "@foundry/external-systems/sources"; export class MyFunctions { @ExternalSystems({ sources: [TennisBotSlackSource] }) @OntologyEditFunction() public async processTennisBotEvent(decodedEventPayload: string): Promise<void> { const message = (JSON.parse(decodedEventPayload) as any).event; // Only process non-bot messages (don't re-process messages that we send as the bot) if (message == null || message.bot_id != null) { return; } const messageText = message.text; const channel = message.channel; if (messageText == null || channel == null) { return; } // Pass the message to our agent const agentResponse = await Queries.tennisAgentDocumentContextExample({ userInput: messageText }); // Forward the agent's response back to Slack const postMessageUrl = `${TennisBotSlackSource.getHttpsConnection().url}/api/chat.postMessage`; const response = await TennisBotSlackSource.fetch(postMessageUrl, { method: "POST", headers: { ["Authorization"]: `Bearer ${TennisBotSlackSource.getSecret("SLACK_BEARER_TOKEN_AUTH")}`, ["Content-Type"]: "application/json" }, body: JSON.stringify({ channel: channel, text: agentResponse.markdownResponse, }) }) } }
For more information on using sources in TypeScript functions, see the relevant documentation.
Commit and tag a version to publish this function.
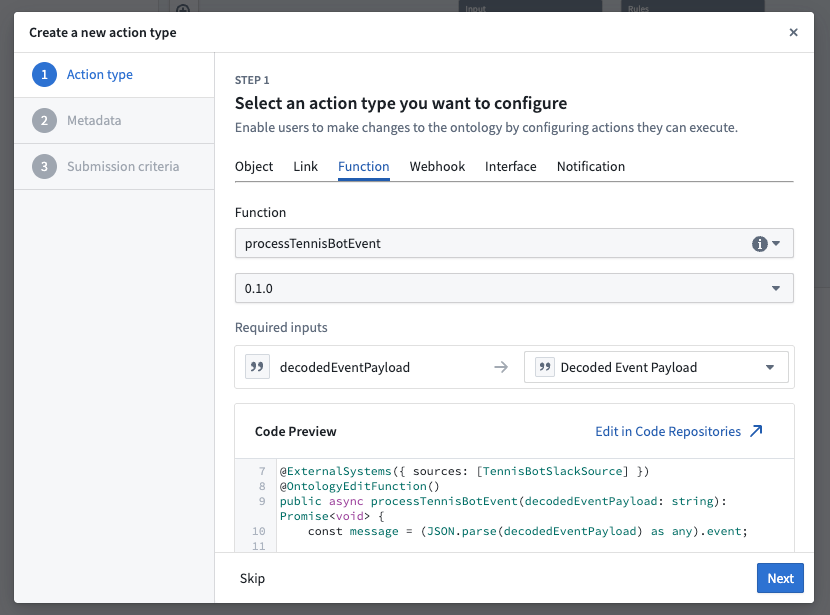
Step 6: Set up function-backed action
Navigate to Ontology Manager to create a function-backed action using your event processor function. This action will be triggered for each incoming Slack message event.
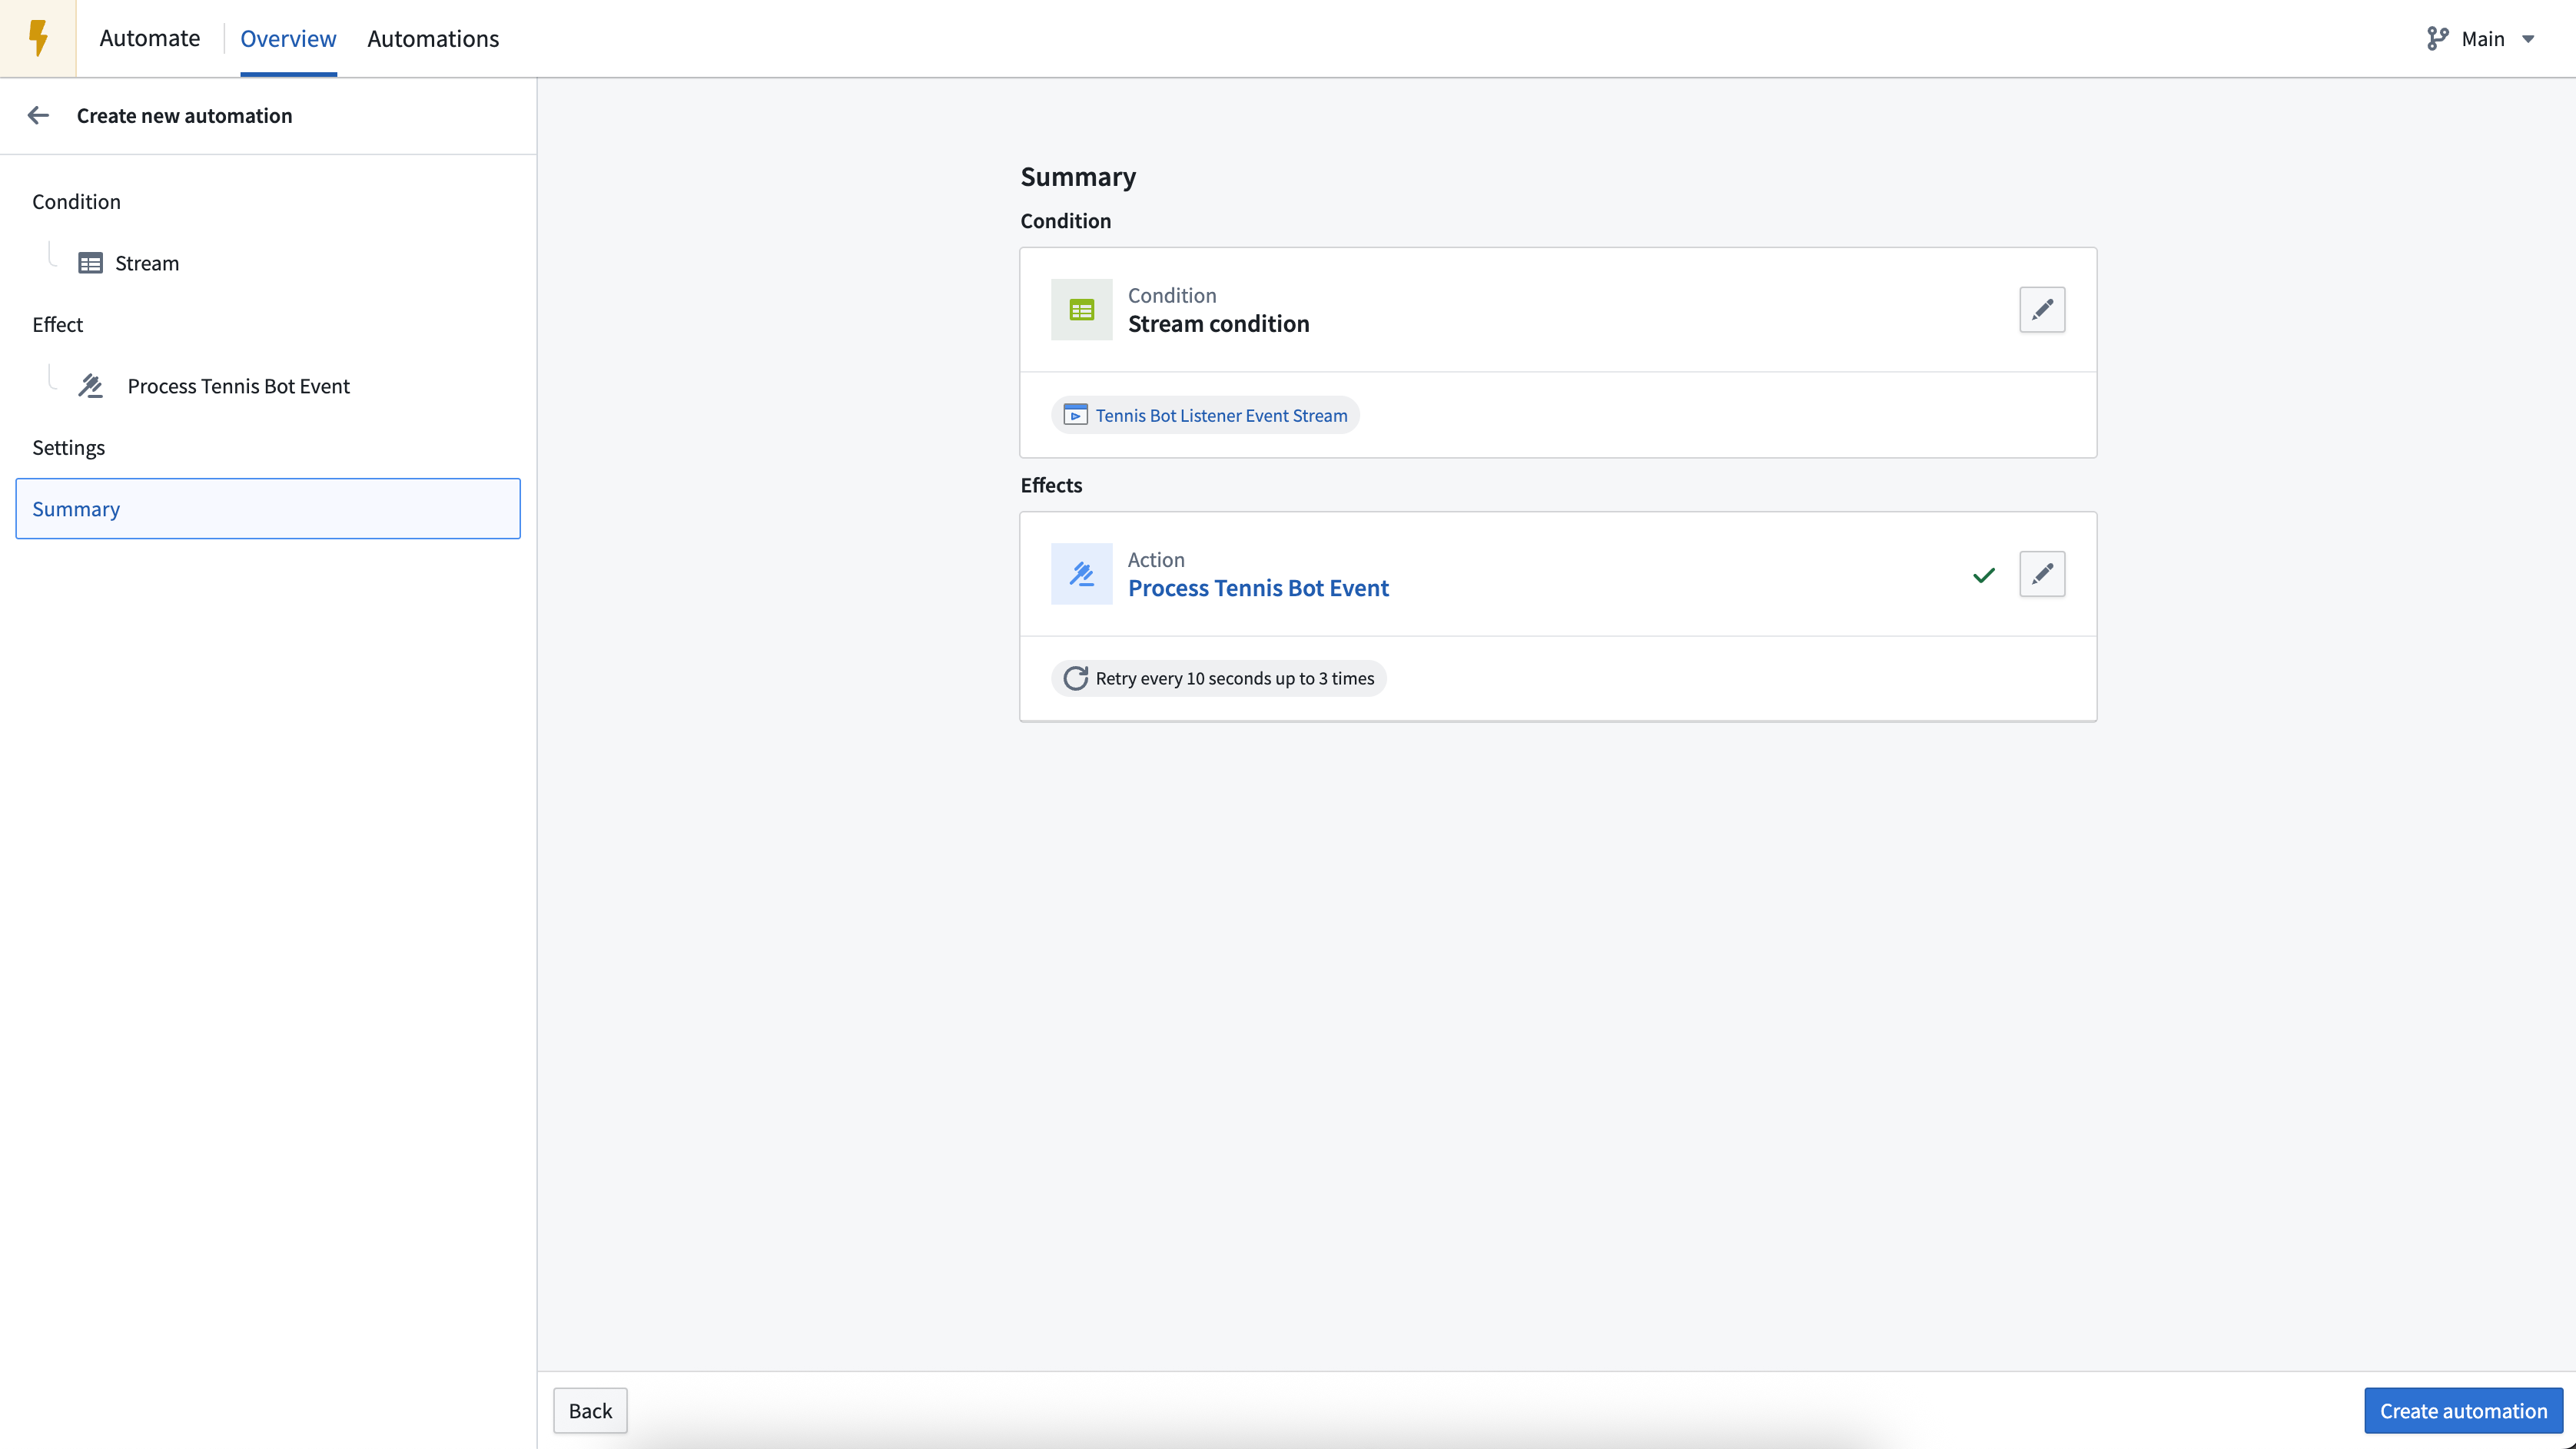
Step 7: Set up automation to execute function-backed actions
Next, create a new automation to execute the function-backed action for each new listener event. The new automation should have a "Stream" condition (it will execute when new rows are added to the stream). The input to this automation should be the output stream from the created Slack listener.
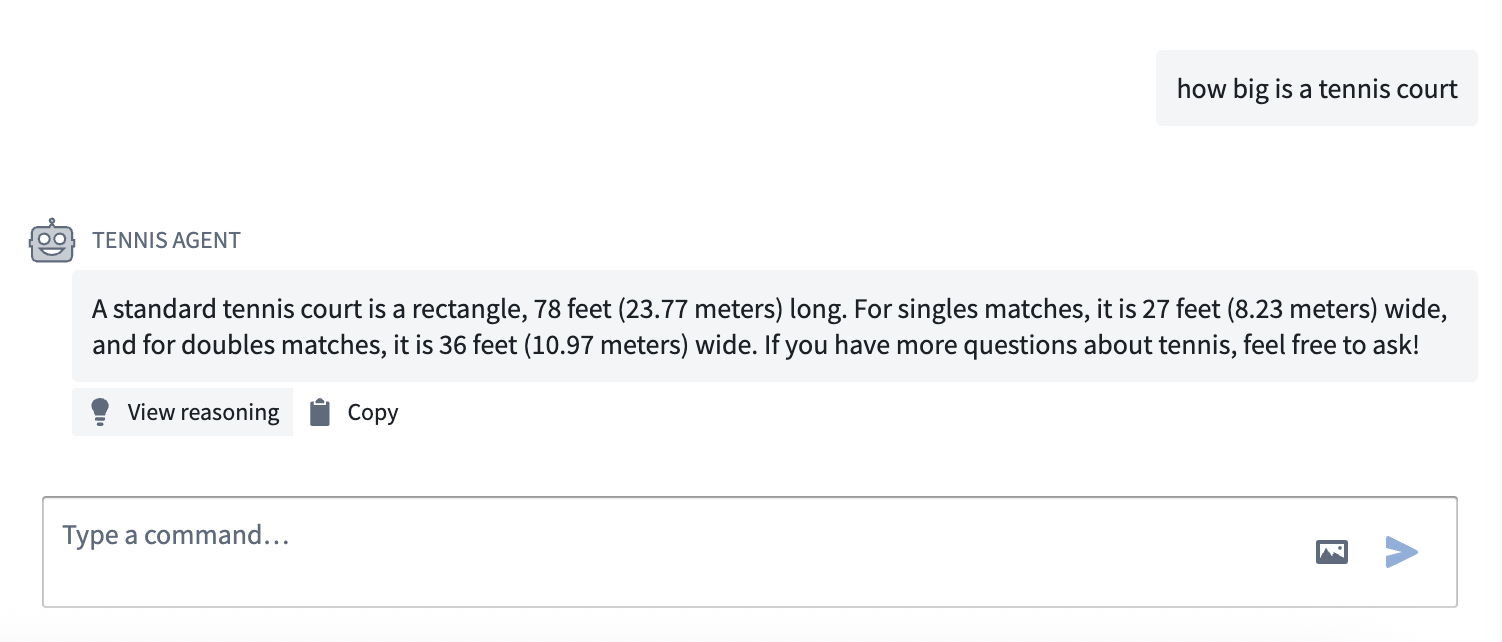
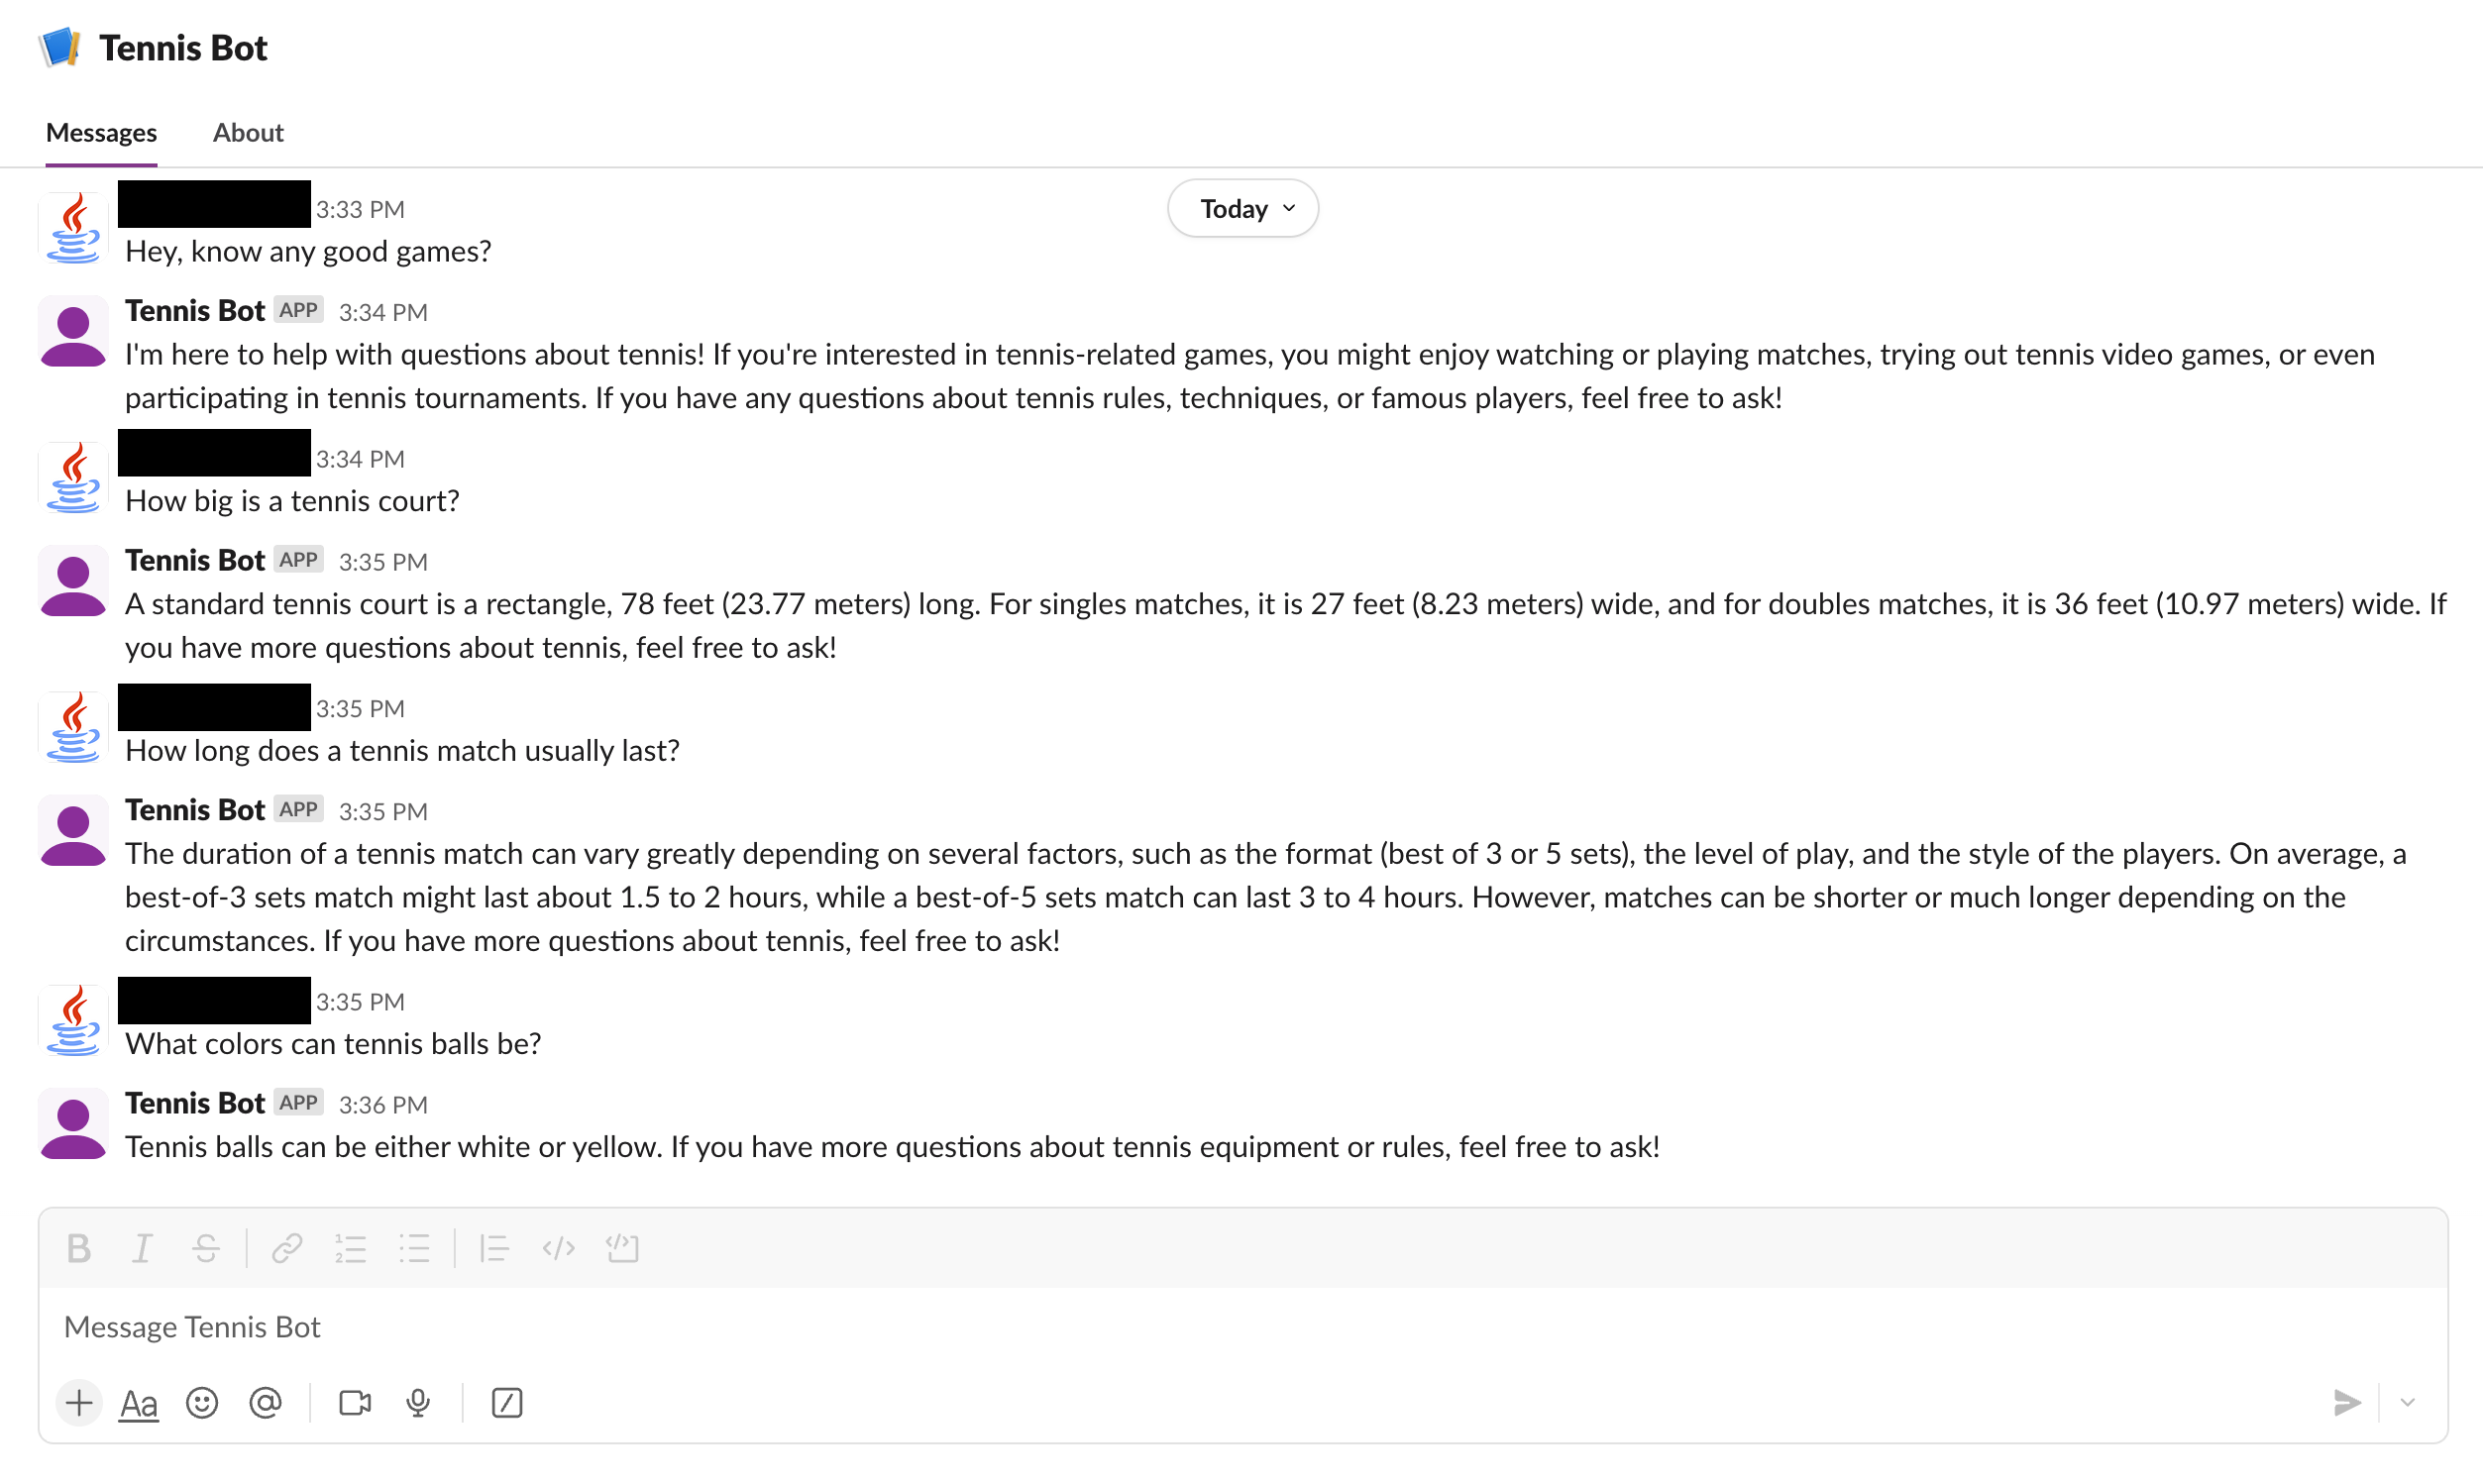
Step 8: Test the bot
At this point, the Tennis Bot is ready for testing. Send a Slack direct message to your bot and wait for its response. The bot should respond with information about tennis.
Optional extensions and improvements
You have now created a basic AI-powered chat bot; from here, you can continue to add functionality to your bot. Example extensions and improvements include:
- Send an initial confirmation message when the event is first received (such as "Working on it!"), and then update the content of that message to the LLM response when the response is available. This reduces the time taken for the user to receive the first response.
- Maintain user conversation history in the agent conversation session; this enables conversations with past messages as context. You can use the
sessionRidparameter of the agent function to enable conversational context.- For example, you can store the session RID from the agent function output (created on the first message in a thread) to an ontology object type, then look up the associated session RID for new messages on this object type to use in the agent function input.
- To reduce processing latency, you can move the event processing implementation from an automation that calls an action to a streaming pipeline that calls an external UDF. For more information on using streaming pipelines to process events, see the documentation on event processing options.
All screenshots of Slack® are provided for reference purposes only and are the property of Slack Technologies, LLC.