- Capabilities
- Getting started
- Architecture center
- Platform updates
Configure ontology peering
After you establish a peering relationship between two spaces, you can use Peer Manager to create and approve object type mappings which enable you to peer its objects over the connection.
To synchronize objects and links through a peering relationship, the object type to peer must exist on both enrollments, and its properties must remain in sync. A peering relationship where properties fall out of sync will be unable to send new object data until the synchronization is restored. Use Marketplace to create a product on the source enrollment that contains the object type to peer before deploying the product to the remote enrollment. When schematic changes are made to the object type on the source enrollment, then the remote enrollment can receive those updates through the product's configured release channel.
Review the core concepts for ontology peering before you proceed.
Make the object type available to peer
Navigate to Peer Manager and follow the instructions below for both the local and remote sides of the peer connection to make the object type available to peer:
- Choose the relevant peer connection and select the Ontology tab from the top of your screen.
- Select the Unmapped tab before choosing + Add ontology entities.
- Search for and select one or multiple object types you will make available for peering over the connection before choosing Confirm selection to launch the Configure peering permissions popup window.
- Optionally change Peer Manager's default peer permissions state, which allows both exports and imports of the associated ontology resources' data.
If you want to establish a unidirectional object type peering relationship where the local space sends objects to the remote space without receiving object edits the remote side makes, then you can select Imports blocked.
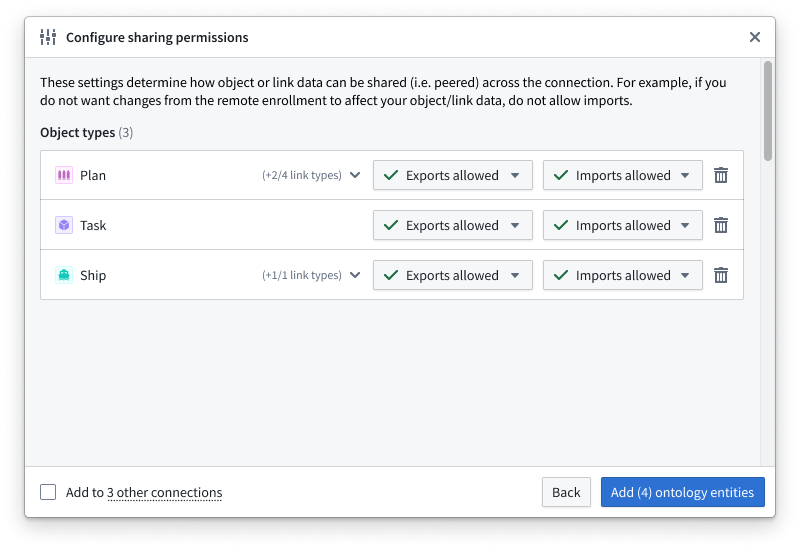
- Select Add ontology entities to finish adding the object types to the Unmapped section of the Ontology.
Create the object type mapping
Once you make the object type available to peer across both sides of the peer connection, you can next follow the instructions below to configure the object type mapping from either side of the relationship:
- Align the corresponding object types from the Local ontology and Remote ontology in the Unmapped section of the Ontology tab.
- Select + on the right side of the Remote ontology object type to launch the Create ontology mapping popup window.
- Map the corresponding properties across the local and remote object types in the Map properties section.
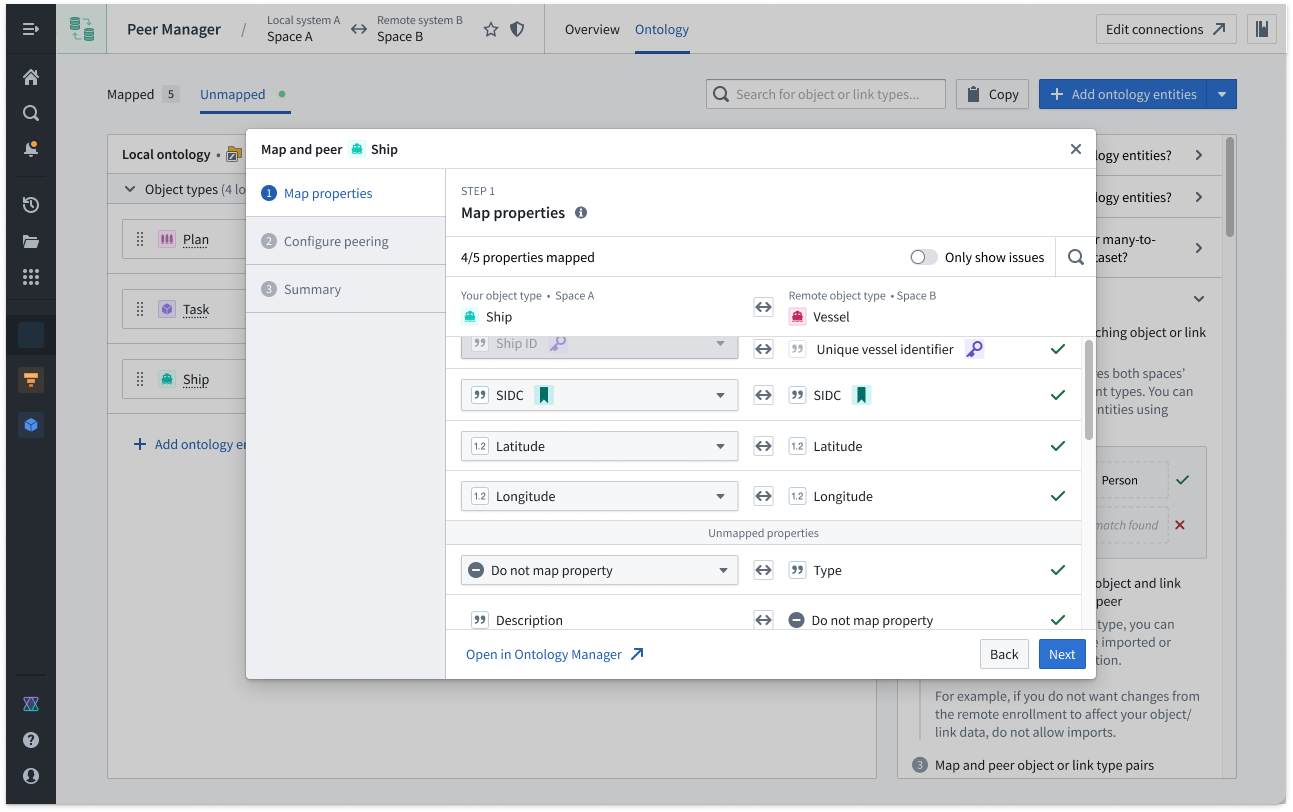
You do not need to map every property; however, you must map any properties you wish to peer over the established connection.
- Configure the peering relationship's Source data and Actions directionality in the Configure peering section. Learn more about peer relationship directionality.
-
Source data is the base data for the object type derived from its backing datasources, such as datasets, virtual tables, or restricted views. Support for source data peering depends on the type of backing data as well as the environment type. Learn more about source data peering.
-
Actions produce data from user edits applied onto Source data. In most cases, you should bidirectionally peer Actions if edits are enabled for the object type, so you should ensure both Export and Import are selected.
- Review the configuration for the object type in the Summary section and choose Submit to save the mapping.
Foundry immediately instantiates the peering relationship for your object type after you press submit. You can monitor the connection's health in Peer Manager's Overview panel.