- Capabilities
- Getting started
- Architecture center
- Platform updates
Deploy an application
This page walks through deploying a Pilot application to production. Deployment is a guided three-step process managed in the Pilot deployment panel. For building your application, see Build an application.
Deployment requires permissions at the project, organization, and enrollment levels. You need at least the Editor role on the project, the Third-party application administrator role in Control Panel to create the Developer Console application, and an enrollment administrator to approve the subdomain request. See the relevant sections below for details, or contact your administrator if you encounter permission errors.
Editor and deploy views
Pilot has two views that control which data your application displays, toggled from the top-right corner of the workspace.

For an overview of editor and deploy views, see Workspace overview.
If your application appears empty in deploy view, verify that the ontology entities have been created on a branch and that the backing datasets contain data. In editor view, Pilot displays seed data generated inside the container.
When you preview your application in deploy view on Main, you are viewing and interacting with production data. Any actions you perform in the application, such as creating or editing objects, are ontology edits that take immediate effect. When previewing on a deployment branch, ontology edits are scoped to that branch and do not propagate to Main.
Check deployability
Before starting the deployment process, verify that your application is ready to deploy. Select the status indicator in the top-right corner of the workspace to open the status monitoring popover. The Deployability status must be Deployable before you can create a branch.
Common deployability blockers include:
- Invalid ontology entities: Object types or action types that have configuration errors, such as missing required properties or references to entities that do not exist
- Outdated package dependencies: Dependencies that need to be upgraded before deployment
- Build errors: Compilation or runtime errors in the application code
To resolve blockers, select the three-dot menu (...) next to the Deployability status and choose Fix with Pilot. Pilot diagnoses the issue and applies a fix automatically. If the issue persists, you can prompt Pilot in the chat panel to describe and resolve the problem.
Start deployment
Select Deploy from the top-right corner of the Pilot workspace to open the deployment panel. The panel presents three steps:
- Implement ontology entities
- Configure application and subdomain
- Pass all CI checks
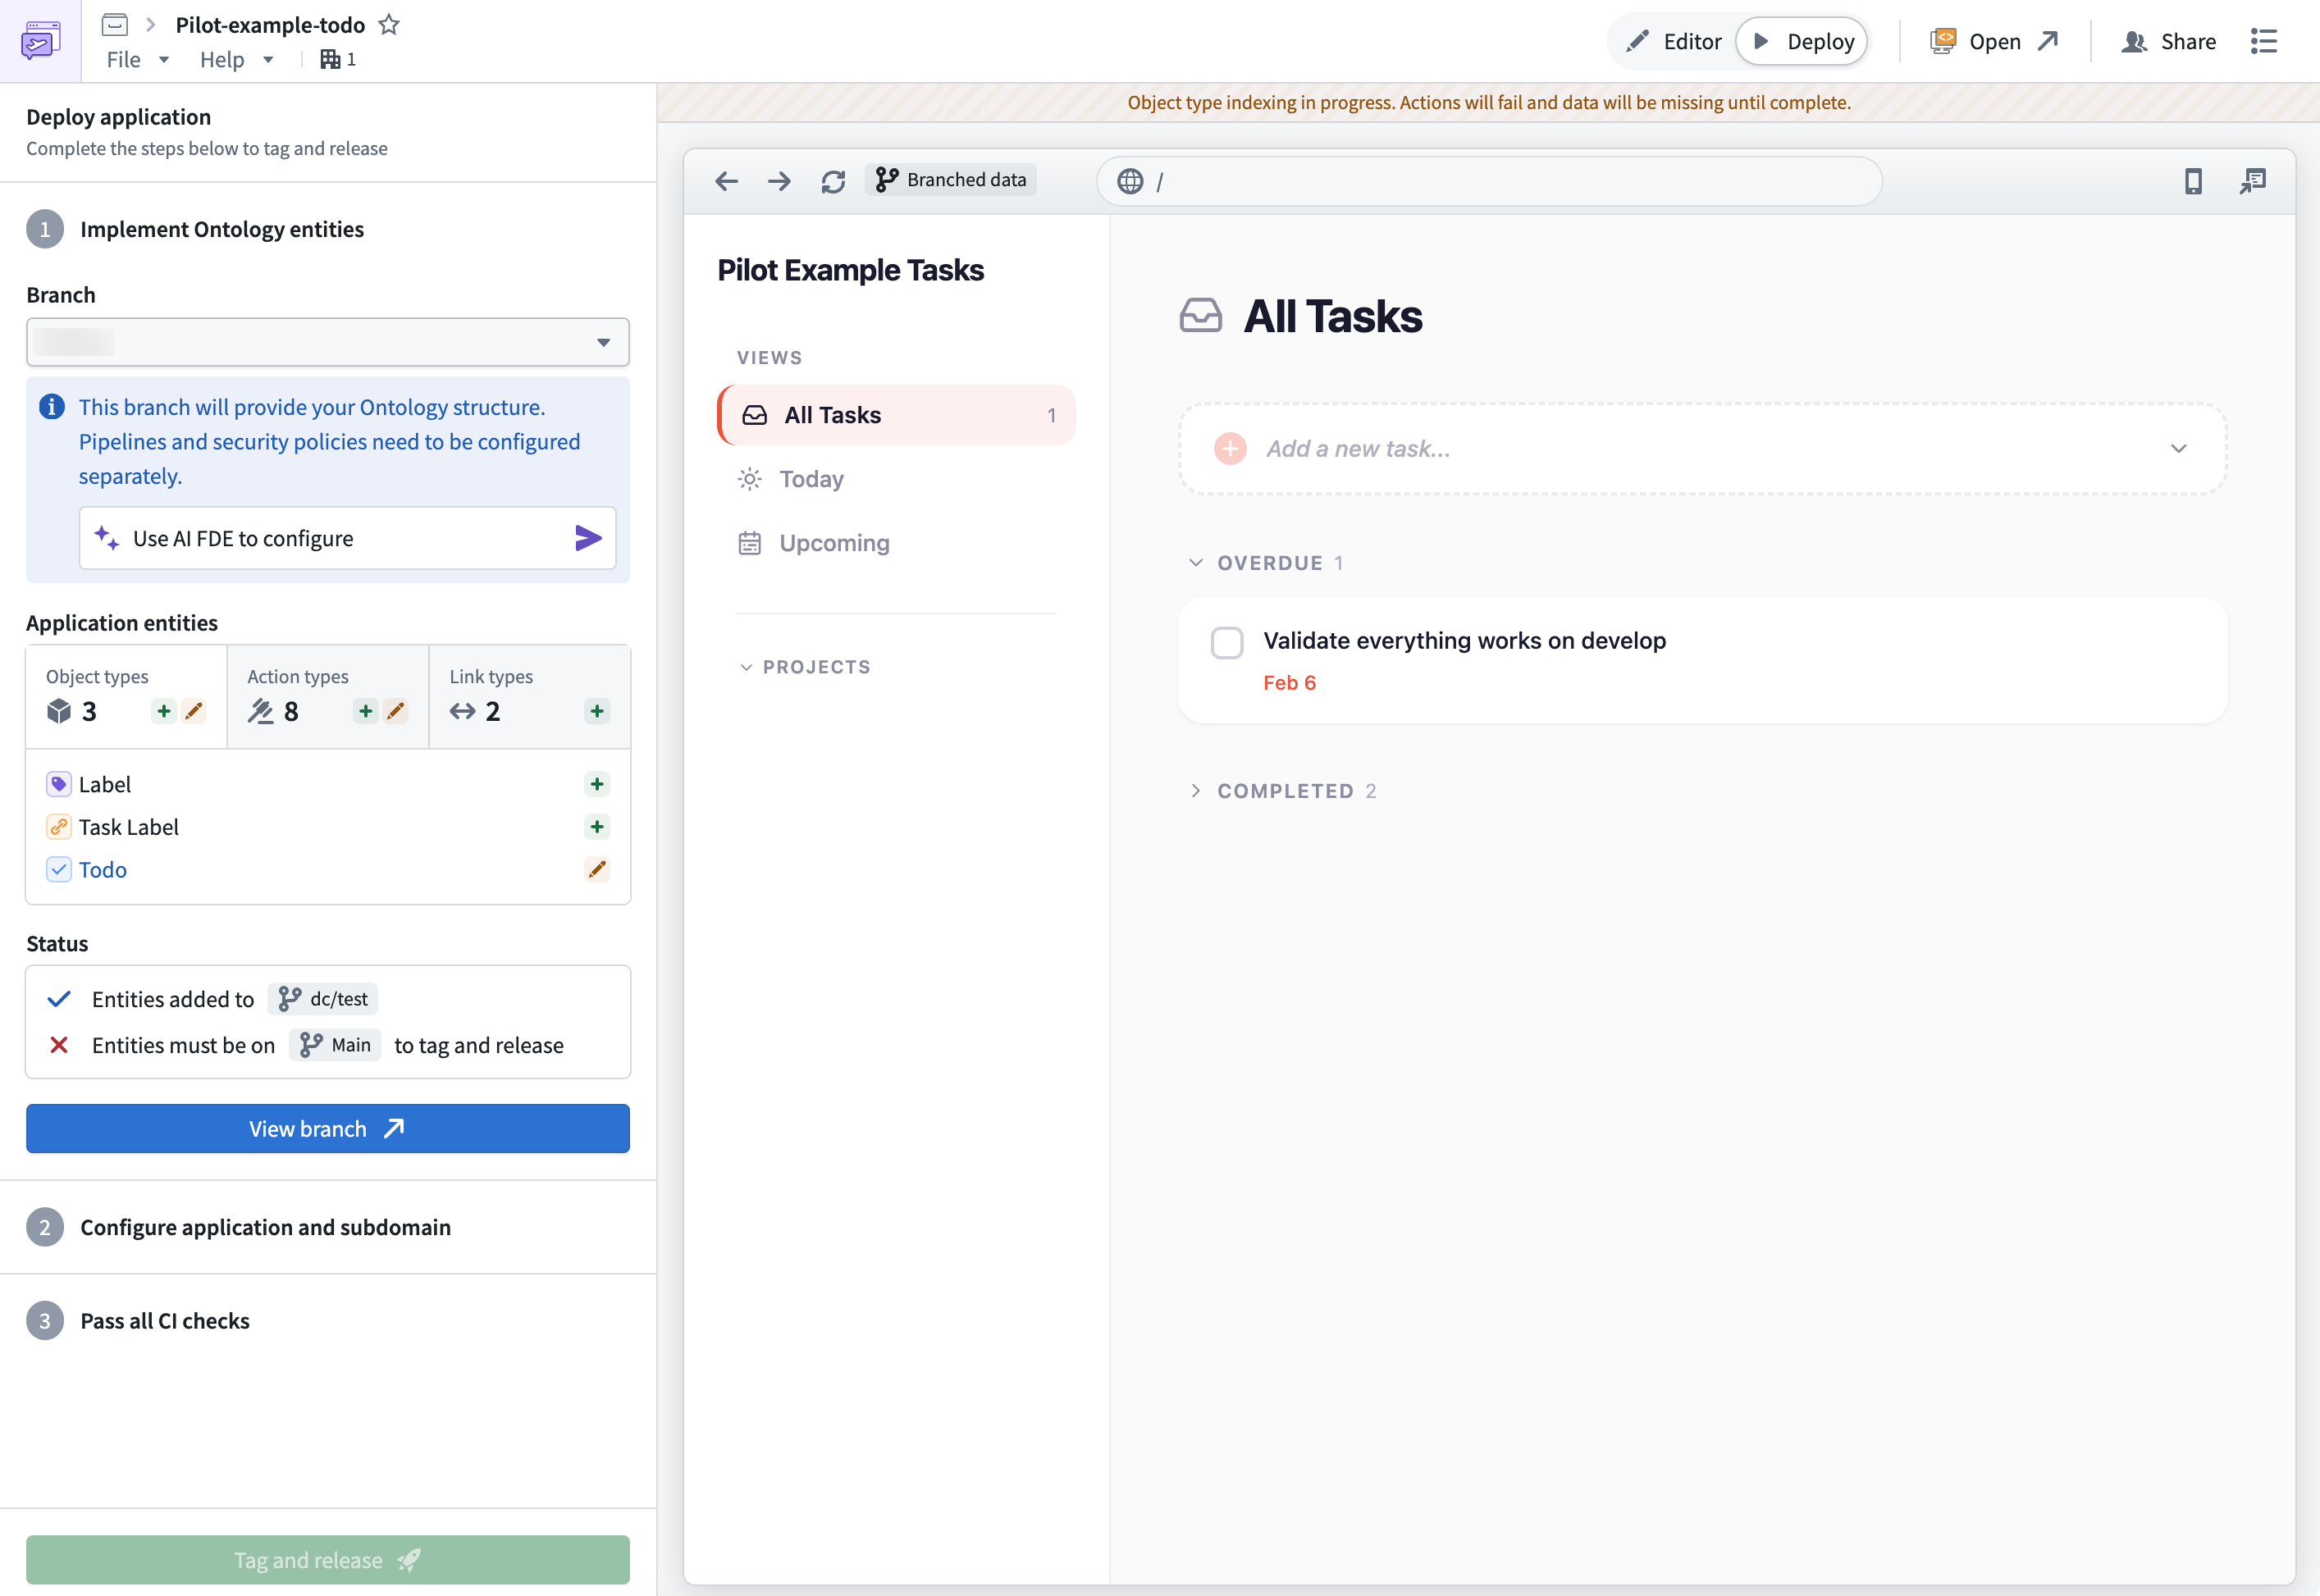
1. Implement ontology entities
Ontology changes created in the Pilot container must be promoted to the main ontology before the production application can use them. Pilot uses Global Branching for this process. Global Branching lets you make ontology changes on an isolated branch, test them against real data, and merge to Main without affecting production until you are ready.
Create a deployment branch
In the Implement ontology entities step, Pilot displays which entities need to be created on a branch, including object types, action types, and link types.
- Select Create branch to generate a deployment branch containing these ontology changes.
- Enter a branch name and confirm.
Once created, Pilot pushes ontology definitions to the branch and starts indexing. Indexing makes the object types and actions available on the branch so you can preview your application against real data in the deploy view and perform actions before merging to Main.
If branch creation fails, verify that the Deployability status is passing. Check the ontology tab for any remaining Pilot edits that need to be resolved. You can also try creating a new branch with a different name.
Review and merge through Global Branching
After the branch is created, review and merge the ontology changes.
- Select View branch to open Global Branching, where you can see the resources on the branch and their state.
- Select Create proposal and enter a proposal name and optional description.
- Select Create to submit the proposal.
- Once checks pass, select Merge proposal to apply the ontology entities to
Main.
Depending on your enrollment configuration, proposal approval may be automatic or may require manual review by a user with the appropriate permissions.
After the merge completes, Pilot prompts you to switch back to Main. The Implement ontology entities step then shows all entities as up to date.
2. Configure application and subdomain
With ontology entities on Main, you can configure the hosted application that will serve your generated UI.
Create the Developer Console application
In the Configure application and subdomain step, select Configure application. A dialog appears with the following fields:
- Developer Console application name: Pilot suggests a name tied to your Pilot project.
- Organization: Select the organization where the application will live.
- Subdomain: Choose a subdomain for your application. Pilot checks availability and the resulting URL follows the pattern
<subdomain>.<enrollment>.palantirfoundry.com.
Select Create application to proceed. Pilot creates the Developer Console application record and defines the application's restrictions, automatically including the relevant object types and action types.
Creating a Developer Console application requires specific permissions. For details, see Developer Console permissions.
Approve the subdomain request
Subdomain registration requires approval through Control Panel. An enrollment administrator must navigate to Control Panel > Approvals and complete the following:
- Review the subdomain request details, including the Foundry domain, requested subdomain, and the hosted application.
- Select Approve.
Once approved, the hosted domain is registered and mapped to the Developer Console application. Back in Pilot, the Configure application and subdomain step confirms that the application's restrictions are up to date.
Subdomain approval timelines vary by enrollment. If you are blocked waiting for approval, contact your enrollment administrator. On some enrollments, subdomain registration may require additional security review.
3. Run CI checks and release
With ontology entities implemented and the Developer Console application configured, you can generate deployment files and release your application.
Generate deployment files
In the Pass all CI checks step, select Generate deployment files to enable checks. Pilot generates CI and environment configuration files into your repository, including:
.env.productionci.ymlfoundry.config.json- Additional build and settings scripts
Pilot then builds a production-ready artifact using the generated configuration. CI checks start automatically.
Failing CI checks
If CI checks fail, try the following:
- Select Generate deployment files again to regenerate the configuration files. This resolves issues caused by outdated deployment configuration.
- Switch to editor view and prompt Pilot to fix the build error. For example,
The CI checks are failing. Can you check the build output and fix any errors? - After Pilot applies a fix, switch back to the deploy view and select Generate deployment files to retrigger CI checks.
Tag and release
When CI checks pass, you can tag and release the application.
- Select Tag and release.
- In the Tag and release dialog:
- Confirm the Branch or specific commit.
- Choose a version type: Patch for backward-compatible fixes, Minor for additive changes, Major for breaking changes, or Custom for a custom tag.
- Select Tag and release to start the release.
Pilot tracks the release progress and surfaces a confirmation when the tag is created.
Open your production application
Once deployment is complete, Pilot displays App successfully deployed! with a link to View app. Select View app to open the newly deployed application at your subdomain.
The first time you visit, you are prompted with an OAuth consent screen. Select Allow to grant the Developer Console application access to the required ontology entities and media datasets. You then land in your production application, which operates on real data through the ontology.
After deployment
After your application is deployed, you can continue iterating in Pilot.
- Switch to the Editor view and make changes through follow-up prompts, just as you did during the initial build.
- When you are ready to release an update, switch to the Deploy view.
- If your changes include new or modified ontology entities, create a new branch or reset the existing one, merge through Global Branching, and tag a new release.
- If your changes are code-only (no ontology modifications), generate new deployment files and tag a new release directly.
Your production application always uses real data from the ontology. Seed data from the Pilot container is never deployed and is not accessible in the production application.