- Capabilities
- Getting started
- Architecture center
- Platform updates
Navigation
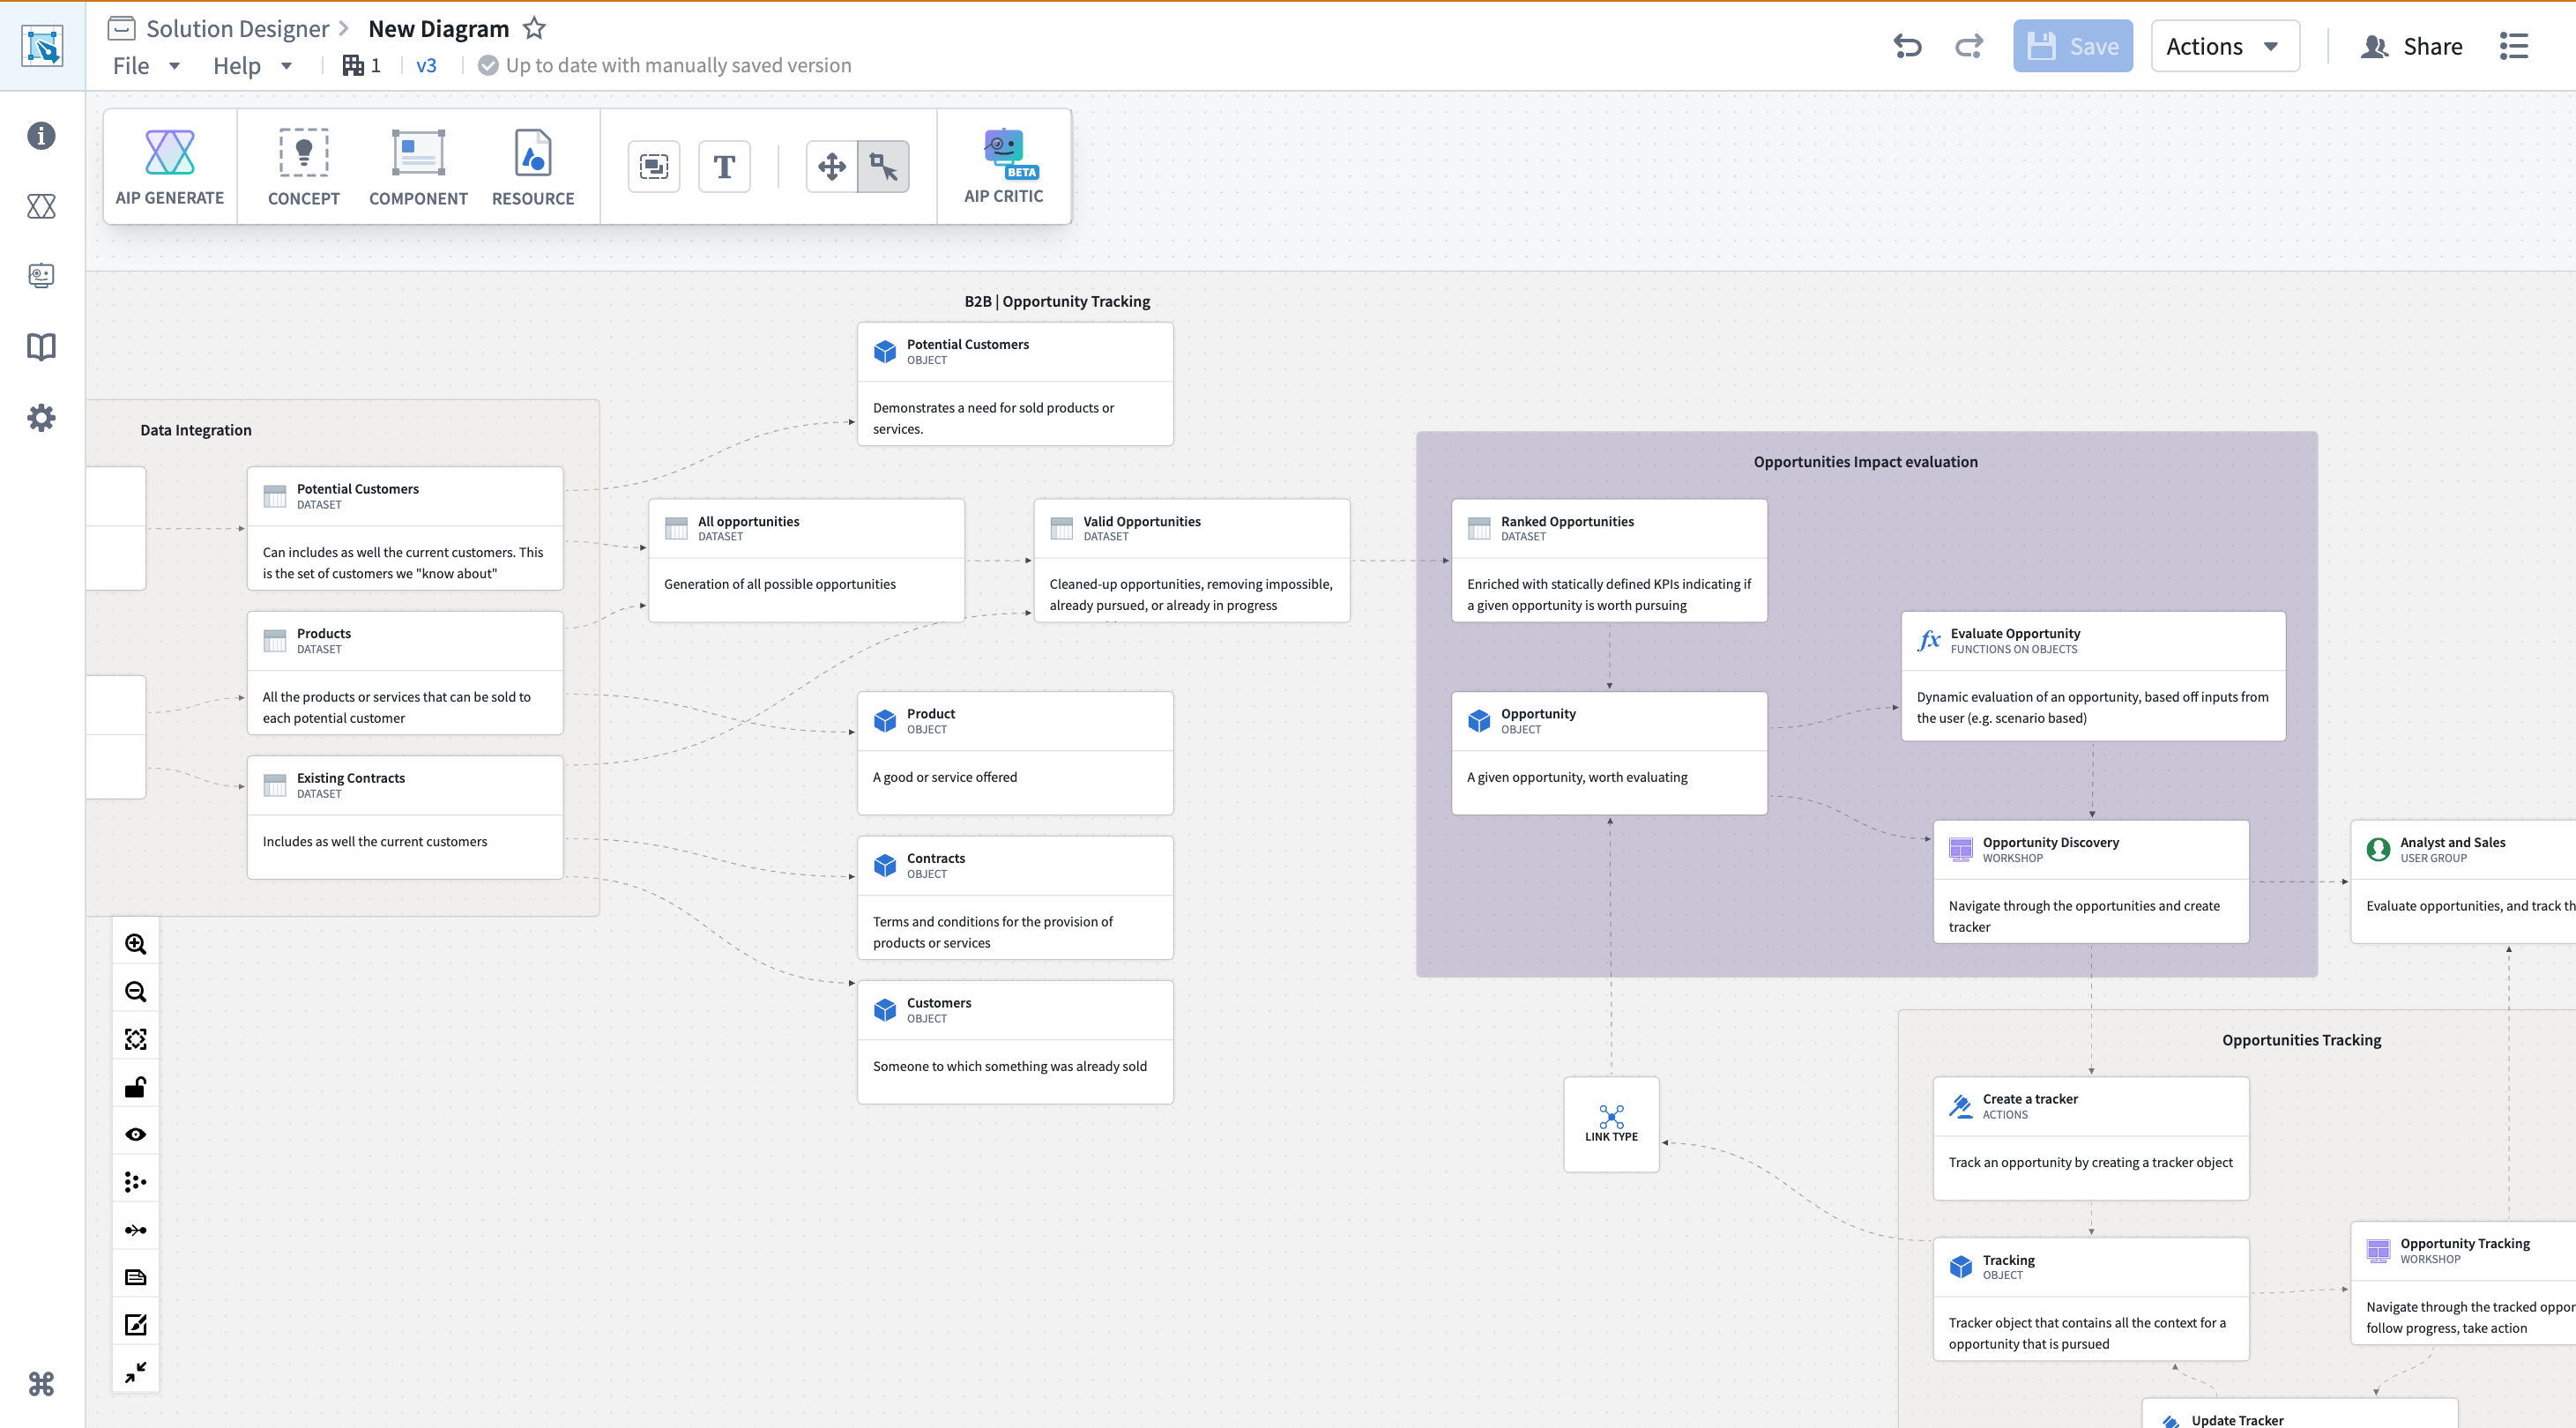
Solution Designer's interface consists of several key areas outlined in the sections below to help you navigate your diagram:
- Navigation bar (top of screen): Contains the diagram name, auto-save indicator, Save button, Actions menu (to import or export a diagram), and undo/redo controls.
- Diagram toolbar (top-left of screen): Contains buttons for adding nodes to your diagram, such as by Concept, Component, or Resource, as well as grouping those nodes or adding descriptive text boxes. If AIP features are enabled, you will also see buttons to use AIP Generate and AIP Critic.
- Canvas (center): The main workspace where you build and visualize your diagram. Nodes appear here, and you can drag to pan or zoom with your mouse wheel or track pad.
- Node toolbar (when viewing a node on your canvas): Appears above any selected node with actions for configuring and managing nodes. See Diagrams for details.
- Canvas controls (bottom-left of screen): Provides a toolbar containing zoom, layout, and view controls. See Diagrams for details.
- Sidebar (left side of screen): Contains buttons to view Diagram Information, interact with AIP Architect or AIP Critic, review Reference Diagrams, and configure Graph Settings.
Navigation bar
The navigation bar at the top of Solution Designer provides access to diagram-level operations that enable you to:
- Edit your diagram's name from its file path in the top left.
- View your diagram's auto-save status, such as
Up to date with manually saved versionorSaved 2m ago. - Navigate your edit history through the undo and redo buttons.
- Manually save your diagram using the Save button.
- Access import and export options and upload images to convert hand-drawn or whiteboard diagrams into editable Solution Designer diagrams using AI vision capabilities through the Actions menu.
View and revert to previous versions
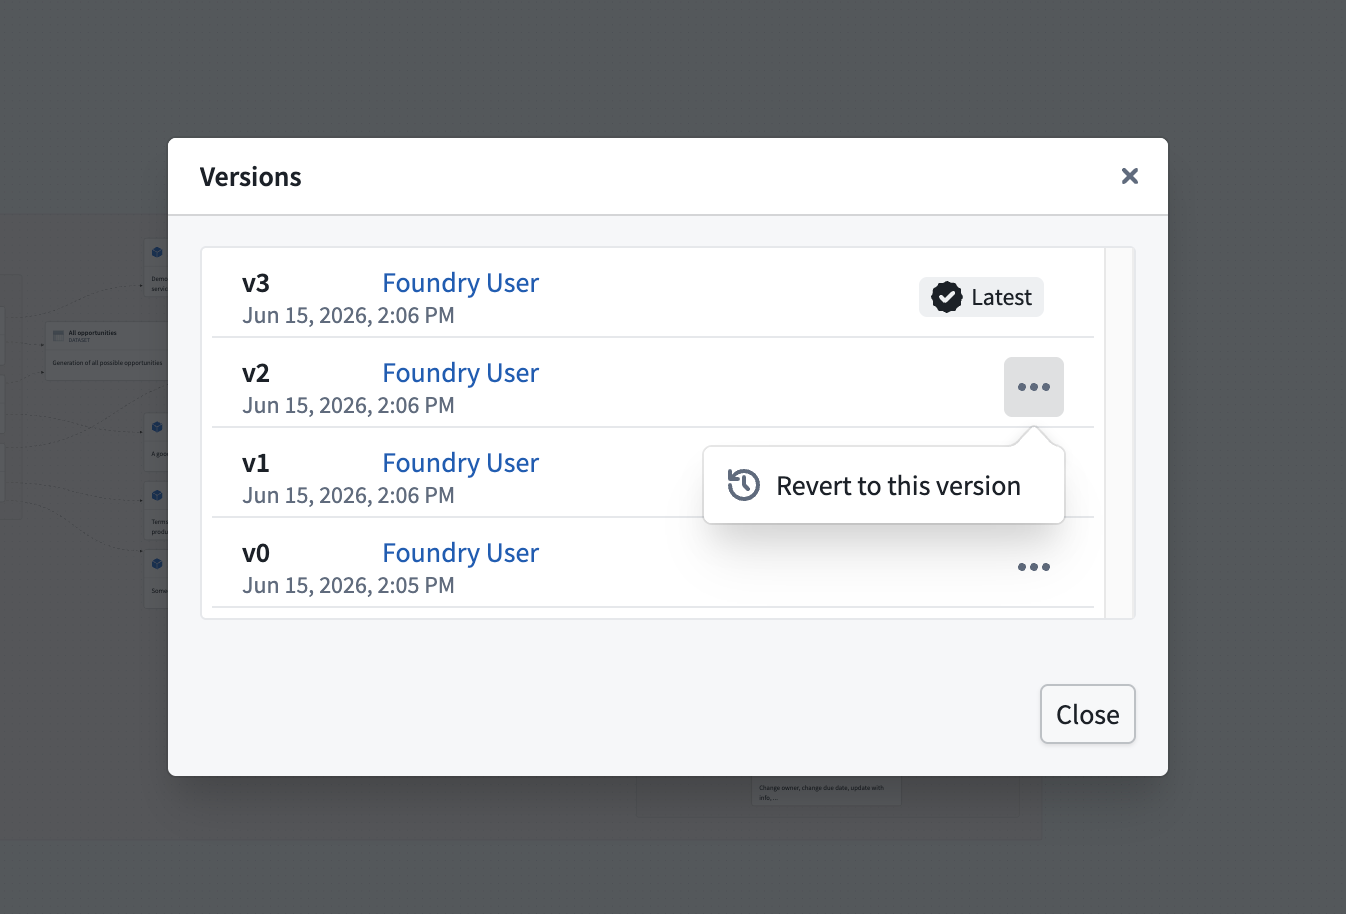
Solution Designer maintains a complete version history of your diagram. Each auto-save and manual save creates a new version with a timestamp.
To view all diagram versions, select the versions icon, which displays as v{N}, in the navigation bar to the left of the auto-save status indicator. This launches the Versions modal showing a list of all saved versions, with each version displaying the timestamp of when the version was saved, the user who created the version, and a preview or description of changes made.
You can restore any prior version by selecting ... > Restore to this version. Restoring an old version creates a new version and does not delete any versions from the diagram's history.
Actions menu
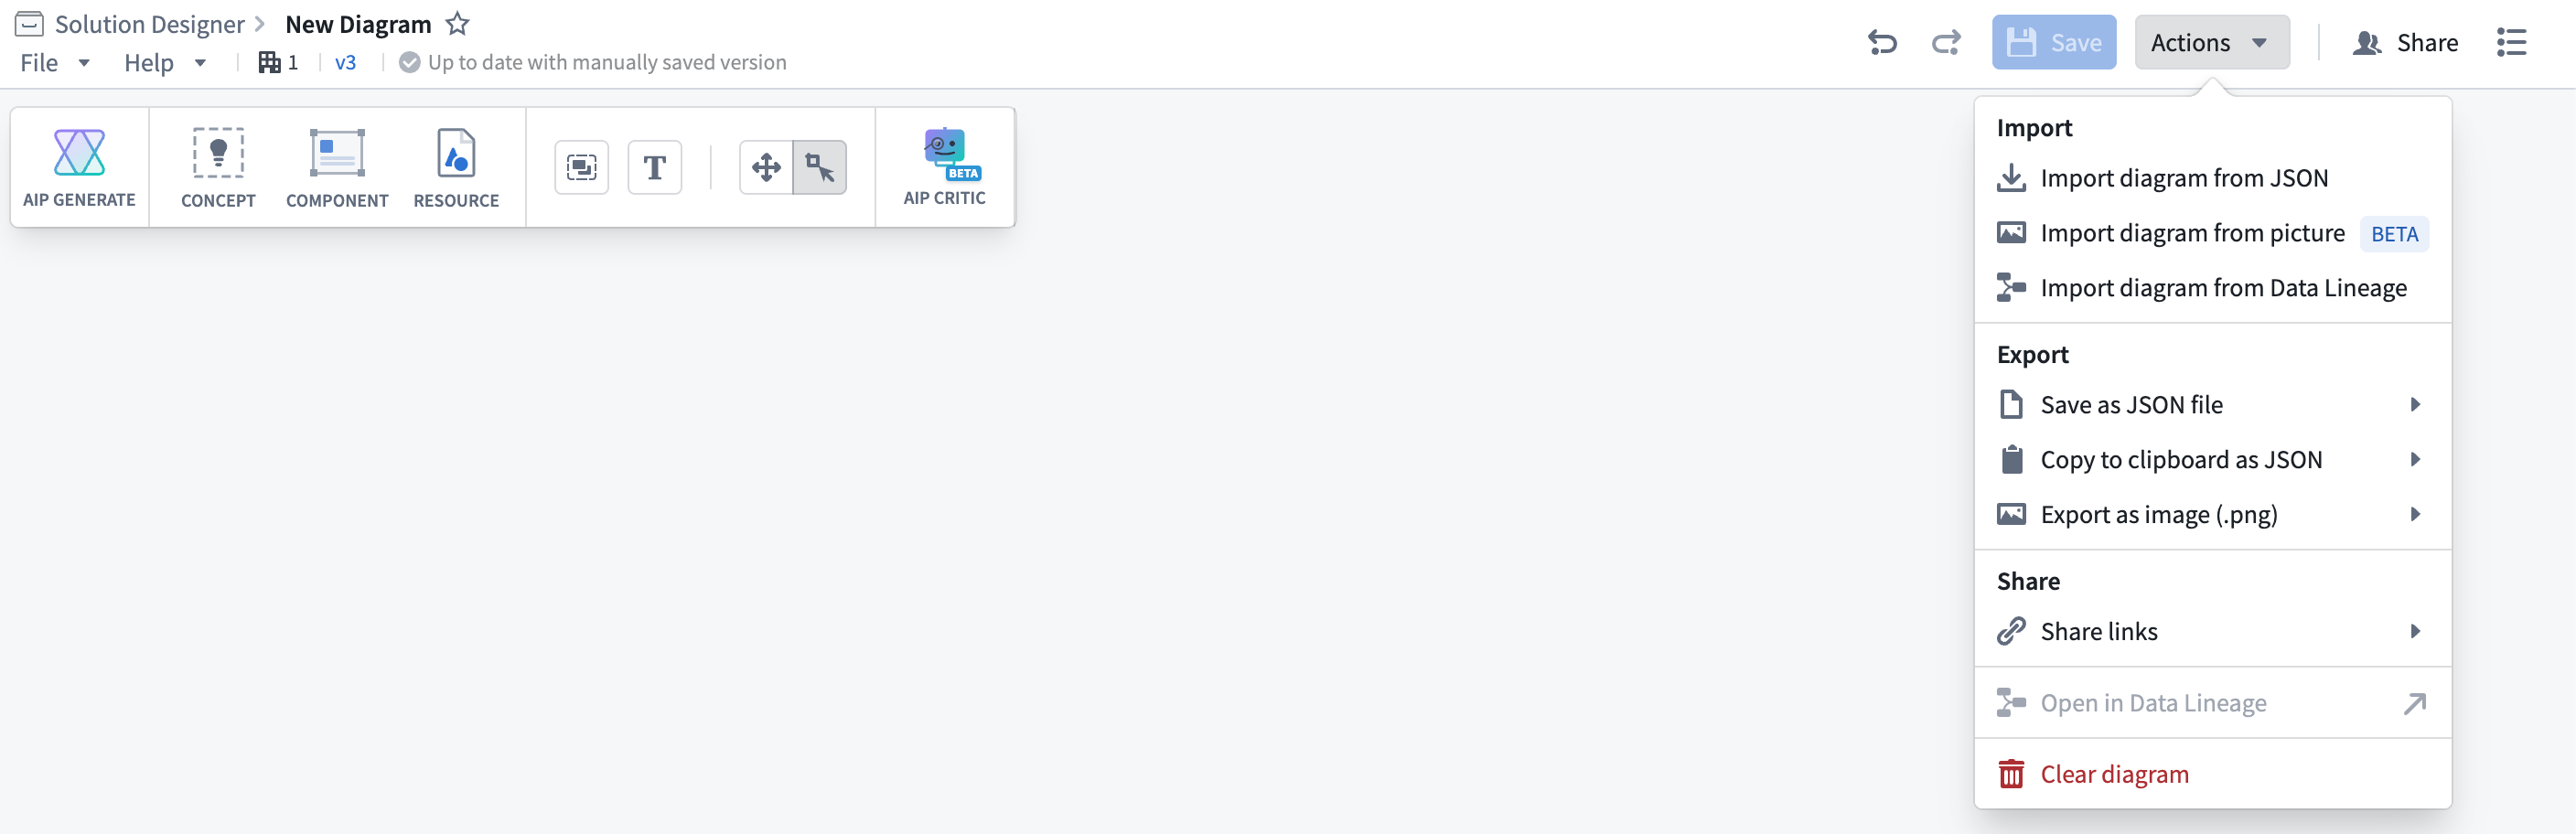
Use the Actions menu to import, export, share, or clear a diagram as well as open it in Data Lineage if it contains resources, such as a dataset or object type.
- Import diagram: Upload a diagram from a JSON file, image, or import one from Data Lineage.
- Export diagram: You can save or copy an entire diagram or selected nodes to a JSON file for backup, sharing, or pasting into other tools. Additionally, you can export an entire diagram or selected node as a high-resolution PNG image, which Solution Designer renders at 2x zoom for clarity.
You must have edit permissions on a diagram to export it, as read-only viewers cannot export diagrams.
Diagram toolbar
The diagram toolbar appears at the top-left of the screen and contains buttons for adding nodes to your diagram and accessing Solution Designer's key features:
- AIP Generate (if AIP is enabled): Start AI-powered workflow planning. See AIP Architect.
- Concept: Add abstract concept nodes. See concept nodes.
- Component: Open the component picker to add platform components (
Cmd/Ctrl + B). See component nodes. - Resource: Add nodes linked to Foundry resources. See resource nodes.
- Group: Add empty groups to organize nodes. See groups.
- Text: Add text nodes for annotations. See Text nodes.
- AIP Critic (if AIP is enabled): Open the diagram review panel. See AIP Critic.
- Pan mode toggle: Switch between edit and read-only pan mode.
Sidebar
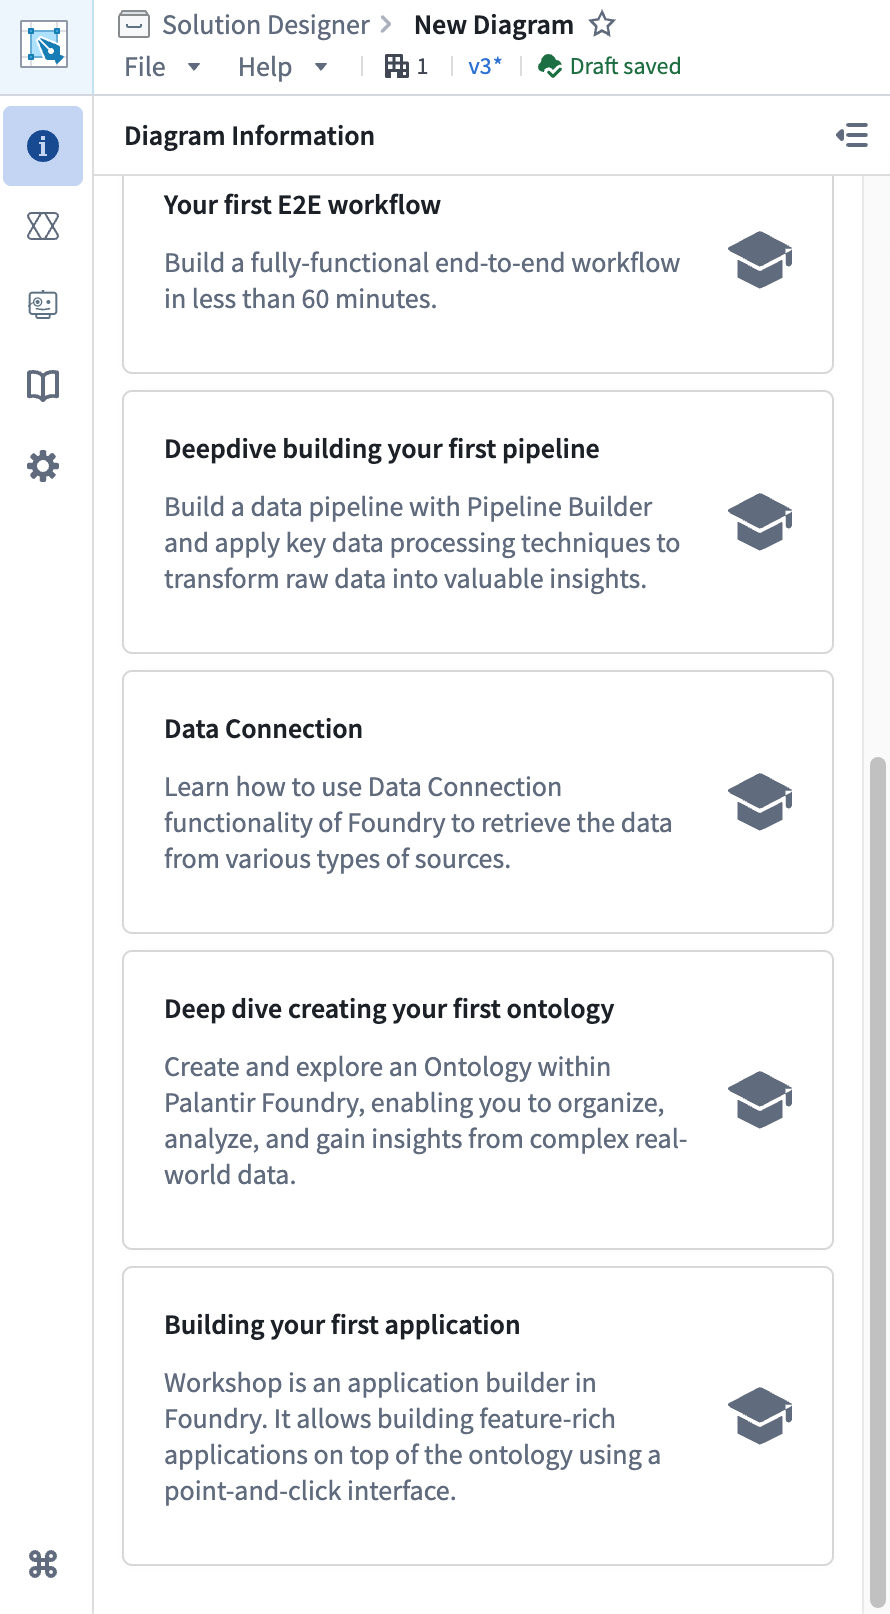
Select an icon in the sidebar on the left side of the screen to display its full view that is both collapsible and resizable. Different buttons open specific panels in the sidebar:
- Diagram Information: Provides a text input box where you can write a diagram description and renders documentation and tutorial links.
- AIP Architect: Use AIP Architect to conduct AI-powered workflow planning. See AIP Architect.
- AIP Critic: View and interact with the AI-powered diagram review panel. See AIP Critic.
- Reference Diagrams: Load and browse Solution Designer's reference architecture library.
- Graph Settings: View and configure your diagram's settings and display options.
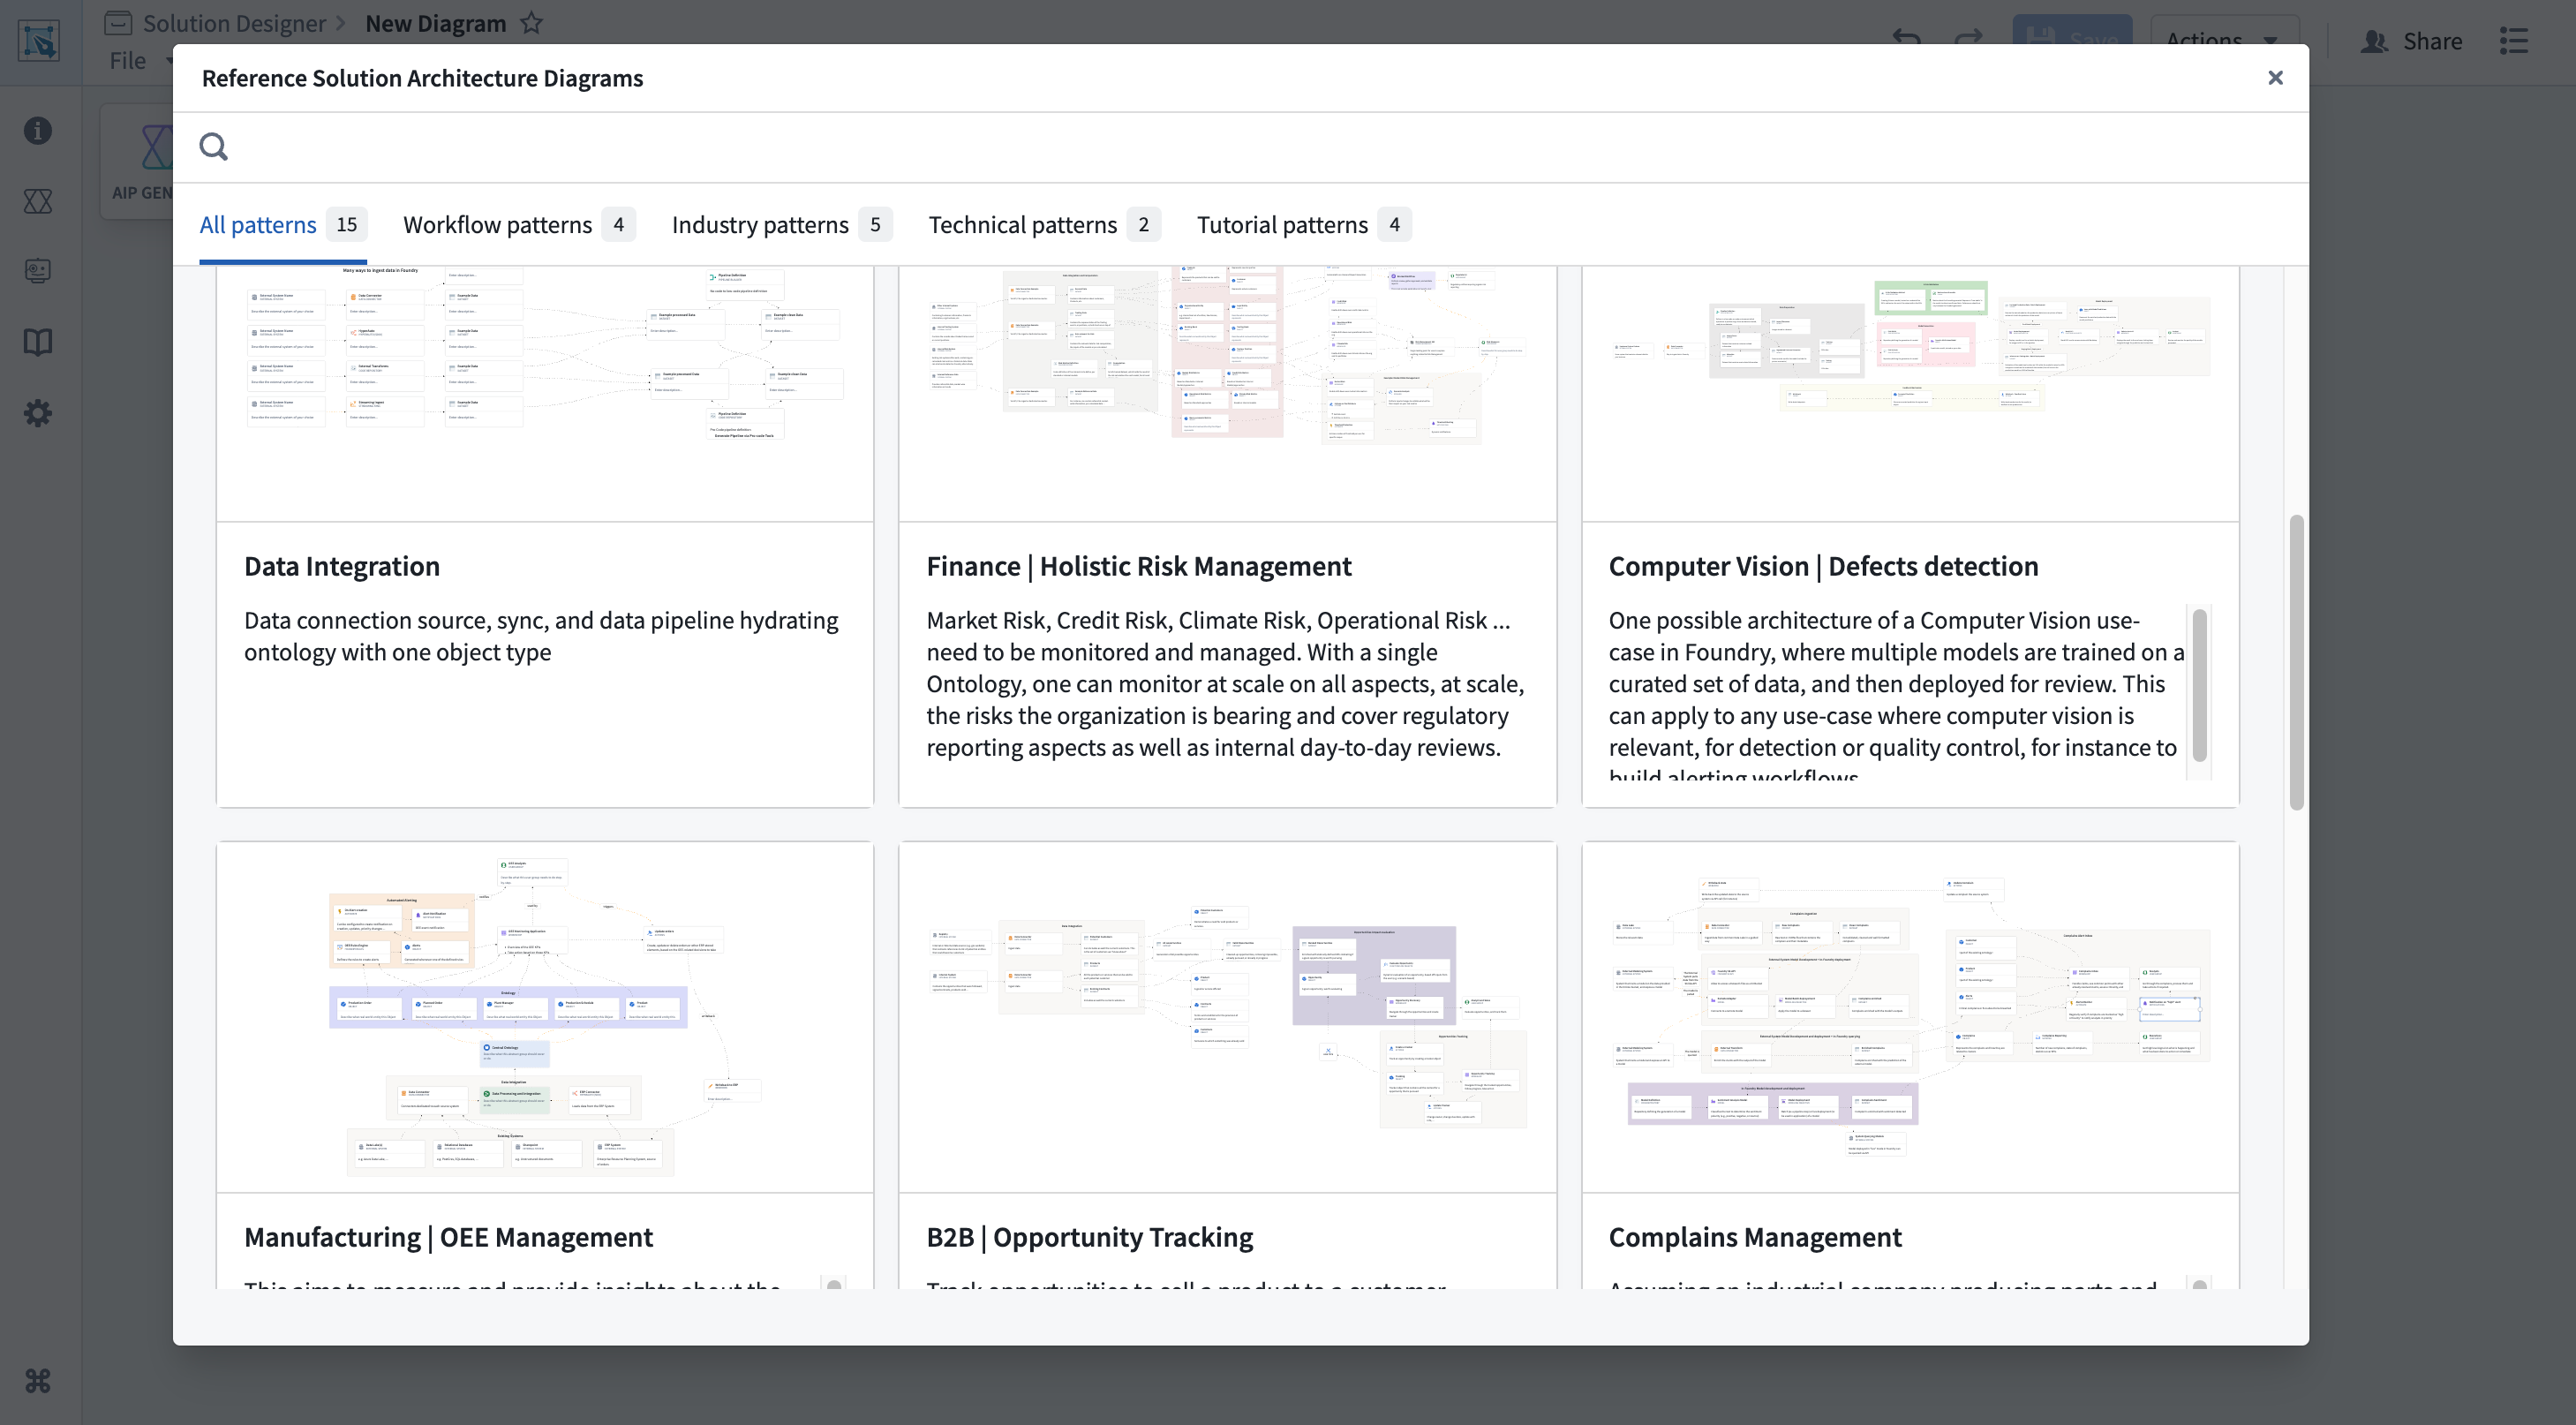
Reference architecture library
The Reference Diagrams panel displays the reference architecture library, where you can browse and load pre-built patterns and templates organized by categories (industry patterns, technical patterns, and workflow patterns). Search for patterns by keyword, preview them, and then create a new diagram, add to an existing diagram, or override your current diagram.
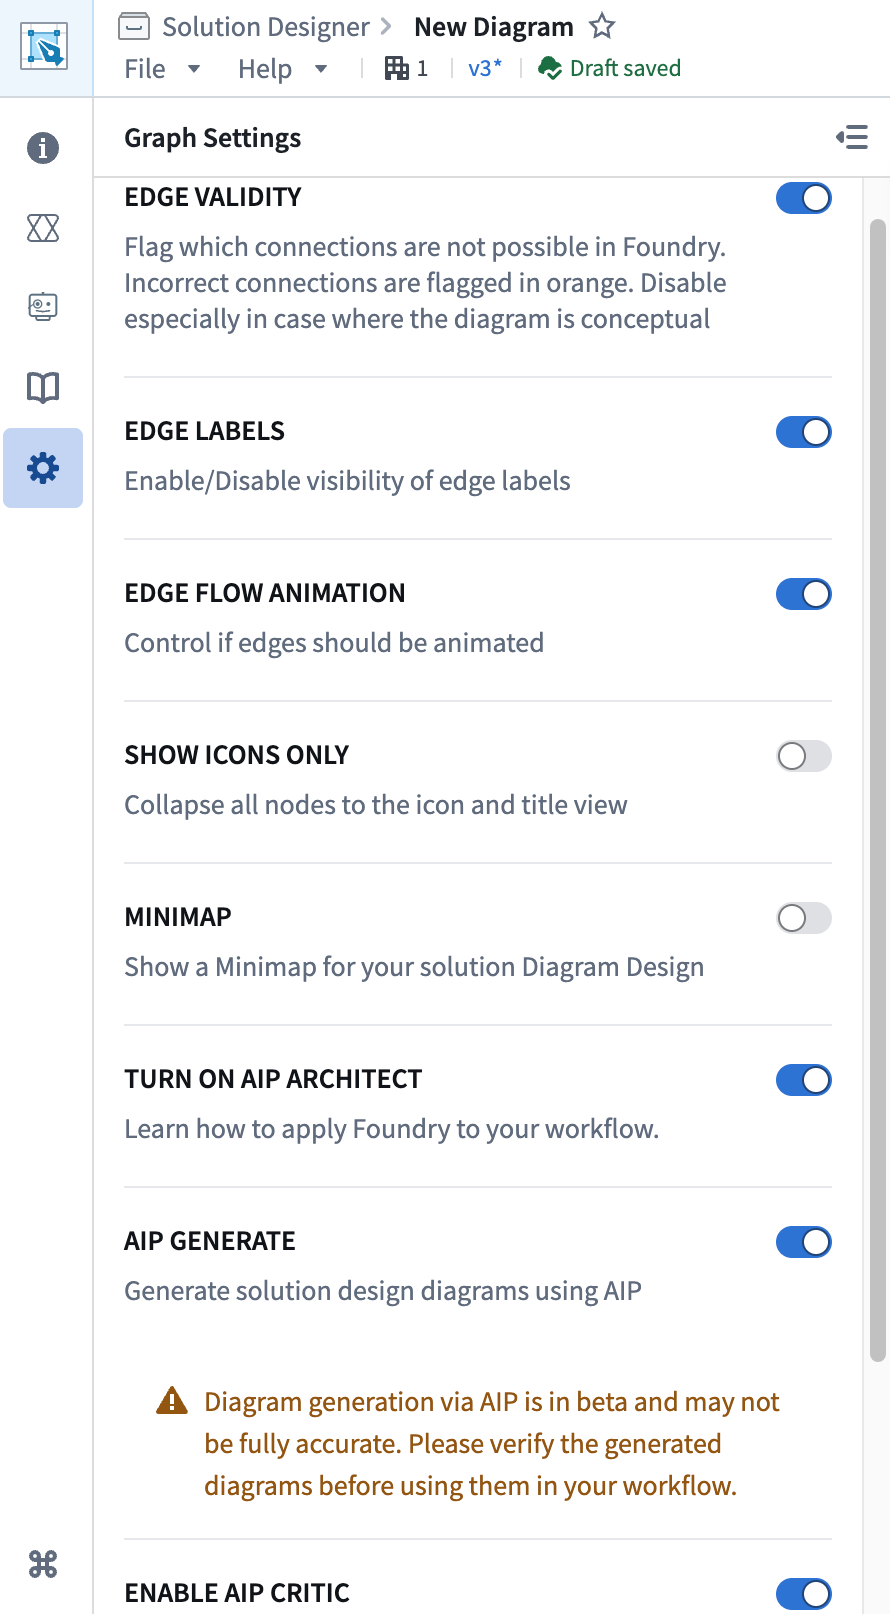
Configure your diagram's settings
The Graph Settings panel enables you to customize how your diagram is displayed and configure Solution Designer features.
Available settings include options for edge display, canvas view controls (mini-map, background grid, and pan mode), icon display modes, and AIP feature toggles. Settings are saved locally to your diagram.
For details on specific canvas features like the mini-map and pan controls, see the canvas controls and pan and zoom documentation.
Keyboard shortcuts
Solution Designer supports keyboard shortcuts to streamline your workflow.
| Shortcut | Action |
|---|---|
Cmd/Ctrl + B | Open component picker |
Shift + click or drag | Multi-select nodes |
Backspace or Delete | Delete selected nodes or connections |
Cmd/Ctrl + C | Copy selected nodes to clipboard |
Cmd/Ctrl + V | Paste nodes from clipboard |
Cmd/Ctrl + Z | Undo last action |
Cmd/Ctrl + Y or Cmd/Ctrl + Shift + Z | Redo last action |
These shortcuts allow you to efficiently build and modify diagrams without constantly switching across menus.
URL parameters
Solution Designer supports URL parameters for specific behaviors:
viewer=true: Opens the diagram in read-only viewer mode with pan mode automatically enabled. Useful for sharing diagrams with stakeholders who should only view, not edit.focusRID=<resource-id>: Automatically centers and zooms to a specific node identified by its resource RID.
Example: Create a link to a view-only diagram
https://{FOUNDRY_URL}/workspace/solution-designer/<diagram-rid>?viewer=true
This opens the diagram in read-only viewer mode, ideal for presentations or reviews.