Creating Helm chart Releases
For Products that do not yet exist in Apollo, you must create a new Product before you can create a Product Release. There are two ways you can create Product Releases in Apollo:
- Follow the Product publishing workflow
- Use the Apollo CLI
Product publishing workflow
- Navigate to the Products page in Apollo and select the Helm chart Product you want to create a Release for.
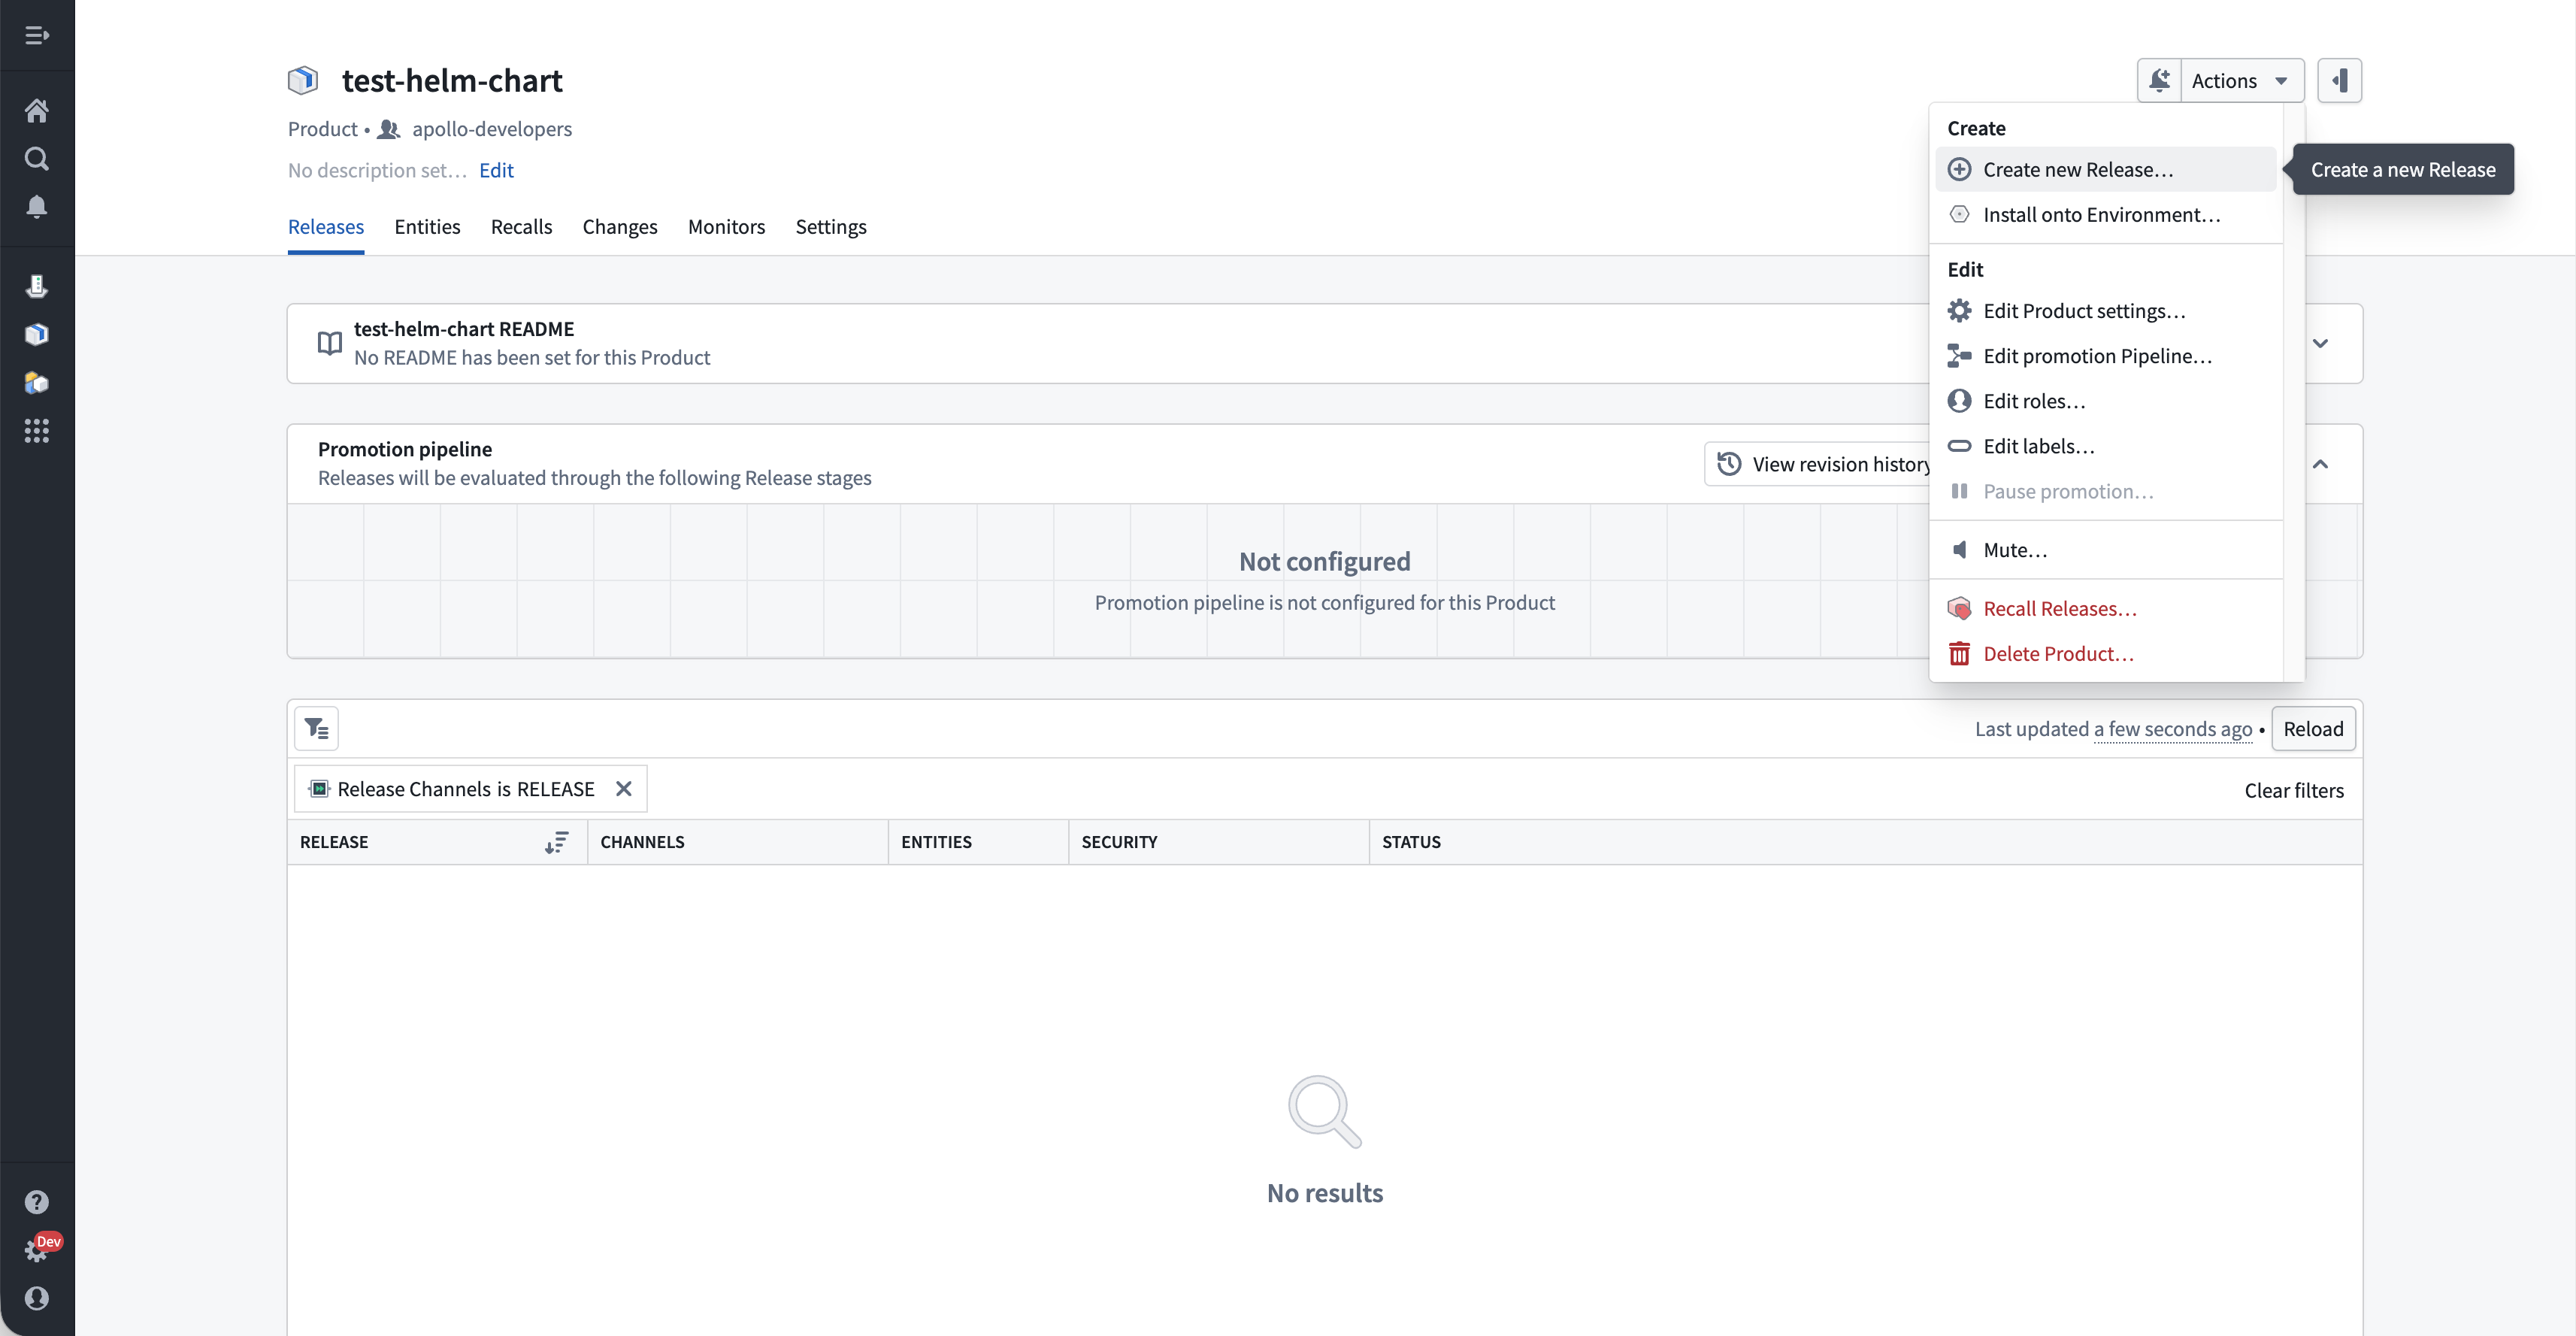
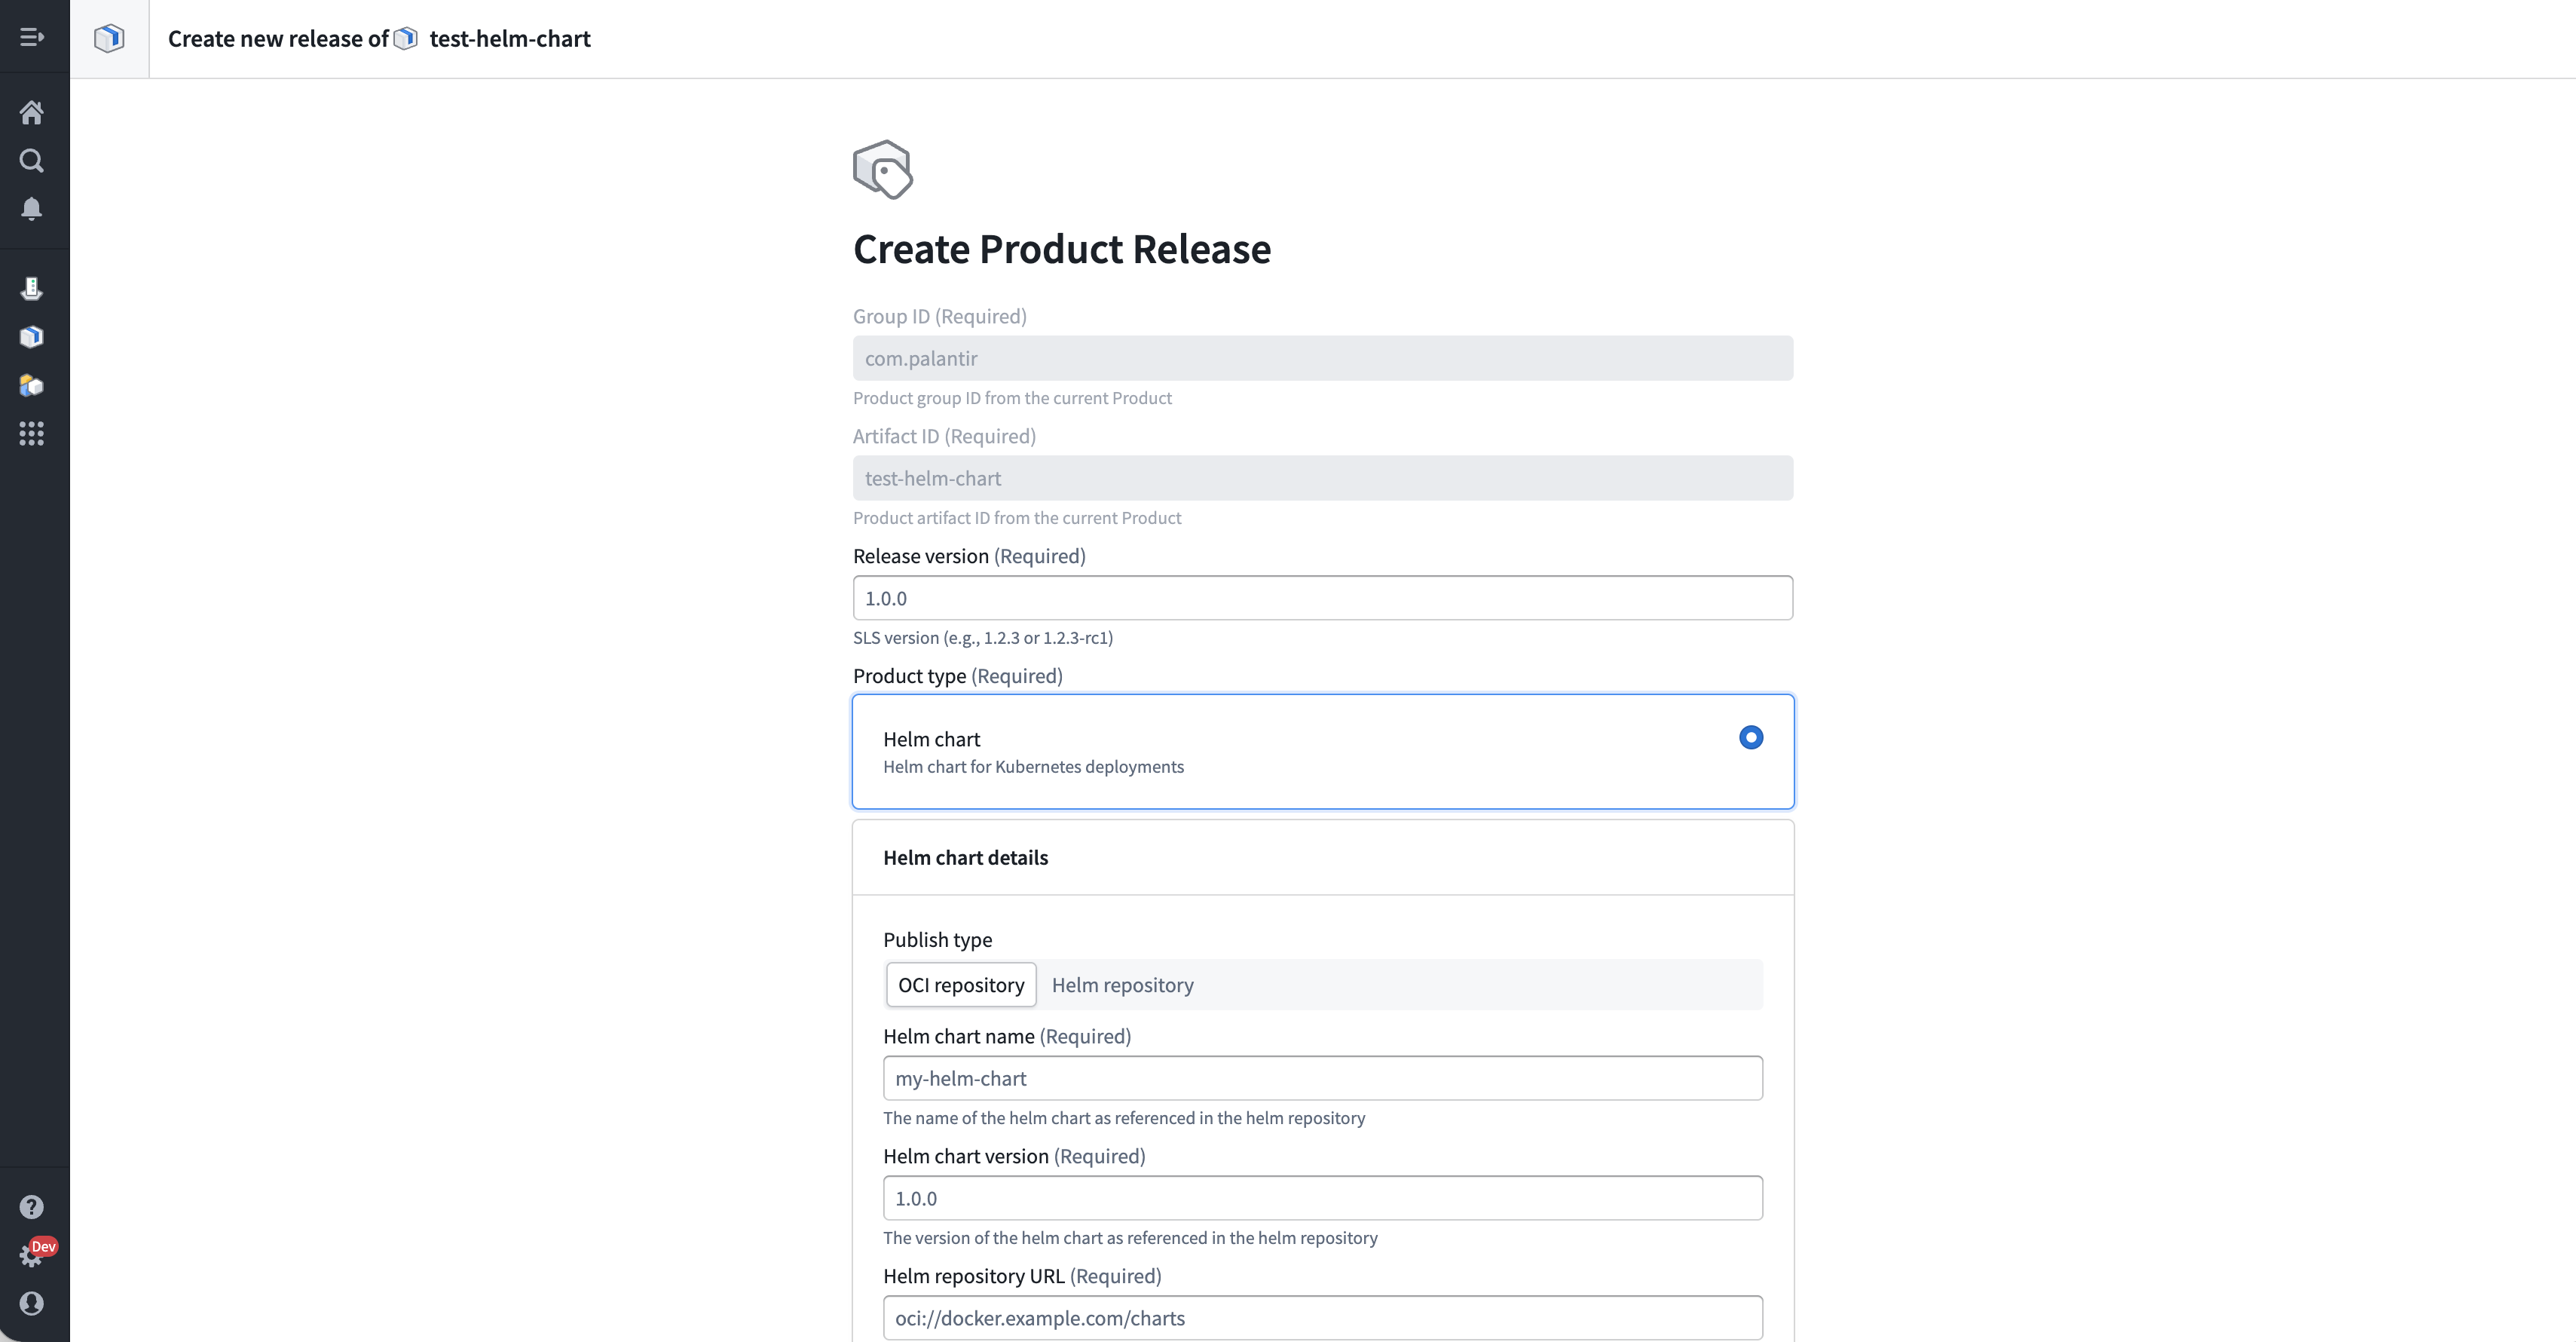
- Select Create new Release. The Release creation form opens with the Group ID and Artifact ID fields pre-filled from the Product's metadata.
-
In the Release version field, enter the version number for this Release. Versions must follow semantic versioning format (for example,
1.2.3or1.2.3-rc1). -
Under Product type, select Helm chart.
-
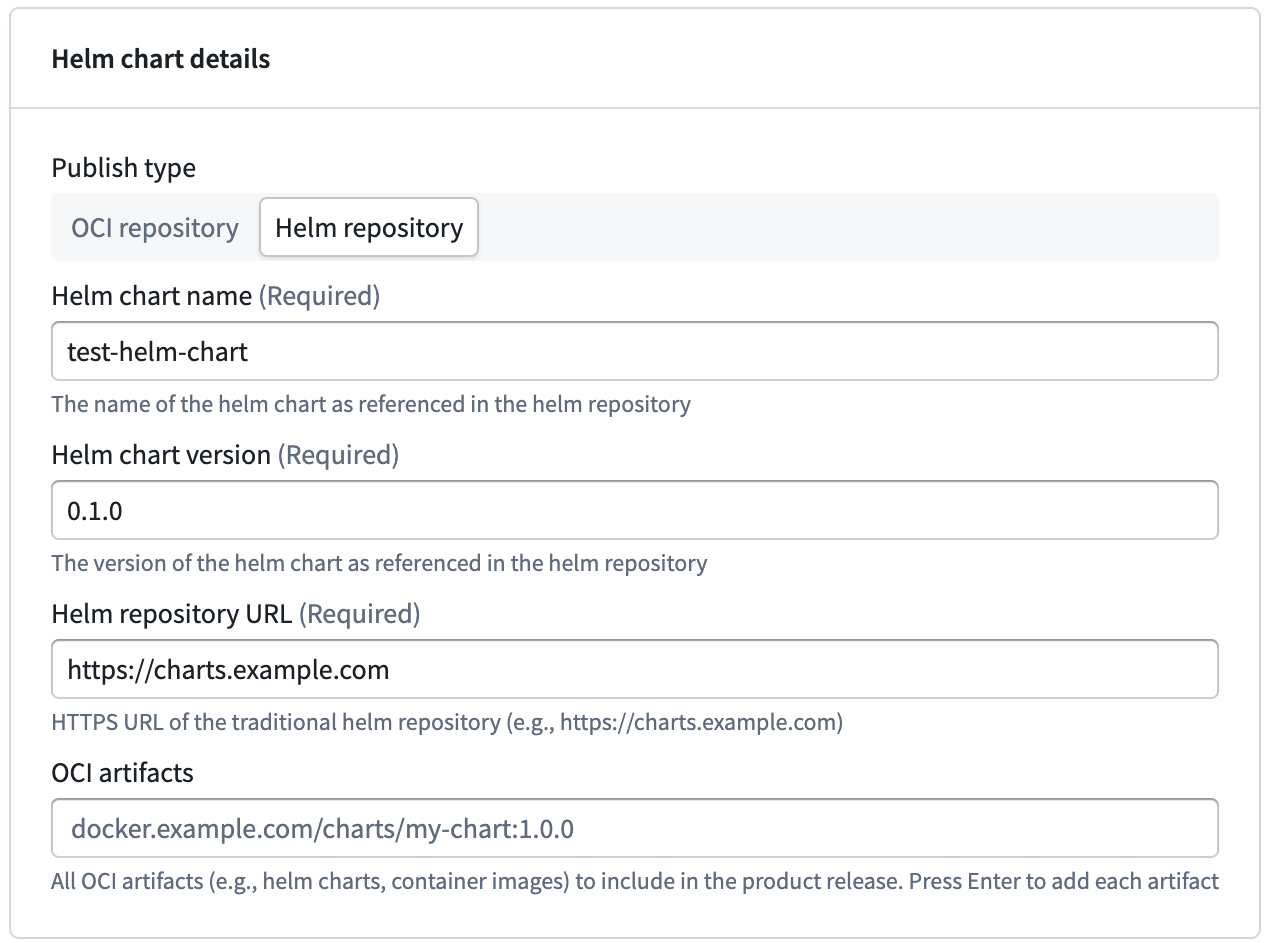
Under Publish type, select whether the chart is hosted in an OCI repository or a Helm repository.
-
Complete the remaining fields:
-
In Helm chart name, enter the name of the chart as it appears in the repository (for example,
wordpress). -
In Helm chart version, enter the version of the chart as it appears in the repository (for example,
32.1.13). -
In Helm repository URL, enter the URL of the repository hosting the chart:
- For OCI repositories, the URL must begin with
oci://(for example,oci://docker.example.com/charts). - For Helm repositories, the URL must begin with
https://(for example,https://charts.bitnami.com/bitnami).
- For OCI repositories, the URL must begin with
-
Optionally, in OCI artifacts, add one or more OCI artifact URIs that Apollo should associate with this Release (for example,
docker.example.com/charts/my-chart:1.0.0).
- Select Create release.
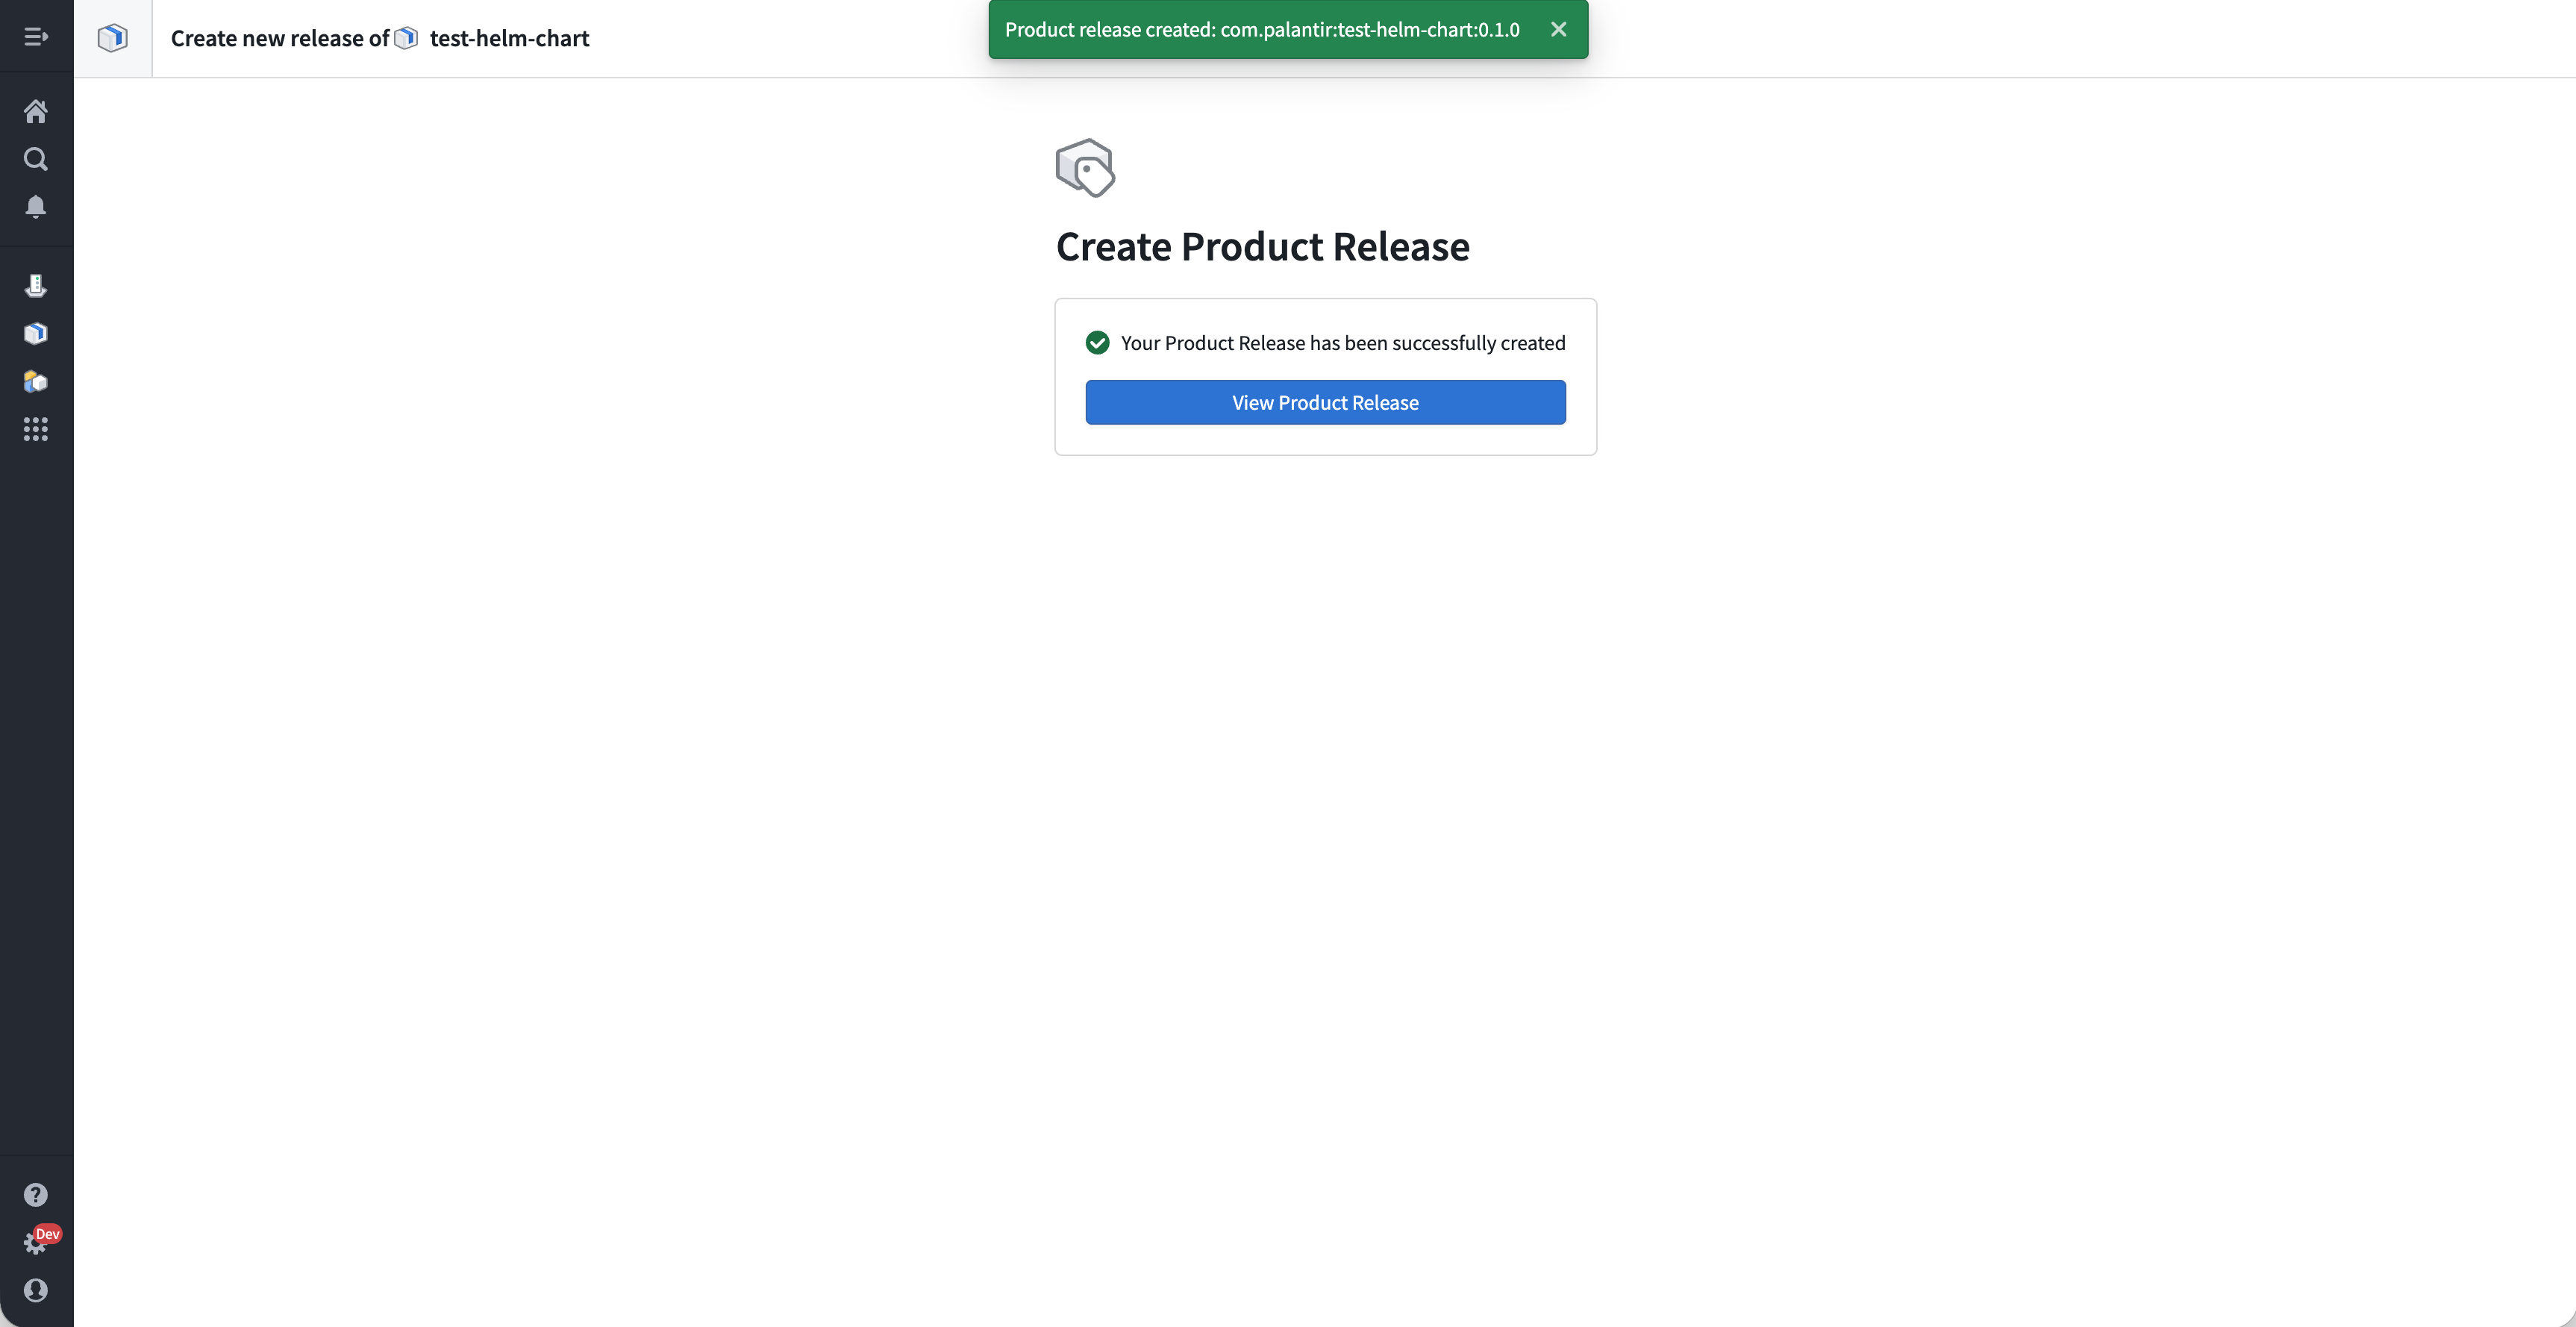
After the Release is created, a confirmation message appears. Select View Product Release to navigate to the new Release's detail page.
Use the Apollo CLI
Prerequisites
- You should download and set up the Apollo CLI.
- Use Apollo CLI version 0.814.0 or later to include Helm chart configuration files when creating a Product Release. Older versions support the same Product TGZ workflow but do not include the configuration files.
- An existing Helm chart, located in a Helm chart repository of your choice.
- An Apollo Bearer Token or a client ID and client secret for authentication.
- A reference to your Helm chart repository. For the purposes of this documentation, we will be using Bitnami and can apply the following secrets via
kubectl. Note that the namespace in the secrets needs to be the same as the namespace where the Helm charts will be installed.
Copied!1 2 3 4 5 6 7 8 9 10 11 12 13 14 15 16 17 18 19 20 21 22 23 24 25 26 27 28 29 30 31 32 33 34 35 36 37 38 39 40 41# secret for docker.io registry apiVersion: v1 kind: Secret metadata: labels: apollo.palantir.com/artifact-store: "docker.io" name: docker-io-registry namespace: default stringData: # the following two methods can be provided for auth: # username/password auth # note: username must be provided if and only if password is provided. username: <username> password: <password> # cert auth # note: cert must be provided if and only if key is provided. cert: <PEM encoded bytes> key: <PEM encoded bytes> ca: <PEM encoded bytes> type: Opaque --- # secret for bitnami image repository apiVersion: v1 kind: Secret metadata: labels: apollo.palantir.com/artifact-store: "charts.bitnami.com" name: bitnami-repository namespace: default stringData: # the following two methods can be provided for auth: # username/password auth # note: username must be provided if and only if password is provided. username: <username> password: <password> # cert auth # note: cert must be provided if and only if key is provided. cert: <PEM encoded bytes> key: <PEM encoded bytes> ca: <PEM encoded bytes> type: Opaque
Package a Helm chart for Apollo
Apollo thinks of the software it manages as Products. To package an existing Helm Chart for Apollo, we will need to do the following:
- Create an Apollo Product tarball
- This Product tarball will also contain metadata that tells Apollo which group, Product, and version this application belongs to.
- It will also include the chart's default configuration and the schema.
- Create a Product Release in Apollo from your Product tarball
Note that we will be publishing only metadata about the Product with Apollo which enables the Orchestration Engine to issue Plans for Installations of the Product in any Spoke Environment. You would have to ensure that the image for the Product is in your company’s image repository and that each Spoke has access to repository to pull the image.
For this example, we will use WordPress, a popular open-source content management system.
Create an Apollo Product tarball
You can create an Apollo Product tarball within your repository when deploying your own application or separately when using a public image.
For Helm charts, the layout for an Apollo Product tarball looks as follows:
Copied!1 2 3 4 5wordpress-32.1.13 └── deployment # Required Apollo metadata ├── manifest.yml # URL of associated container image(s) are included here ├── values.yaml # Helm chart values file └── values.schema.json # Optional: Helm chart values schema
When the chart provides a values.schema.json file, Apollo uses it to validate configuration overrides.
All of our files are contained in a directory named wordpress. The deployment/manifest.yml file contains metadata required by the Apollo platform; this file should contain the following:
Copied!1 2 3 4 5 6 7 8 9 10 11 12 13manifest-version: "1.0" product-group: <group ID> product-name: <product name> product-version: <version> # This version is used for downloading the artifact # It can be distinct from the Helm Chart version, # but it's recommended to keep them the same. product-type: helm-chart.v1 extensions: helm-chart: helm-chart-name: <name of helm chart in the helm chart repo> #will be used to preset the version in the Apollo Control Center helm-chart-version: <version of the helm chart> helm-repository-url: <URL of the helm chart repo>
The group ID, Product name, and version should be carefully chosen; they will be used to construct an Apache Maven coordinate and the product-version field must be an Apollo orderable version (see Products, Versions, and Releases for more details). Note that this is slightly more restrictive than Semantic Versioning but required for Apollo to coordinate upgrades of your Product.
You can use the Apollo CLI to create an Apollo Product TGZ. The following command creates a TGZ containing the manifest, values.yaml, and values.schema.json when the chart provides a schema:
product-release helm-chart init --as-tgz --maven-coordinate=[maven-coordinate] --repository-url=[helm-repository-url] --name=[helm-chart-name] --version=[helm-chart-version] --output-dir=[output-directory]
Here is an example invocation:
Copied!1./apollo-cli product-release helm-chart init --as-tgz --maven-coordinate="com.palantir.example:wordpress:32.1.13" --repository-url="oci://registry-1.docker.io/bitnamicharts/wordpress" --name=wordpress --version=32.1.13 --output-dir="./chart"
The command creates ./chart/wordpress-32.1.13.config.tgz. Creating a Product Release from this TGZ includes its bundled configuration files.
Setting dependencies across Product Releases
Apollo’s first-class concept of Product dependencies ensures that upgrades only happen when all the required pre-requisites (that is, dependencies) are met, and obligations to consumers are maintained.
This allows fast-moving Product Teams to release software independently, without having to sequence or coordinate upgrades with other Product Teams.
Product dependencies are embedded in the manifest of the Product Release in the extensions section under the product-dependencies.
Copied!1 2 3 4 5 6 7 8 9 10 11 12 13 14 15 16 17extensions: product-dependencies: # An unordered list of product dependencies # (required) The dependency's product-group (as per its manifest) - product-group: <group ID> # (required) The dependency's product-name (as per its SLS manifest) product-name: <product name> # (required) An orderable version indicating the lowest allowed # version (inclusive) for this dependency minimum-version: <min version> # (required) A version matcher indicating the highest allowed # version (inclusive) for this dependency maximum-version: <max version> # (optional) An orderable version indicating the recommended version # for this dependency. If omitted, this will be equal to the minimum-version recommended-version: <recommended version> # (optional) Whether the dependency is optional. Defaults to false. optional: false
Example for a populated manifest for an example helm-charts product:
Copied!1 2 3 4 5 6 7 8 9 10 11 12 13 14 15 16 17 18 19 20 21manifest-version: '1.0' product-group: com.palantir.example product-name: wordpress product-version: 32.1.13 product-type: helm-chart.v1 extensions: helm-chart: helm-chart-name: wordpress helm-chart-version: 32.1.13 helm-repository-url: oci://registry-1.docker.io/bitnamicharts/wordpress product-dependencies: - product-group: com.palantir.foo product-name: foo minimum-version: 1.3.5 maximum-version: 1.x.x optional: false - product-group: com.palantir.bar product-name: bar minimum-version: 2.7.0 maximum-version: 2.x.x optional: true
Optional dependencies
To learn more about how to interact with optional dependencies, see Apollo Product Spec - Product Dependencies.
Artifacts Manifest extension
If vulnerability scanning is enabled on your Apollo Hub, you must indicate to Apollo what container images are used in your Helm Chart. You can do this using the artifacts manifest extension. To learn more, see Container image specification.
Access token
You will need either a Bearer Token or a client ID and client secret to publish Products using the Apollo CLI.
Learn more about configuring authentication for the Apollo CLI.
Publish your Helm Chart to Apollo
Once you have packaged the Helm chart, use product-release create to publish it to Apollo. The Helm chart must remain available in the repository specified by the manifest so Apollo can deploy it.
To create a Product Release from the TGZ generated by product-release helm-chart init --as-tgz, run:
Copied!1./apollo-cli product-release create --apollo-url="$APOLLO_URL" --apollo-token="$APOLLO_TOKEN" --product-tgz="./chart/wordpress-32.1.13.config.tgz"
The --product-tgz flag publishes the manifest and any bundled values.yaml and values.schema.json files. You can replace --apollo-token with --apollo-client-id and --apollo-client-secret to authenticate with a service account.
If you are creating a Product Release in an enrollment outside your primary organization, add --space-id="<space-RID>" to the command.
You can also create a Product Release from separate manifest and configuration files. First, download and unpack the chart, then generate the manifest without --as-tgz:
Copied!1 2 3helm pull oci://registry-1.docker.io/bitnamicharts/wordpress --version=32.1.13 --untar ./apollo-cli product-release helm-chart init --chart-path="./wordpress" --repository-url="oci://registry-1.docker.io/bitnamicharts/wordpress" --maven-coordinate="com.palantir.example:wordpress:32.1.13" --output-dir="./chart"
Provide the chart's values.yaml file using --default-config:
Copied!1./apollo-cli product-release create --apollo-url="$APOLLO_URL" --apollo-token="$APOLLO_TOKEN" --manifest="./chart/manifest.yml" --default-config="./wordpress/values.yaml"
The WordPress 32.1.13 chart does not include a values.schema.json file.
If your chart includes a schema file ↗, also add --config-schema:
Copied!1./apollo-cli product-release create --apollo-url="$APOLLO_URL" --apollo-token="$APOLLO_TOKEN" --manifest="./chart/manifest.yml" --default-config="./my-chart/values.yaml" --config-schema="./my-chart/values.schema.json"
This CLI can be easily incorporated into your CI process to publish future versions of your Helm Chart.