- Capabilities
- Getting started
- Architecture center
- Platform updates
Explore other action types
The getting started tutorial builds one kind of action type: a rule that modifies a property on a single object. Action types can express much more than a property edit. The same configuration surface also lets you create and delete objects, manage links between objects, run custom logic in a function, call an external system, notify users, trigger a build, and merge scenario edits.
This page introduces each of these capabilities, describes when to use it, and links to the reference documentation. The examples continue with the Demo Ticket object type from the getting started tutorial, so you can follow along in the same Ontology.
Prerequisites
- Complete the getting started tutorial. It covers the creation wizard, parameters, and submission criteria that the rest of this page assumes you know.
- Confirm that the object types you plan to change are configured for editing.
Where to configure rules
The capabilities below are configured through rules, and rules can be added in two places.
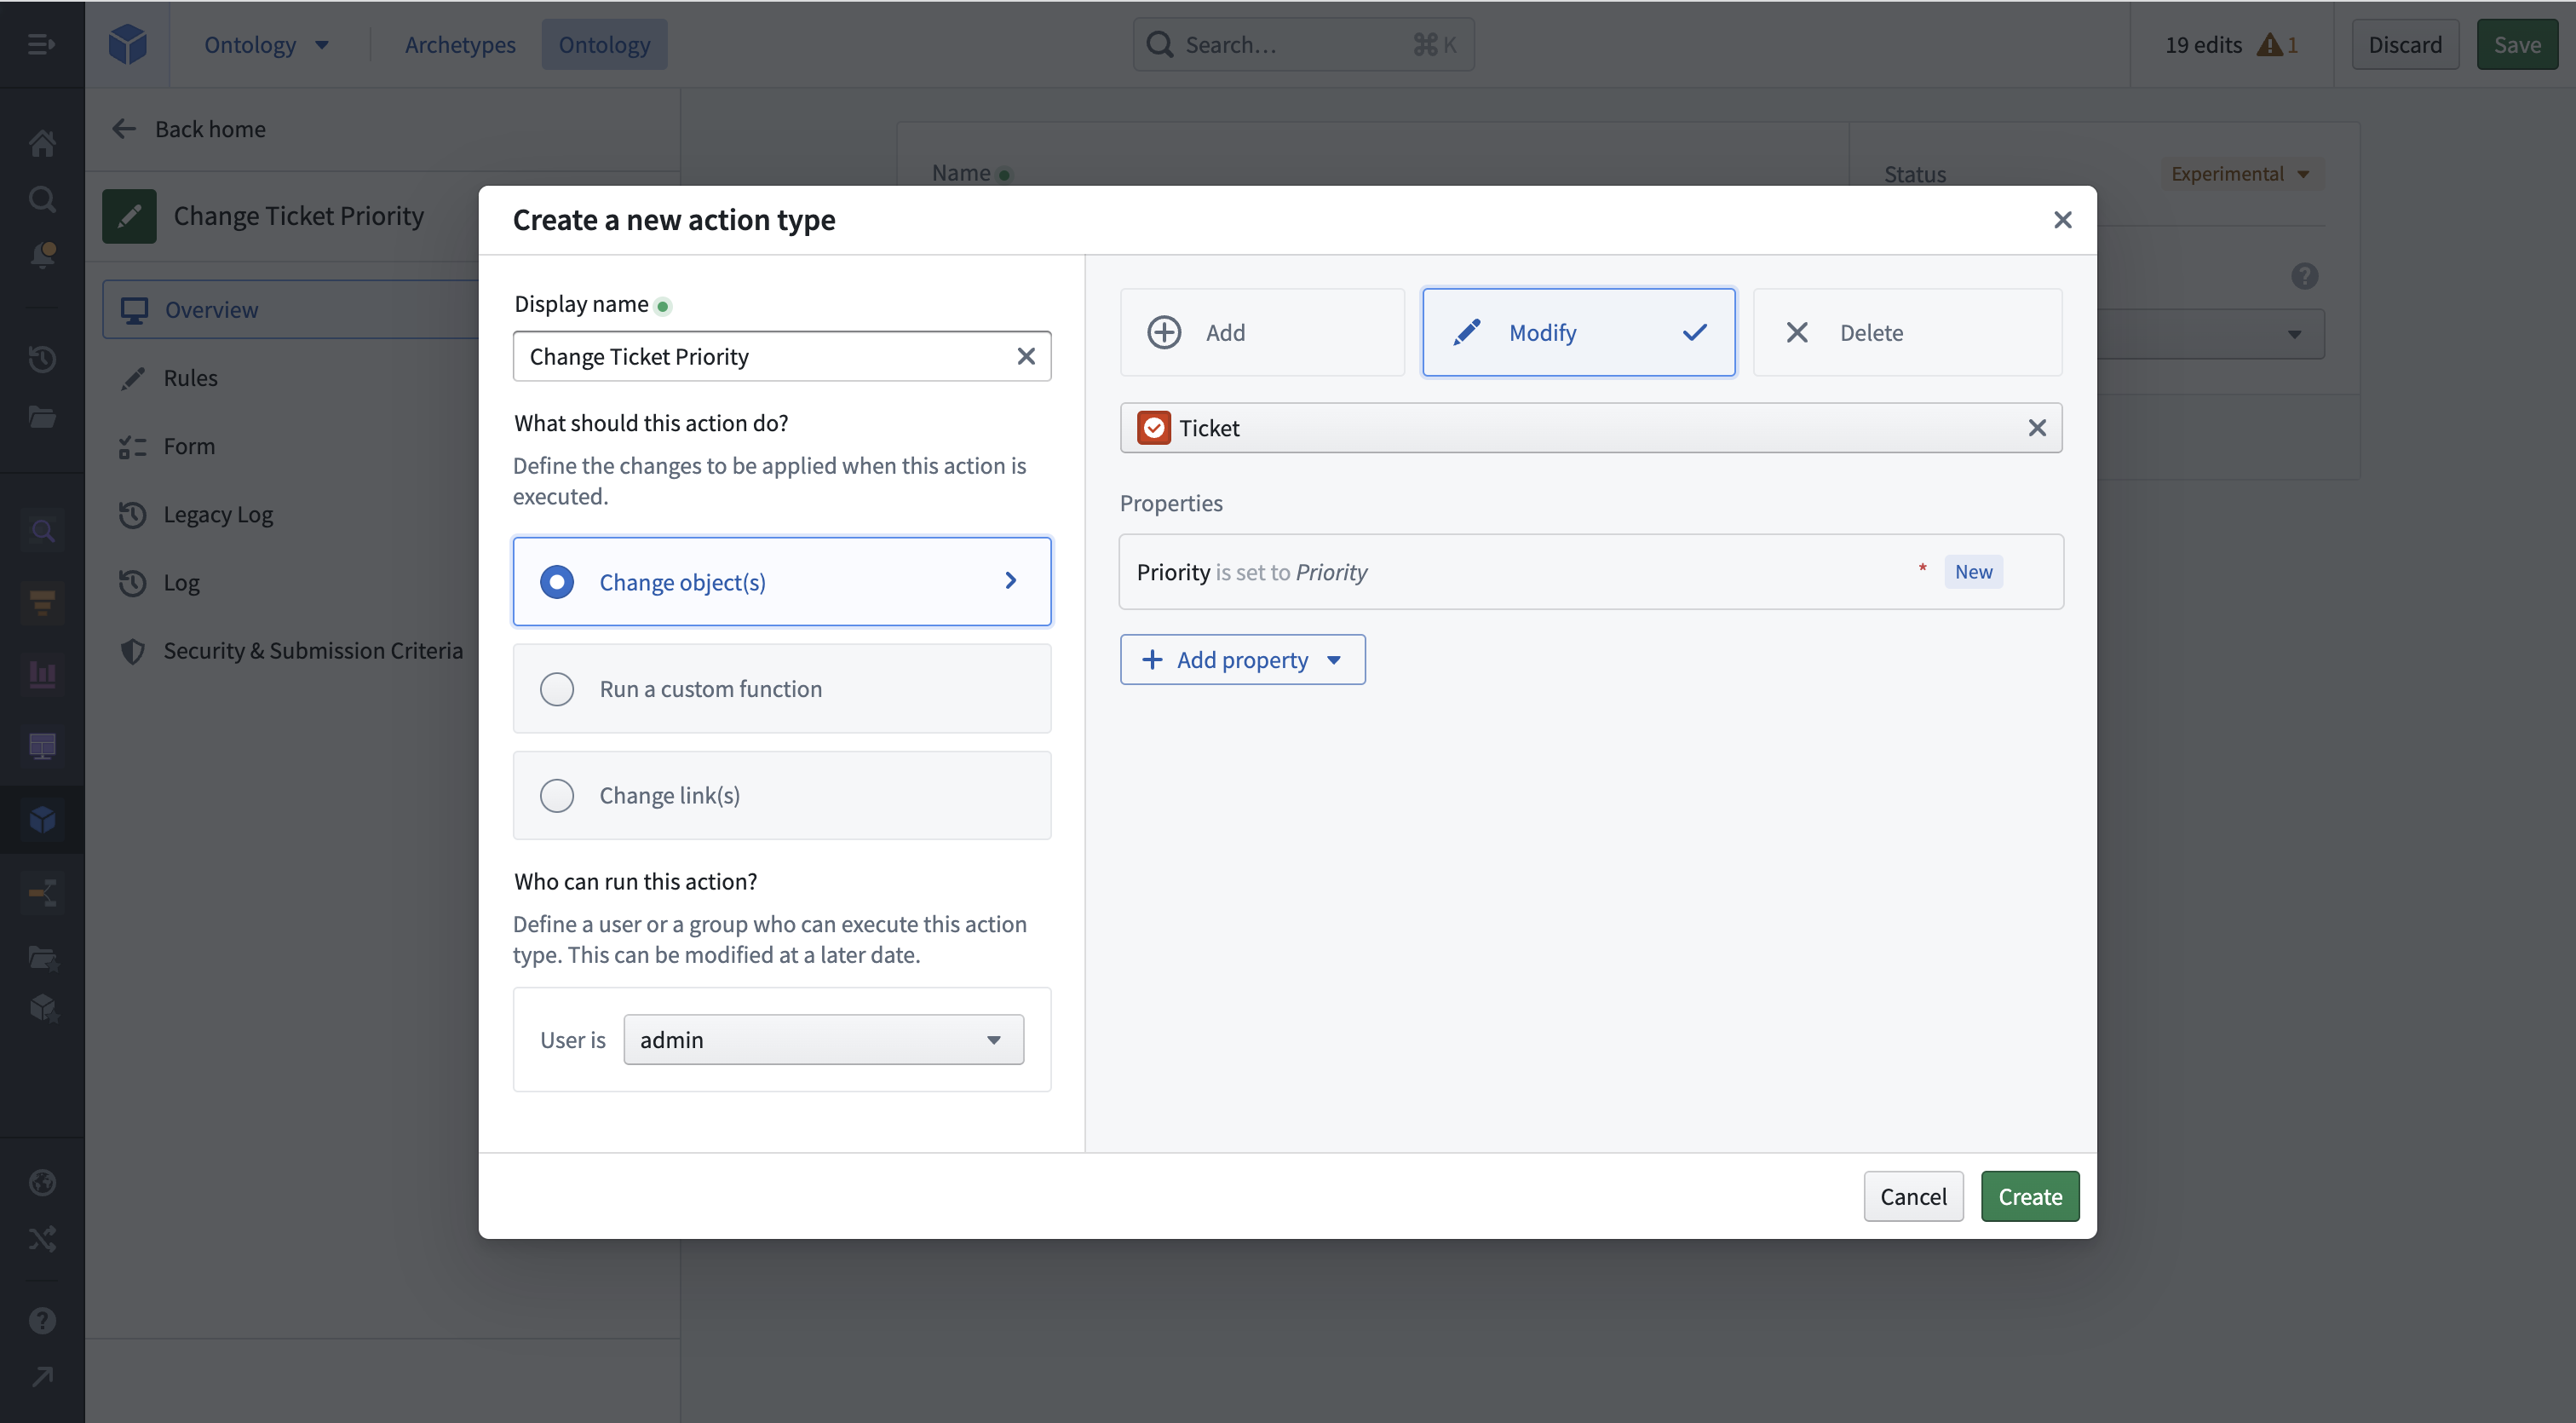
The creation wizard configures the first rule of a new action type. On the Action type step, open the Object tab, select the object type, then choose the change the action makes under Object actions. Select the properties to include on the Mapping step. The getting started tutorial walks through this flow.
For an action type that already exists, open it in Ontology Manager, select the Rules tab, then select Add new rule to choose the rule you need. Every rule described on this page can be added here.
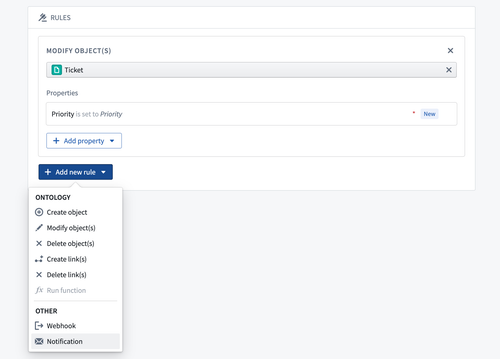
A single action type can combine several rules. The function rule is the exception: it cannot be combined with the other Ontology rules.
Choose a rule
| Goal | Rule to add | Learn more |
|---|---|---|
| Create a new object | Create object | Create and delete objects |
| Create an object only when the user does not supply one | Create or modify object | Create and delete objects |
| Delete an existing object | Delete object | Create and delete objects |
| Relate two objects, or remove the relationship | Create link or Delete link | Manage links between objects |
| Express logic that rules cannot describe | Run function | Run custom logic with a function |
| Send a request to a system outside Foundry | Webhook | Call an external system with a webhook |
| Call an external system before any edits are applied | Writeback Webhook | Call an external system with a webhook |
| Tell a user that something changed | Notification | Notify users when an action is applied |
| Recompute datasets when the action is applied | Schedule | Trigger a build |
| Commit the edits staged in a scenario | Apply scenario | Merge scenario edits |
| Change objects of any type that implements an interface | Interface rules | Act on interfaces |
The rules reference describes every rule in detail.
Create and delete objects
The getting started tutorial modifies an object that the user selects. To create a new ticket instead, add a Create object rule and select the Demo Ticket object type. The primary key of the object type, Ticket ID in this example, is a required property that must be filled. Add the other properties the new object needs, such as Title, Status, and Priority, by selecting Add property.
Each property you add automatically creates a parameter of the same name and maps the property to it. You can instead map a property to a property of an object reference parameter, to a static value that users cannot change, or to the current user or the time of submission. Review values and parameters for all mapping options.
Two related rules cover the remaining cases:
- Create or modify object: Modifies the object supplied in an object reference parameter. When no object is supplied, a new object is created with either an automatically generated unique ID or a primary key that the user submits.
- Delete object: Deletes the object supplied in an object reference parameter. This rule cannot reference an object that the same action creates.
When an action type contains several rules, Foundry compiles them into a single edit for each object, so the order of the rules affects the result and some combinations are not supported. Review invalid combinations before you combine create, modify, and delete rules in one action type.
Manage links between objects
Actions can maintain the relationships between objects as well as their properties. Which rule you need depends on the cardinality of the link type.
For a many-to-many link type, add a Create link rule to relate two objects that are supplied through object reference parameters, or a Delete link rule to remove the relationship between them.
For a one-to-one or one-to-many link type, the relationship is stored in a foreign key property on the object. Use a Modify object rule to set or clear that property instead of a link rule.
You can also create an object and its many-to-many links in a single action. Configure a Create object rule with an object type that has a many-to-many link type, then select Add link below Add property to select the link type and configure the links.
Run custom logic with a function
Rules describe edits as declarative mappings, which is not always sufficient. Consider backing the action with an Ontology edit function when you want to modify every object linked to the one the user selected, compute a property value from business logic that reads several objects, or create objects of several types and link them together.
Add a single Run function rule, then select the published function and the version to use. Every input of the function is created as a parameter on the action type, which you can then constrain like any other parameter. A Run function rule cannot be combined with the other Ontology rules, because function code alone can express everything they can.
Follow the function-backed actions tutorial for the full walkthrough, including how to change the function version that an action references. By default the action stays on the version you selected. Enable auto upgrades to resolve a version range at runtime instead, and review the permission and breaking-change trade-offs described there before you do.
Call an external system with a webhook
When a system outside Foundry is the source of truth for part of a process, a webhook rule sends a request to that system as part of applying the action. Action parameters can be passed to the webhook as inputs.
Two separate rules send the request, and the rule you add determines when it runs:
- Webhook: The request is sent after the object edits are applied. Add this rule from the Side Effects group. An action type can contain several of these, and a failure is not shown to the end user, who may already have seen the success message.
- Writeback Webhook: The request is sent before any other rule is evaluated. Add this rule from the External Request group. If the request fails, no edits are applied and the end user sees the failure. An action type can contain only one, and its output parameters can be used by later rules.
The webhook must already exist in Data Connection before you can select it in the rule. Follow set up a webhook for the configuration steps, and review webhooks for input parameters, output parameters, and authentication options.
Notify users when an action is applied
A Notification rule tells users that the action was applied. Recipients can be a fixed set of users or derived from a property of an object parameter, and the content can be a template that references the action's parameters. Each recipient receives an in-platform push notification, an email, or both, according to their own notification preferences.
Notifications are sent once all the action's edits have been applied, but their content is generated from the state of the Ontology before those edits. Follow set up a notification for a worked example, and review notifications for all recipient and content options.
Trigger a build
A Schedule rule triggers the build of a schedule when the action is applied. Add this rule from the Advanced group. This lets an end-user workflow in the Ontology recompute datasets as part of the action. The schedule must be in project-scoped mode.
An action type with a schedule rule applies its Ontology edits after the build begins rather than waiting for the build to finish. Review trigger schedule build to learn how to pass values to a parameterized schedule and how to record the resulting schedule run RID on an object.
Merge scenario edits
Edits made inside a scenario exist only in that scenario's sandbox and do not affect the main Ontology. A merge action commits all the staged edits as a single transaction. The merge action requires a Scenario parameter holding the RID of the scenario, and that value is typically passed from a Workshop variable or an Ontology SDK application.
There are two routes to a merge action:
- Create a new action type and select the Scenario tab in the creation wizard, then define the scope of the merge by adding the relevant Object types and Link types.
- Add an Apply scenario rule to an action type that already exists, from its Rules tab.
In both cases, use the Security & Submission Criteria tab of the action type to define which users are permitted to run the merge. Review merge scenarios for the full configuration.
Ontology scenarios are in the beta phase of development and may not be available on your enrollment. Contact Palantir Support to request access to scenarios.
Act on interfaces
Interfaces have a dedicated rule for each Ontology edit:
- Create object of interface
- Modify object of interface
- Delete object of interface
- Create link on object of interface
- Delete link on object of interface
Each rule targets any object type that implements the interface rather than one specific object type. The modify and delete rules take an interface reference parameter in place of an object reference parameter. Review actions on interfaces.
Map a struct property in a rule
Struct properties take their values from a struct parameter whose nested fields mirror the fields of the property. Map the property inside a rule, and ensure that every field is mapped. Review actions on structs.