注: 以下の翻訳の正確性は検証されていません。AIPを利用して英語版の原文から機械的に翻訳されたものです。
MCP ツールとエージェントの設定
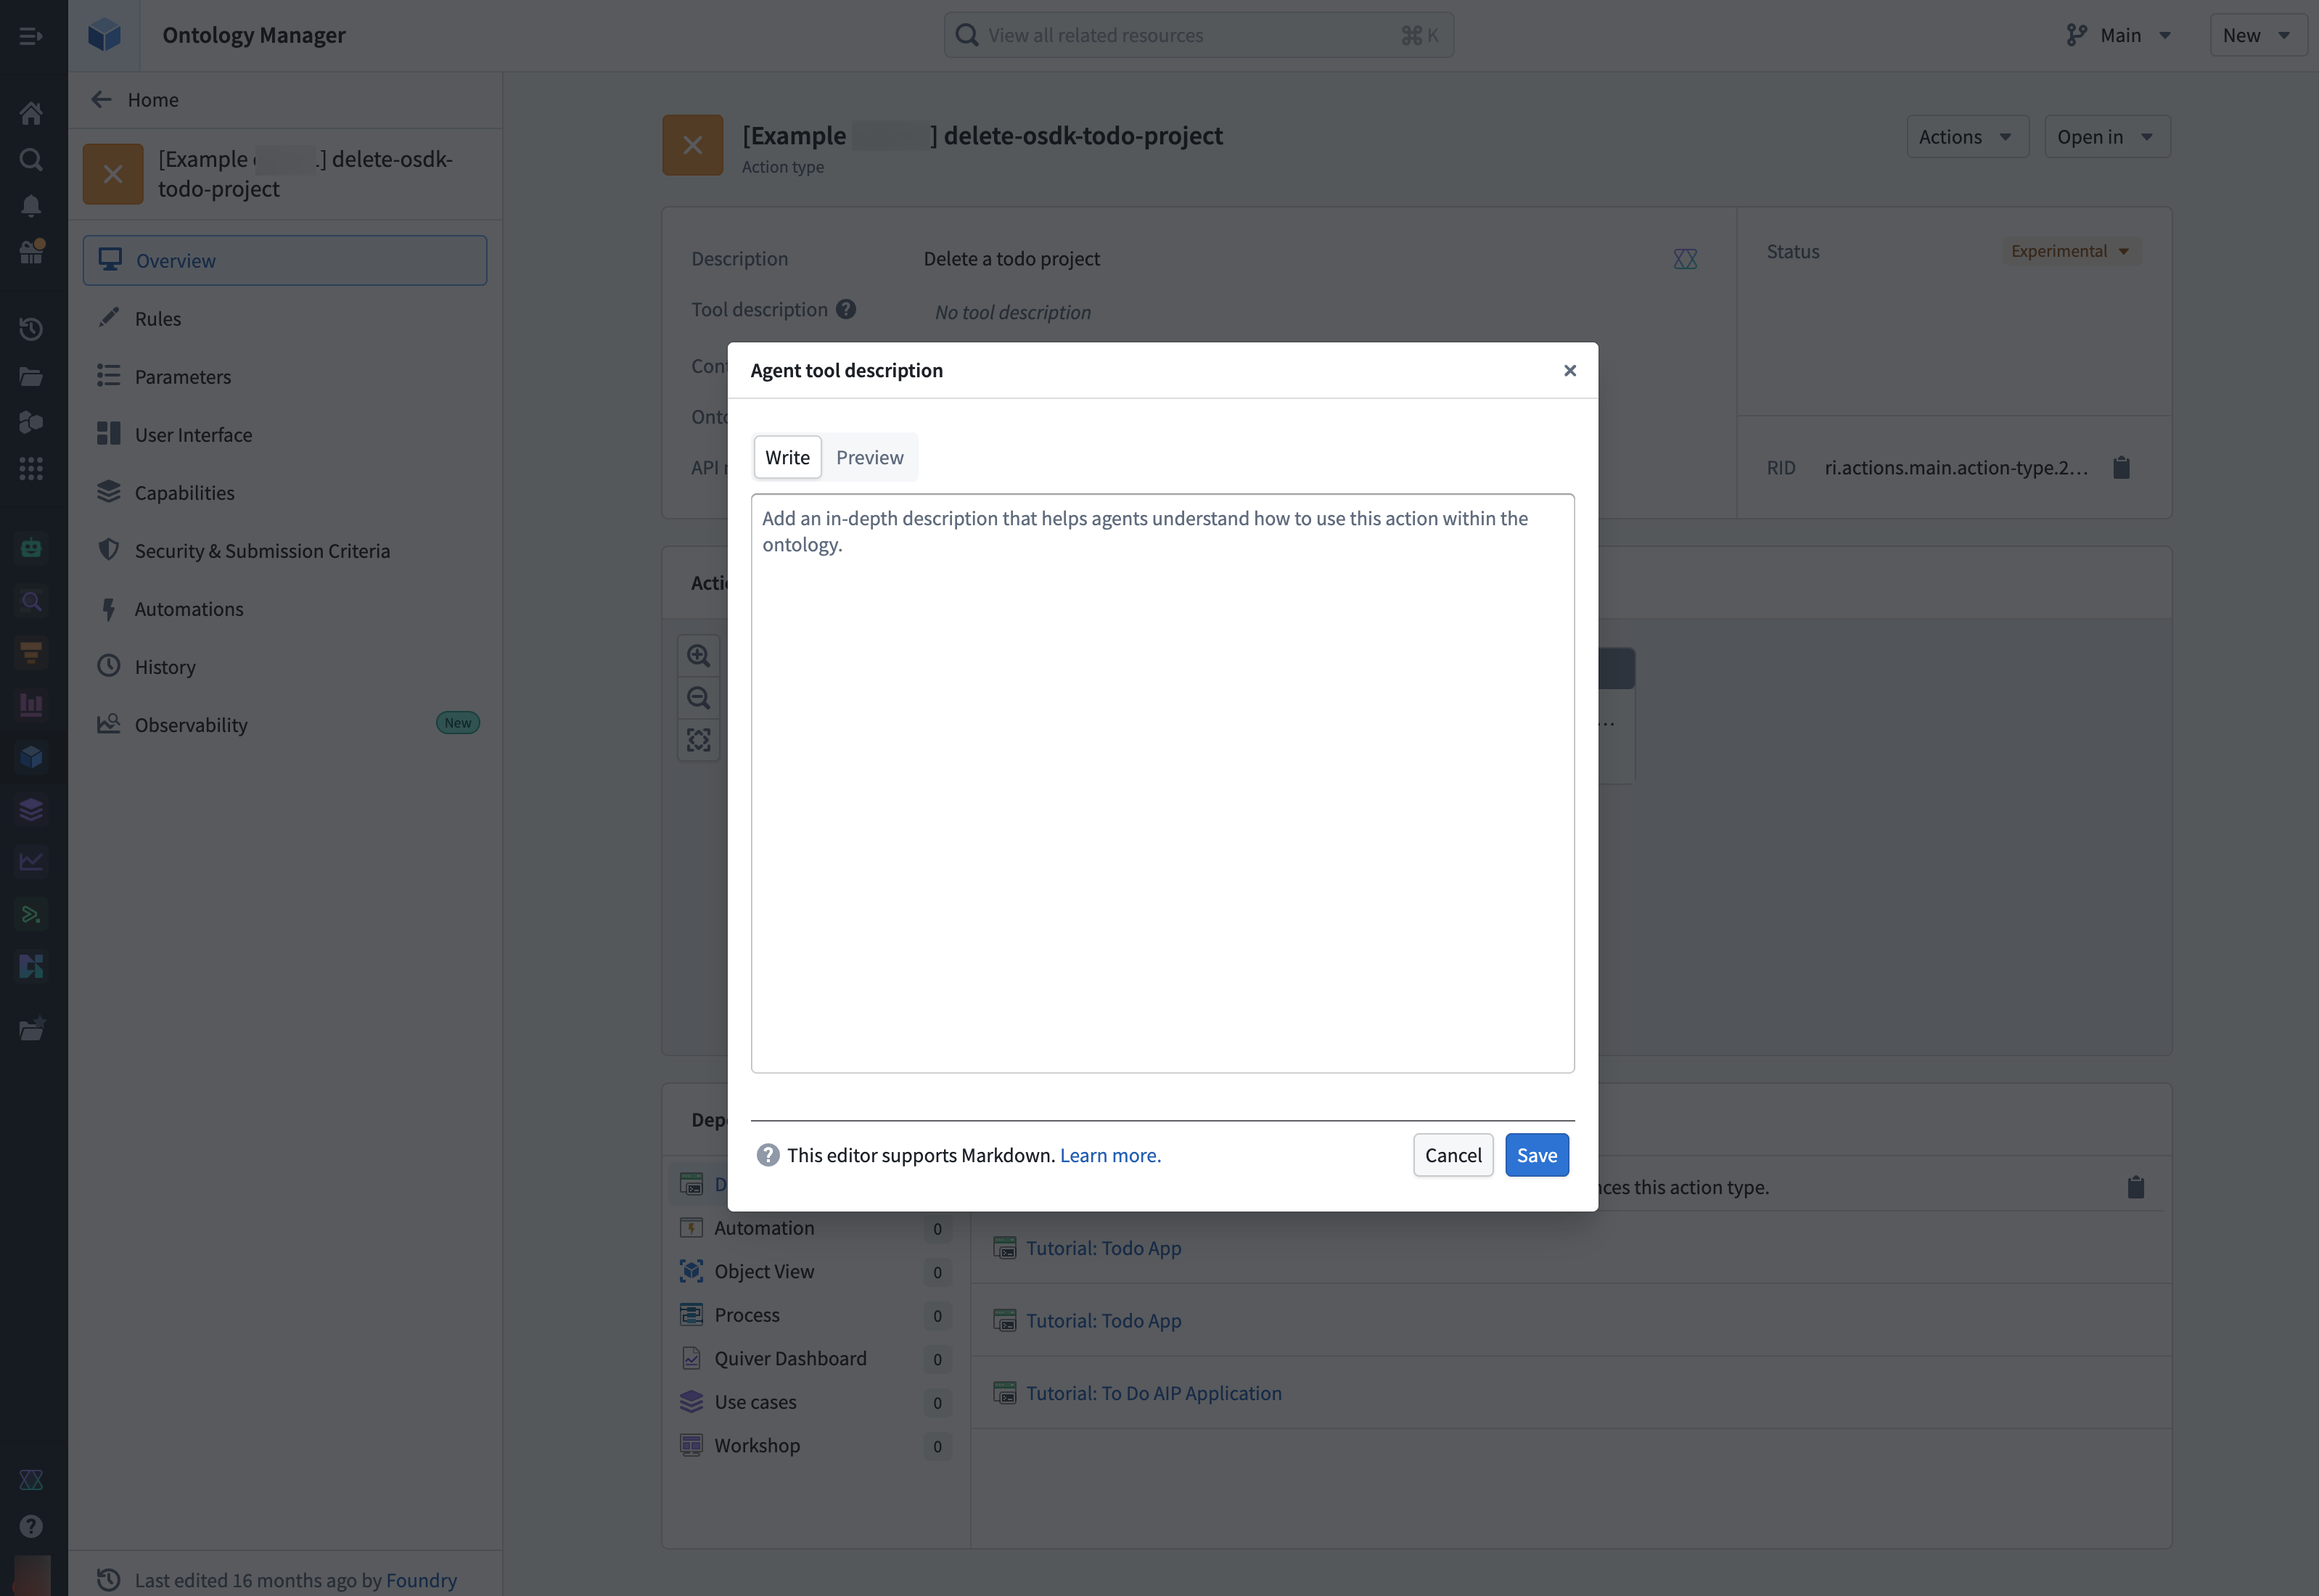
アクションツールの説明
Ontology Manager アプリケーションのエージェントツールの説明項目を使用して、アクションをツールとして使用するときにエージェントに表示される説明を更新します。これにより、各アクションをいつ、どのように使用するかについて、AI エージェントに具体的なガイダンスを提供できます。たとえば、新しいタスクを作成し、タスクをリンクするためのプロジェクトIDを取得するアクションには、プロジェクトIDの取得方法に関する手順を含めることができます。
Ontology MCP を Claude スキルと併用する
Claude スキル ↗は、Claude でできることを拡張する、再利用可能な指示セットです。Ontology MCP (OMCP) ツールをスキルと統合することで、より複雑なビジネスロジックをエージェントに組み込むことができます。
以下の例では、get-or-create-task というスキルが、検索ツールとタスク作成アクションツールを組み合わせて使用する方法をエージェントに指示します。新しいタスクを作成する前に既存のタスクを検索することで、タスクの重複作成を防ぎます。
Copied!1 2 3 4 5 6 7 8 9 10 11 12 13 14 15 16 17 18 19 20 21 22 23 24 25 26--- name: get-or-create-task description: Searches for a task by title in a project, returns it if found, or creates a new task if not found --- # Get or create task Find an existing task by title within a project, or create a new task if no match is found. ## Instructions 1. Search for the task by title using the search tool: - Tool: `search-osdk-todo-task` - Filter results by `project_id` if provided 2. Evaluate results: - If a match is found, return the existing task details - If multiple matches are found, use the first match - If no matches are found, proceed to create a new task 3. Create a new task using the create task action tool: - Tool: `create-osdk-todo-task` - Required parameters: `title`, `project_id` - Optional parameters: `description`, `status`, `assigned_to`, `start_date`, `due_date` 4. Return the task details including ID, title, project, status, and assignee
Microsoft Copilot Studio との統合
Microsoft Copilot Studio との統合は、機密クライアントでの認可コードグラントのみをサポートします。そのため、Microsoft Copilot Studio と Ontology MCP を統合するための Developer Console アプリケーションを作成するときは、バックエンドサービスとユーザーの権限を選択する必要があります。これにより、Copilot Studio がユーザーに代わってトークンを発行するために使用する、必要なサービスユーザーが作成されます。
Adaptive Cards を使用して Ontology MCP データを整形して表示する
Microsoft が開発した Adaptive Cards ↗ は、Teams、Copilot、Outlook との統合に使用できる汎用的な UI フレームワークです。Ontology MCP ツールと組み合わせることで、エージェントはオントロジーから構造化データを返し、プレーンテキストではなく、整形されたカードとして表示できます。
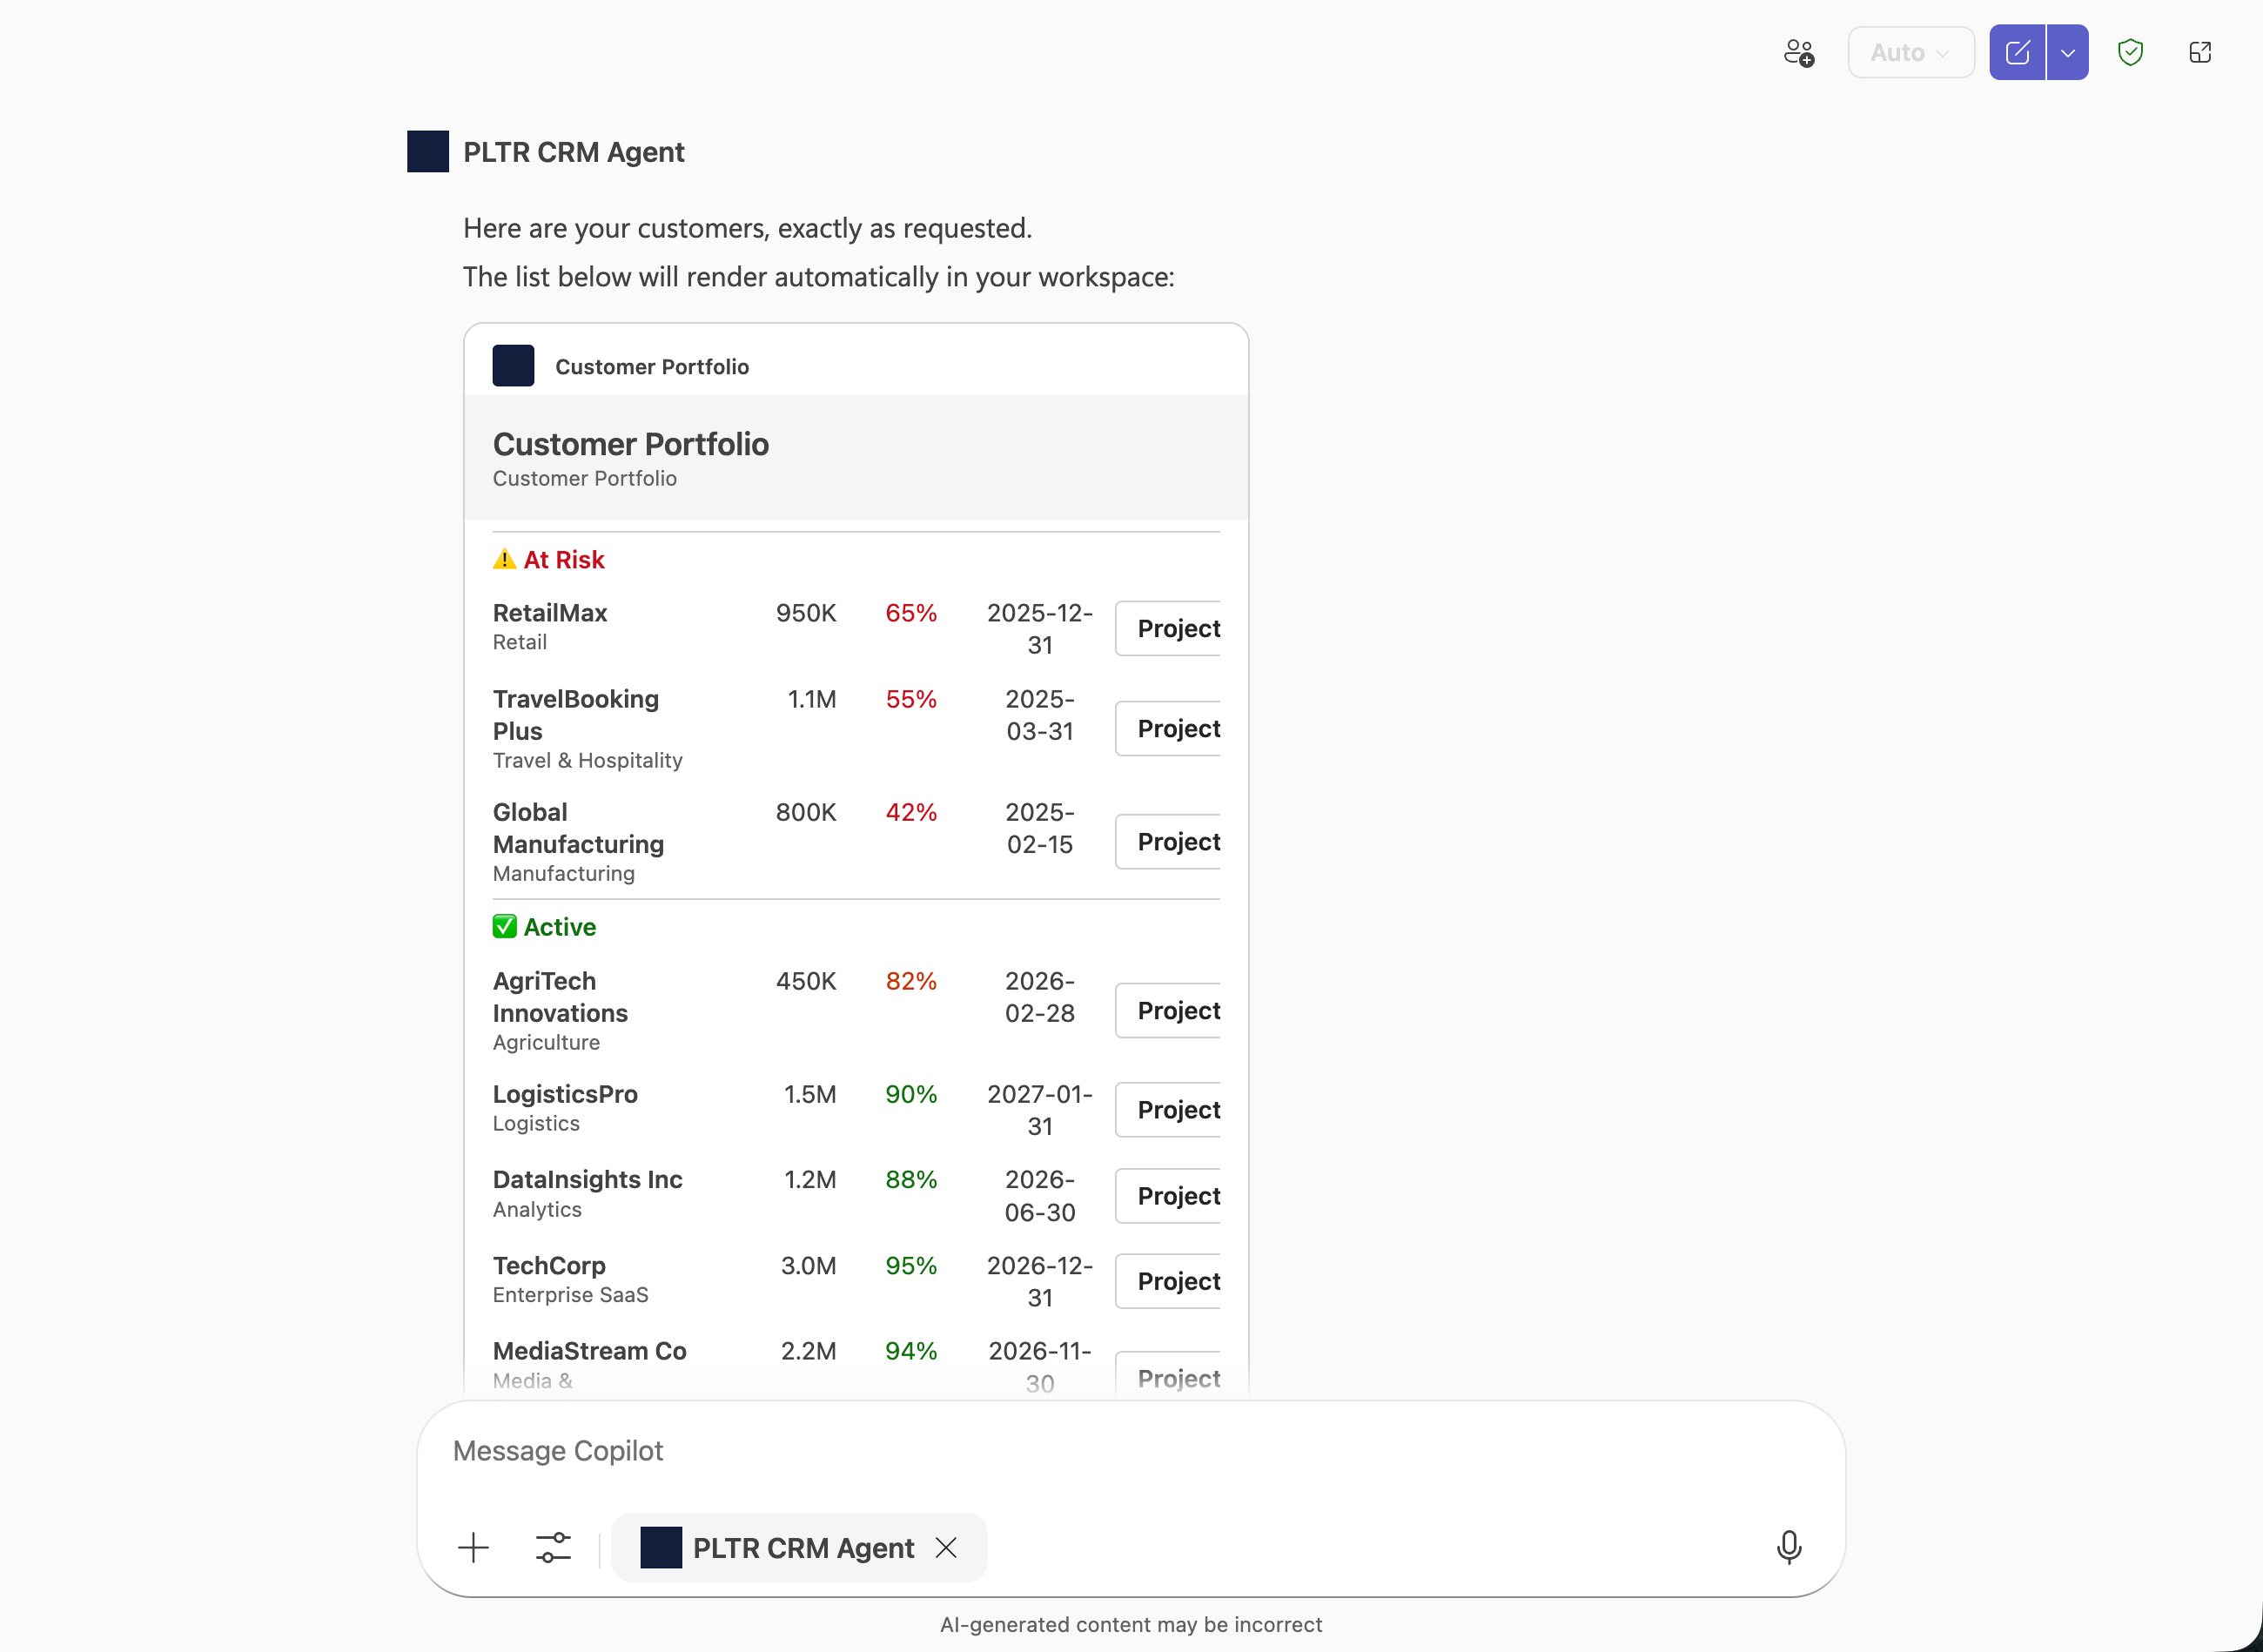
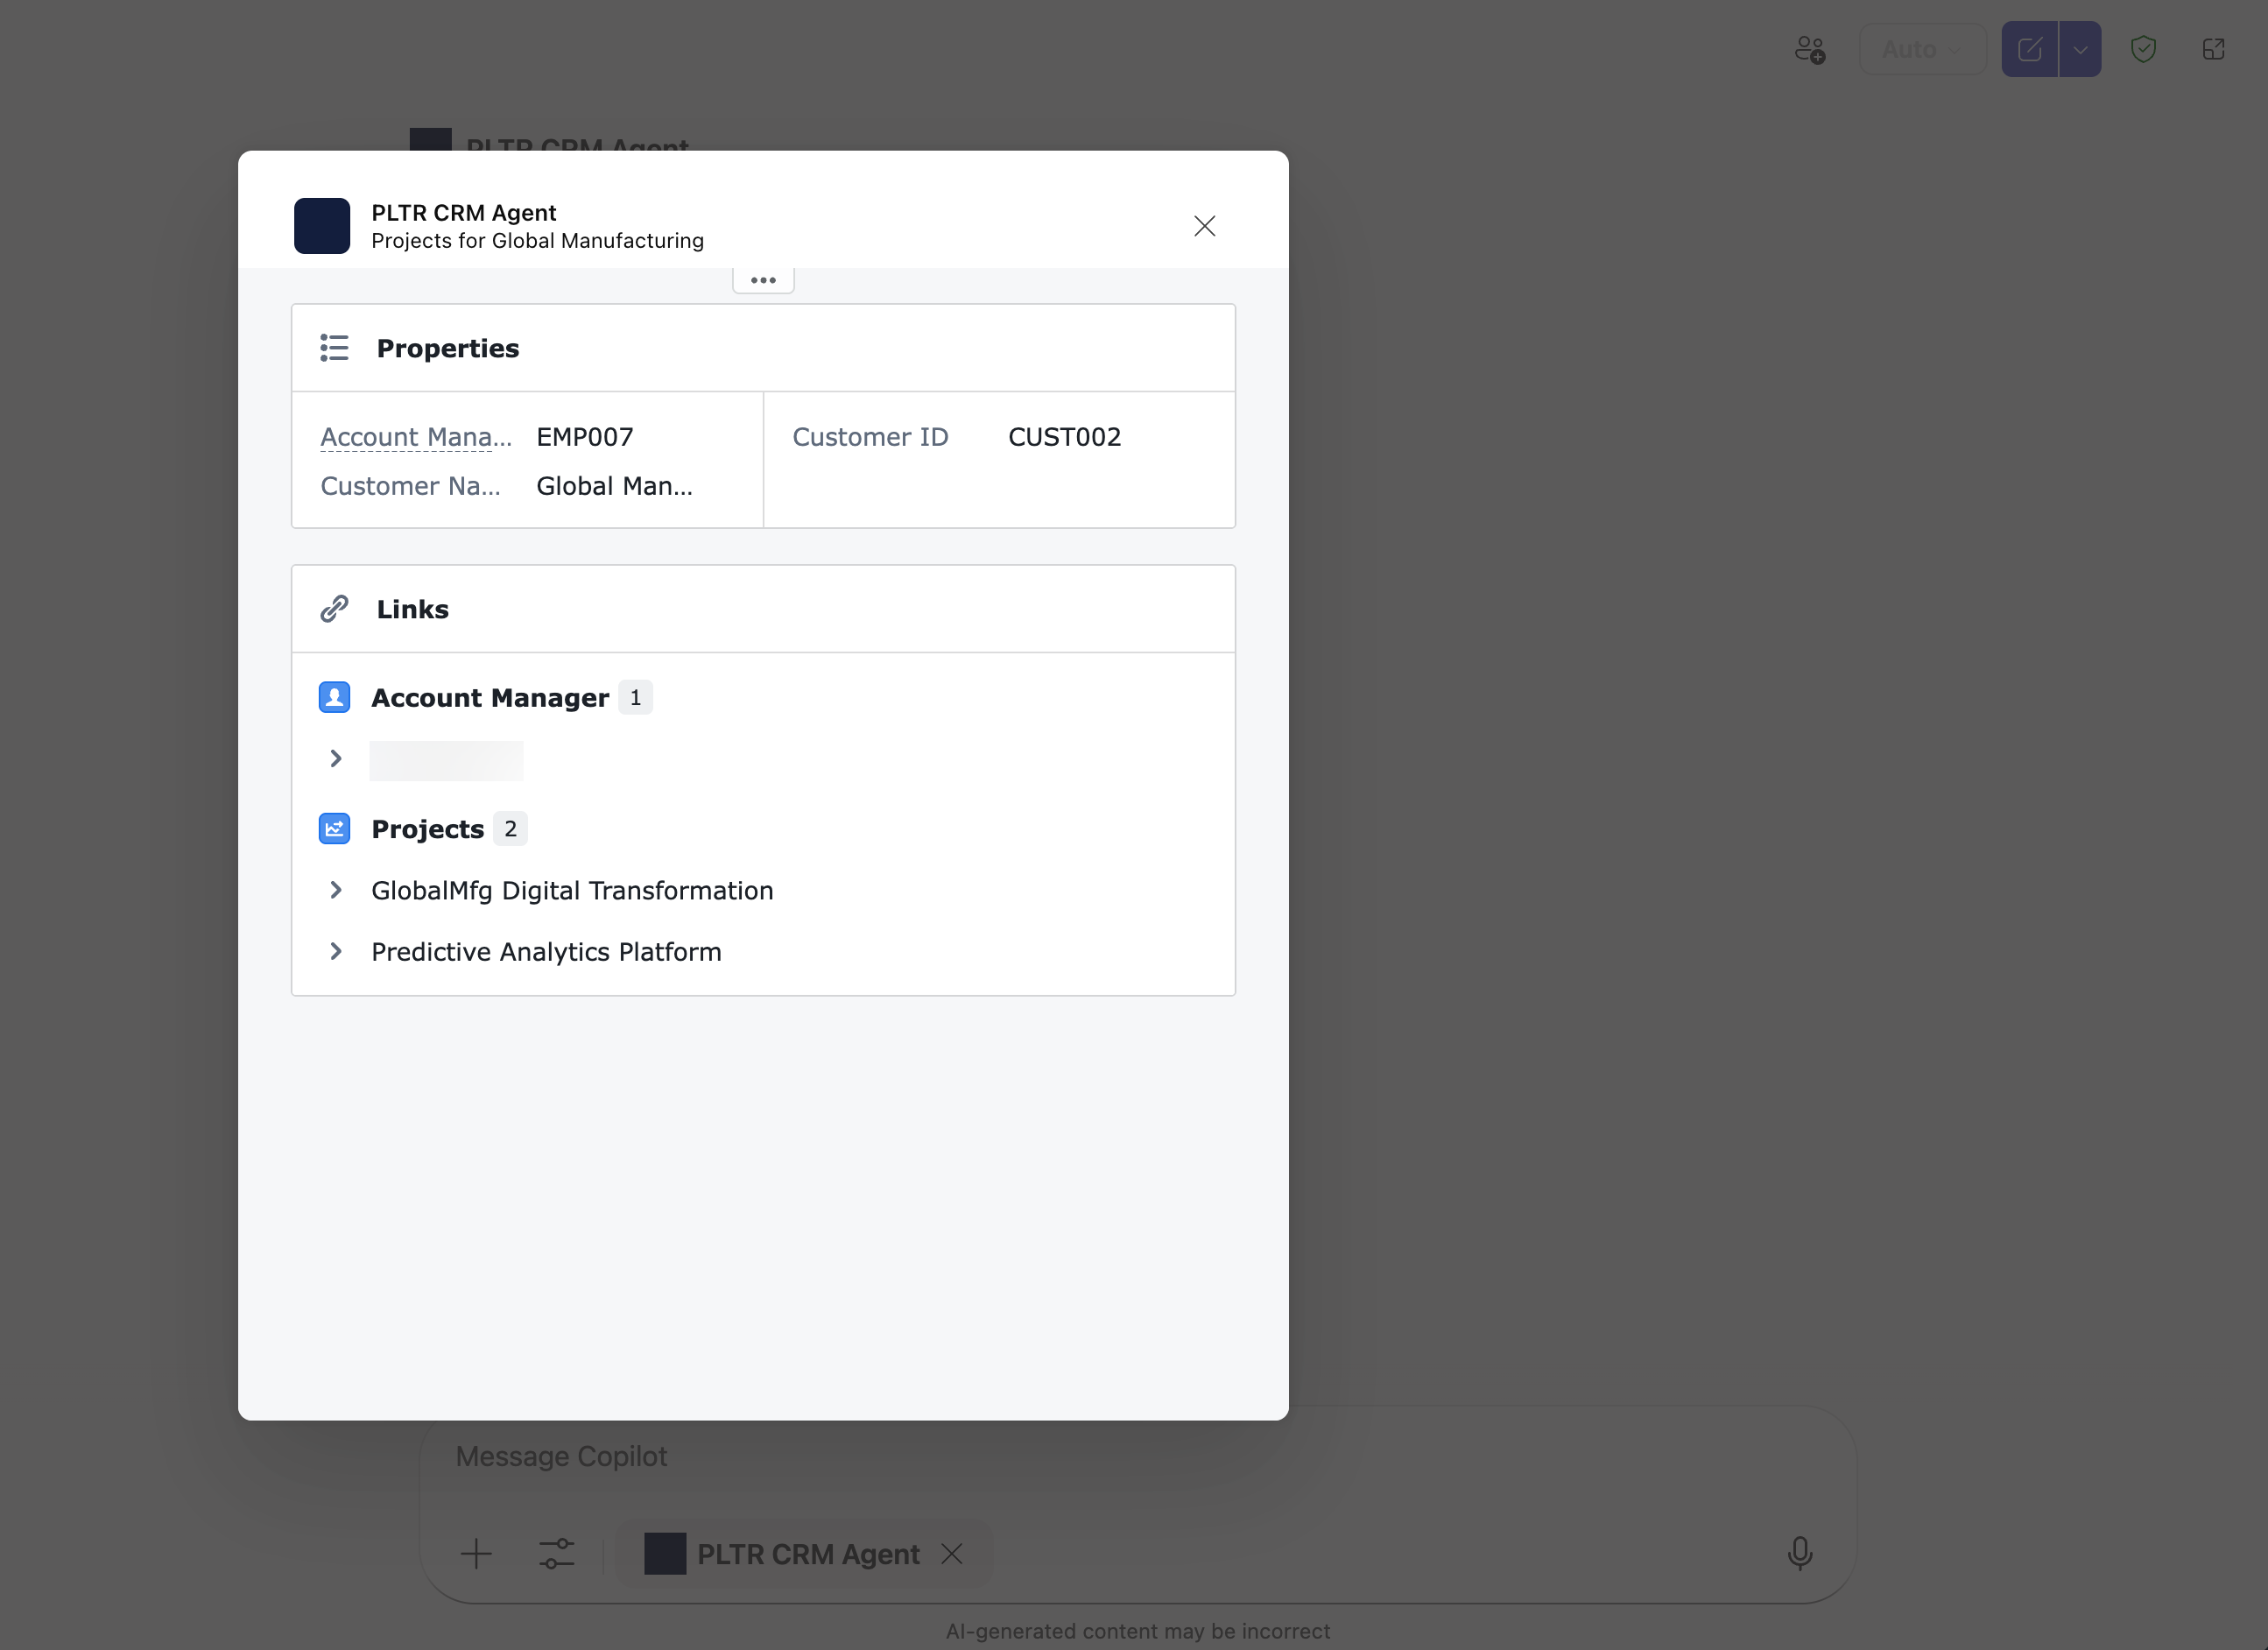
また、Adaptive Cards で Action.OpenUrlDialog を使用して、Teams または Copilot でカスタムダイアログを開く URL を呼び出すことができます。これにより、ユーザーは Ontology MCP ツールから返されたデータを操作できます。
前提条件
開始する前に、以下の VS Code 拡張機能をインストールしてください。
VS Code で Ontology MCP サーバーを設定する
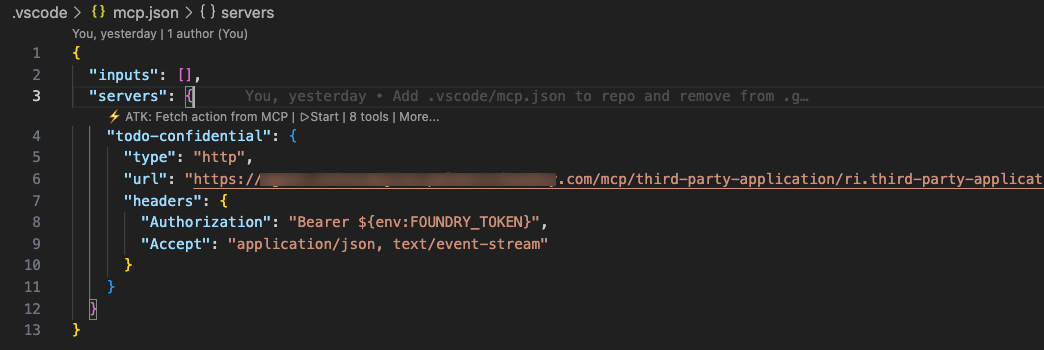
VS Code を Ontology MCP サーバーに接続するには、プロジェクト内に .vscode/mcp.json ファイルを作成します。
Copied!1 2 3 4 5 6 7 8 9 10 11 12 13{ "inputs": [], "servers": { "todo-confidential": { "type": "http", "url": "<your-ontology-mcp-server-url>", "headers": { "Authorization": "Bearer ${env:FOUNDRY_TOKEN}", "Accept": "application/json, text/event-stream" } } } }
<your-ontology-mcp-server-url> を Ontology MCP サーバーの URL に置き換えます。この URL は Developer Console アプリケーションで確認できます。
アダプティブエージェントを作成する
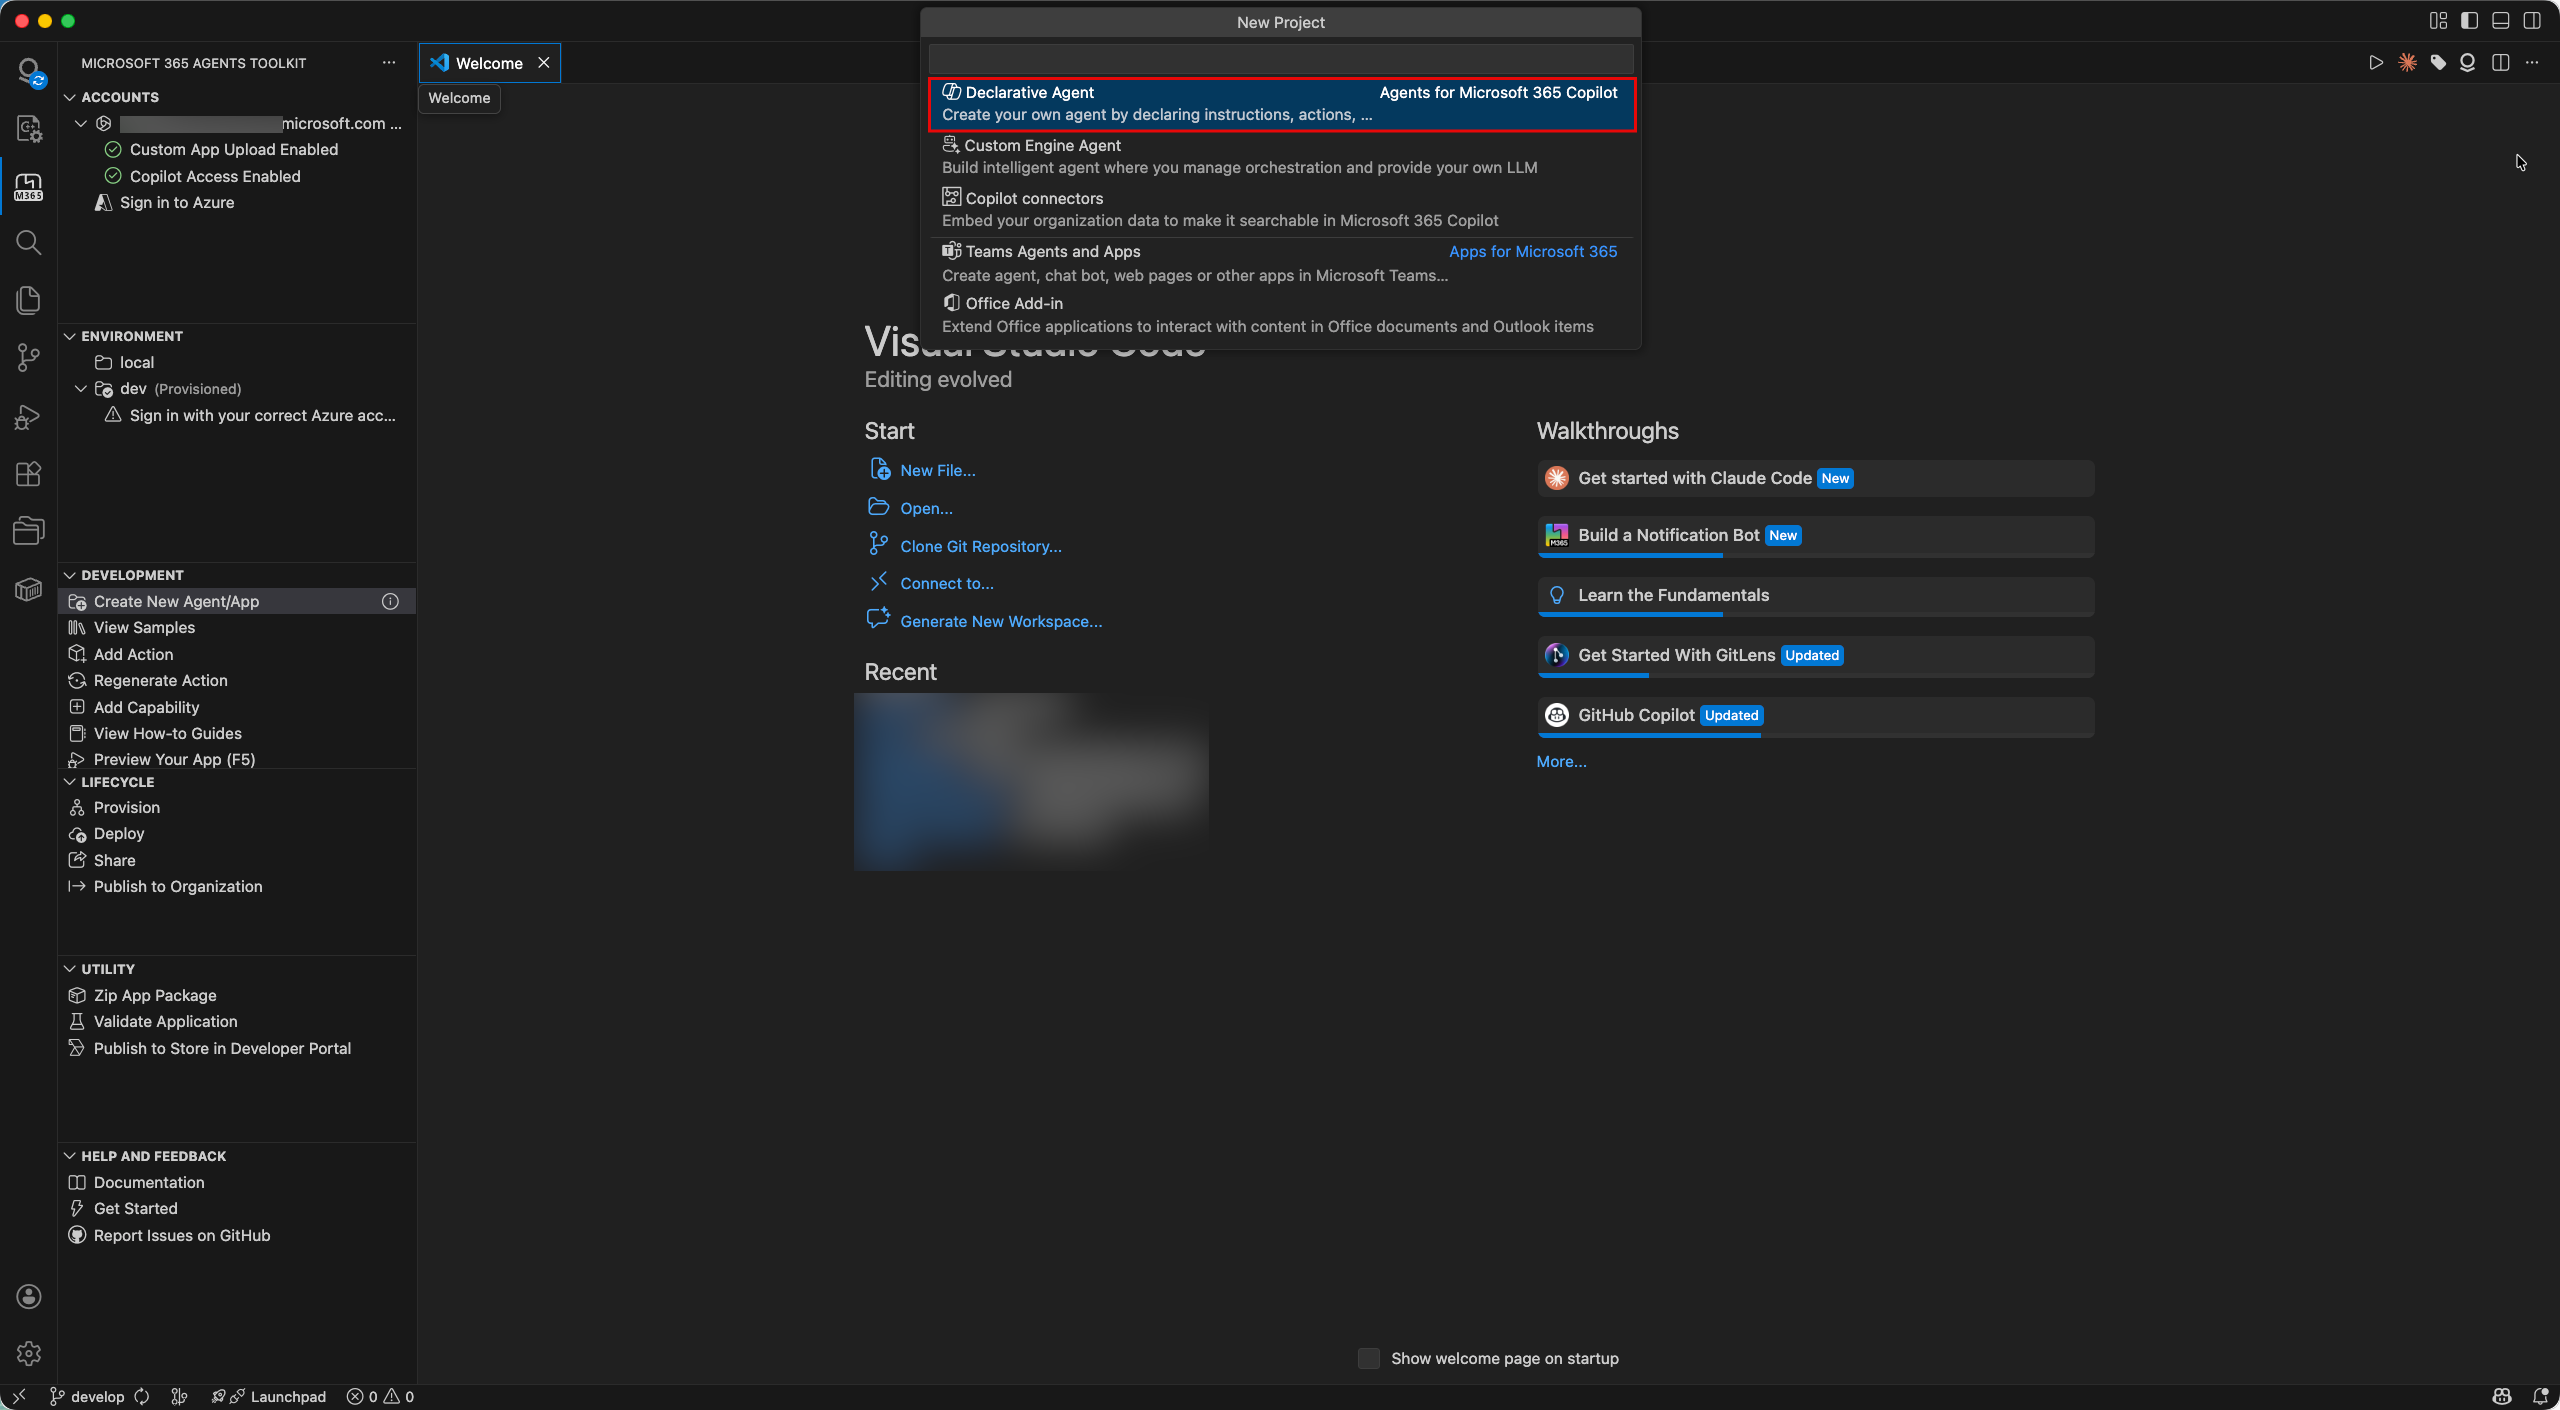
- Microsoft 365 Agents Toolkit パネルで開始を選択し、Ontology MCP サーバーに接続します。
- Microsoft 365 Agents Toolkit のガイド付き手順に沿って、新しいアダプティブエージェントを作成します。
エージェントに機能を追加する
Ontology MCP ツールの出力から Adaptive Card を表示するには、エージェントのツール定義に capabilities ブロックを追加します。static_template プロパティは、返されたデータの表示方法を定義する Adaptive Card テンプレートファイルを指します。
以下の例では、GetCustomerList ツールが Adaptive Card を使用してレスポンスを表示するように設定します。
Copied!1 2 3 4 5 6 7 8 9 10 11 12 13 14 15 16 17{ "name": "GetCustomerList", "description": "List all customers.\n\n Returns:\n A list of CustomerSummary objects with key customer properties.", "parameters": { "type": "object", "properties": {}, "required": [] }, "capabilities": { "response_semantics": { "data_path": "$", "static_template": { "file": "adaptiveCards/customerList.json" } } } }
data_path プロパティはツールのレスポンス内のデータへの JSON パスを指定し、static_template.file はデータを表示する Adaptive Card テンプレートを指します。
任意:Claude スキルで Adaptive Cards を生成する
Ontology MCP ツールのスキーマに基づいて Adaptive Card テンプレートを自動生成する Claude スキルを作成できます。まず、Developer Console の MCP ページの手順に沿って、Ontology MCP サーバーを Claude Code に接続します。次に、以下のスキルファイルを、以下の例にある .claude/skills/build-adaptive-card.md のように、プロジェクトの .claude/skills ディレクトリに保存します。
Copied!1 2 3 4 5 6 7 8 9 10 11 12 13 14 15 16 17 18 19 20 21 22 23 24 25 26 27 28 29 30 31 32 33 34 35 36 37 38 39 40 41 42 43 44 45 46 47 48 49 50 51 52 53 54 55 56 57 58 59 60 61 62 63 64 65 66 67 68 69 70 71 72 73 74 75 76 77 78 79 80 81 82 83 84 85 86 87 88 89 90 91 92 93 94 95 96 97 98 99 100 101 102--- name: build-adaptive-card description: Build an Adaptive Card for a specific MCP tool connected to Claude Code --- # Build Adaptive Card for MCP Tool You are helping the user build an Adaptive Card for a specific MCP tool that is connected to Claude Code in this session. ## Instructions Follow these steps precisely: ### Step 1: Identify the target tool Ask the user which MCP tool they want to build an Adaptive Card for. List the available MCP tools you know about from the connected MCP server. If the user has already named the tool, skip asking. ### Step 2: Call the tool to get a real response sample Call the named MCP tool with minimal or sample arguments to get a real response. If the tool requires arguments, use the most minimal and representative ones possible. Capture the full JSON response. If the tool requires arguments you cannot guess, ask the user for sample argument values before calling. ### Step 3: Validate the response shape Inspect each property of the returned object. If any property value is a string that is itself valid JSON (starts with `[` or `{` and parses as JSON), the tool is double-serializing its output. Stop and tell the user: > The tool is returning its data as a JSON-encoded string instead of a native JSON > object or array. Adaptive Card templates cannot bind to a string. Fix the MCP server > tool implementation to return a native Python dict or list instead of `json.dumps(...)`. Do not proceed until the user confirms the tool has been fixed. If the response is valid JSON, determine: - Is the top-level response an object with a `value` array? (MCP envelope pattern) - Or is it a flat array or a single object? - What are the field names, types, and which fields are nullable? - Which fields are numeric and might benefit from formatting (currency, percentages)? ### Step 4: Generate the Adaptive Card JSON Create an Adaptive Card (version 1.5) following these rules: **Template binding:** - If response is `{"value": [...]}`, use `"$data": "${value}"` on the repeating Container - If response is a flat array, use `"$data": "${$root}"` on the repeating Container - If response is a single object, bind fields directly with `${fieldName}` **Card structure:** - Start with a header Container (`style: "emphasis"`, `bleed: true`) with a title TextBlock - For list responses: use a repeating Container with a ColumnSet inside - For single-object responses: use a FactSet or labeled rows - Use `"wrap": true` on all TextBlocks - For nullable fields, add `"$when": "${field != null}"` guards - For currency fields: use `formatNumber` for display formatting - For status color coding: use conditional `if()` expressions - Do NOT use `.length` on arrays (not supported in template language) - Do NOT use date functions, structs, arrays, or window functions **File naming:** `appPackage/adaptiveCards/<toolName>.json` (camelCase the tool name) Write the card JSON to `appPackage/adaptiveCards/<toolName>.json`. Next, write a companion `.data.json` file at `appPackage/adaptiveCards/<toolName>.data.json` containing the actual sample response for design-time preview data. ### Step 5: Wire up response_semantics in ai-plugin.json Read `appPackage/ai-plugin.json`. Find the function entry matching the tool name. Add or update the `capabilities` block: ```json "capabilities": { "response_semantics": { "data_path": "$", "static_template": { "file": "adaptiveCards/<toolName>.json" } } } ``` ### Step 6: Report to the user Print a summary of the card file created, the data sample file created, the function updated in `ai-plugin.json`, the `data_path` used, and key design decisions made. ## Key constraints - `response_semantics` must be inside `capabilities`, not directly on the function - `static_template` uses `"file": "adaptiveCards/foo.json"` (the toolkit inlines at build time) - Adaptive Card template language does not support `.length` - `$schema` for the card: `"http://adaptivecards.io/schemas/adaptive-card.json"` - Card version: `"1.5"`
スキルを保存し、Claude Code で Build a card for the GetCustomerList tool のようなプロンプトを使って呼び出します。このスキルは MCP ツールを呼び出し、レスポンスの形式を調べ、Adaptive Card テンプレートを生成して、エージェントの設定に組み込みます。Ontology MCP で Claude スキルを作成して使用する方法の詳しくはこちら。Ontology MCP の使用に関するその他の例やガイダンスについては、Palantir DevCon4 のプレゼンテーションとデモ ↗をご覧ください。