- Capabilities
- Getting started
- Architecture center
- Platform updates
Establish a Multipass exchanger connection
A Multipass exchanger (MPX) connection enables Enrollment administrators to create a secure communication channel between two enrollments across a network as a prerequisite to creating a peer connection. Before you establish an MPX connection, contact Palantir Support for help configuring the network setup required between the enrollments you will connect, including firewall rules, certificate trust, and any other network configuration needed for the enrollments to communicate.
The instructions in the sections below outline actions an Enrollment administrator on each enrollment must take to establish the connection, such as generating an invite code, sharing the code with the other Enrollment administrator, and pasting the invite code in the Network connections tab in Peer Manager.
Use an MPX connection when a network connection is available between the two enrollments. If no network connection is available, establish a data relay connection as an alternative to an MPX connection. A data relay connection establishes peering over an enrollment's existing cross-domain solution.
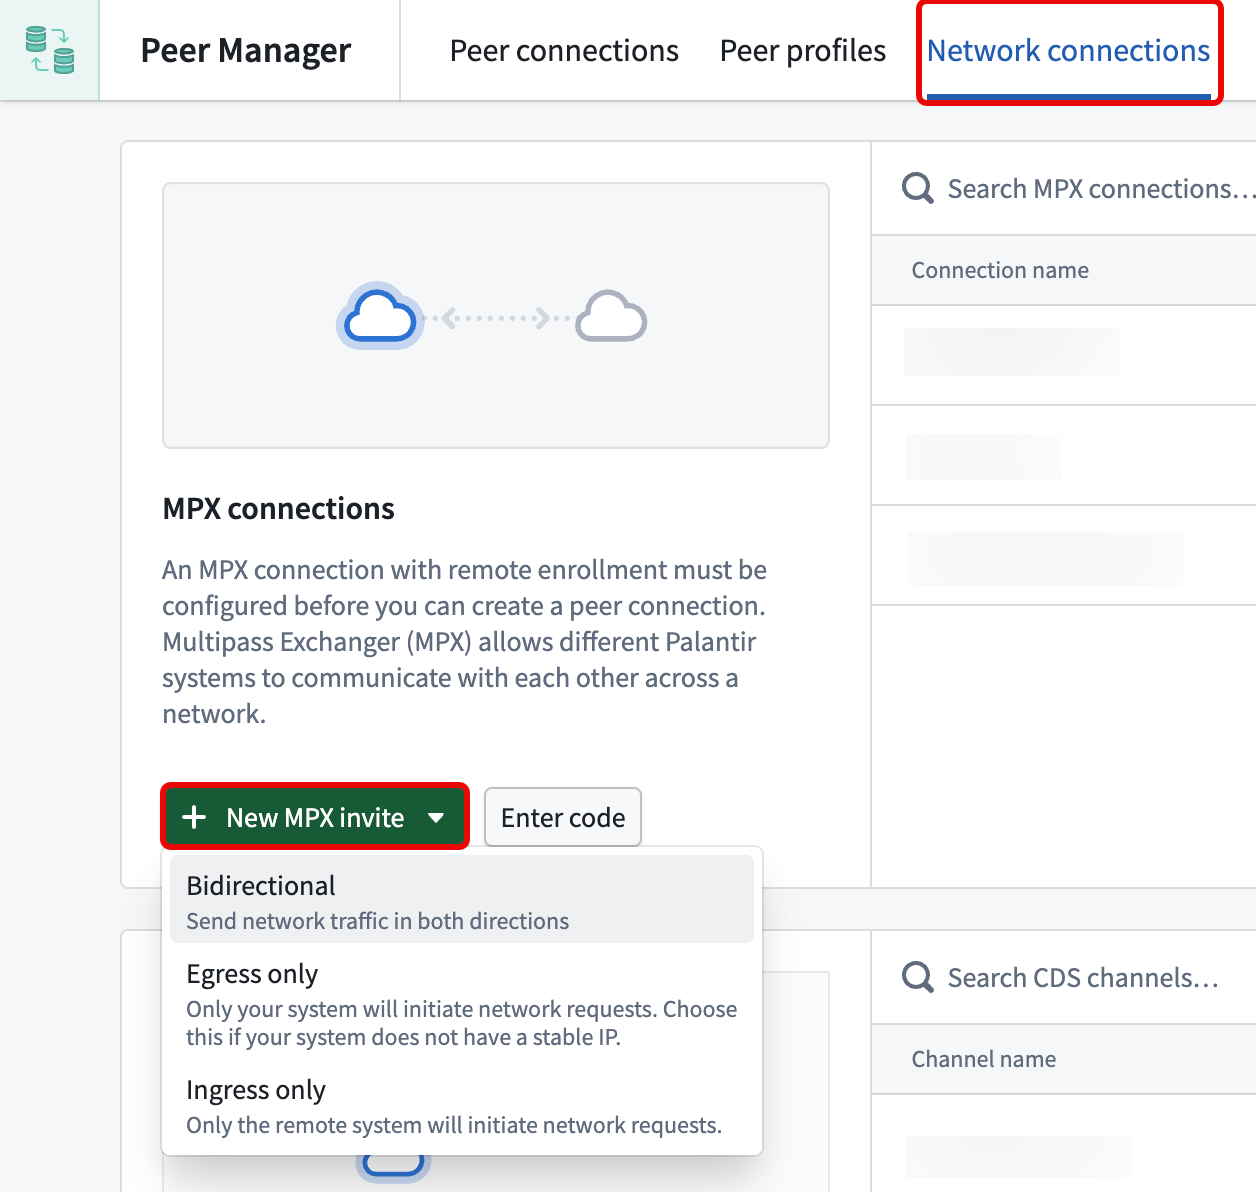
Coordinate the connection direction
Before you generate an invite code by selecting New MPX invite in the Network connections tab of Peer Manager, coordinate with the other enrollment's administrator so that each side selects the matching direction when generating their invite code:
- Bidirectional connection: To create a bidirectional connection where network traffic is sent in both directions, both administrators select Bidirectional.
- Unidirectional connection from
Enrollment AtoEnrollment B: To create a unidirectional connection whereEnrollment Ainitiates network requests toEnrollment B:- The administrator on
Enrollment Aselects Egress only. - The administrator on
Enrollment Bselects Ingress only.
- The administrator on
Create a new MPX invite code
After you determine the connection's direction alongside the other Enrollment administrator, select from the options listed under New MPX invite to generate an invite code to share:
- Bidirectional: Both systems can initiate network requests to each other. Use this option if both enrollments have stable IPs.
- Egress only: Only your enrollment will initiate network requests. Choose this option if your system does not have a stable IP.
- Ingress only: Only the remote enrollment will initiate network requests. Choose this option if the remote enrollment does not have a stable IP.
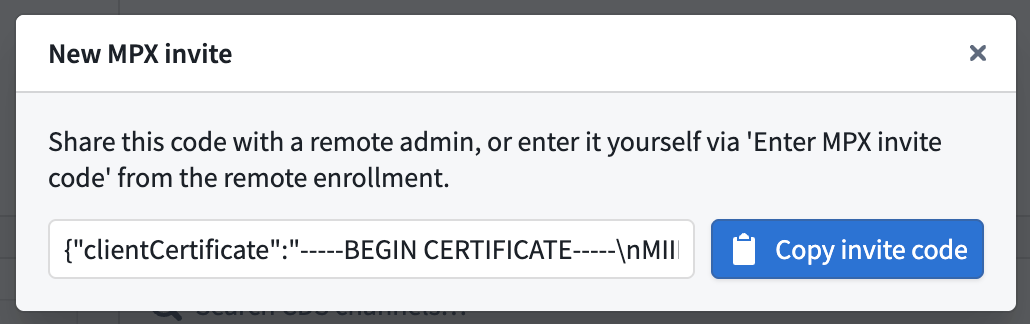
After you select a direction, Peer Manager displays the New MPX invite dialog, where you can copy the invite code to share with the other Enrollment administrator.
Enter an MPX invite code
After you receive an invite code from the Enrollment administrator on the other enrollment, follow the steps below to enter the code on your enrollment and complete your side of the connection:
- Select Enter code next to New MPX invite.
- Paste the invite code in the Enter MPX invite code dialog. Peer Manager validates the code and routes you to the MPX connection creation page.
- Provide a Name for the MPX connection.
- Confirm that a network egress policy is configured for your enrollment, as noted in the Before you proceed section.
- Select Create connection.
Both administrators must create their own and enter the enrollment's MPX invite codes. After the MPX connection is established on both enrollments, you can return to Peer Manager to create a peer connection that uses the MPX connection.