- Capabilities
- Getting started
- Architecture center
- Platform updates
Bulk migrate pipelines in Pipeline Builder
Use bulk migrations in Pipeline Builder to create and run migrations at the pipeline, project, or enrollment level. By migrating multiple pipelines in a single workflow, you can reduce repetitive manual work, simplify maintenance, and keep pipeline configurations consistent.
A bulk migration does not change pipelines directly. Instead, it creates a proposal for each eligible pipeline. Review and merge each proposal to apply the changes to the pipeline's main branch.
Pipeline Builder supports the following bulk migrations:
- Migrate standard batch pipelines to faster pipelines
- Replace models in bulk in Use LLM nodes and
Text to embeddingsexpressions
Required permissions
You need the following permissions for the migration scope you select:
- Projects:
Editpermission on each selected project. - Pipelines:
Editpermission on each selected pipeline. - All in enrollment: Permission to run enrollment-wide migrations, which enrollment administrators have by default.
Configure a bulk migration
To configure a bulk migration in Pipeline Builder, follow the steps below:
-
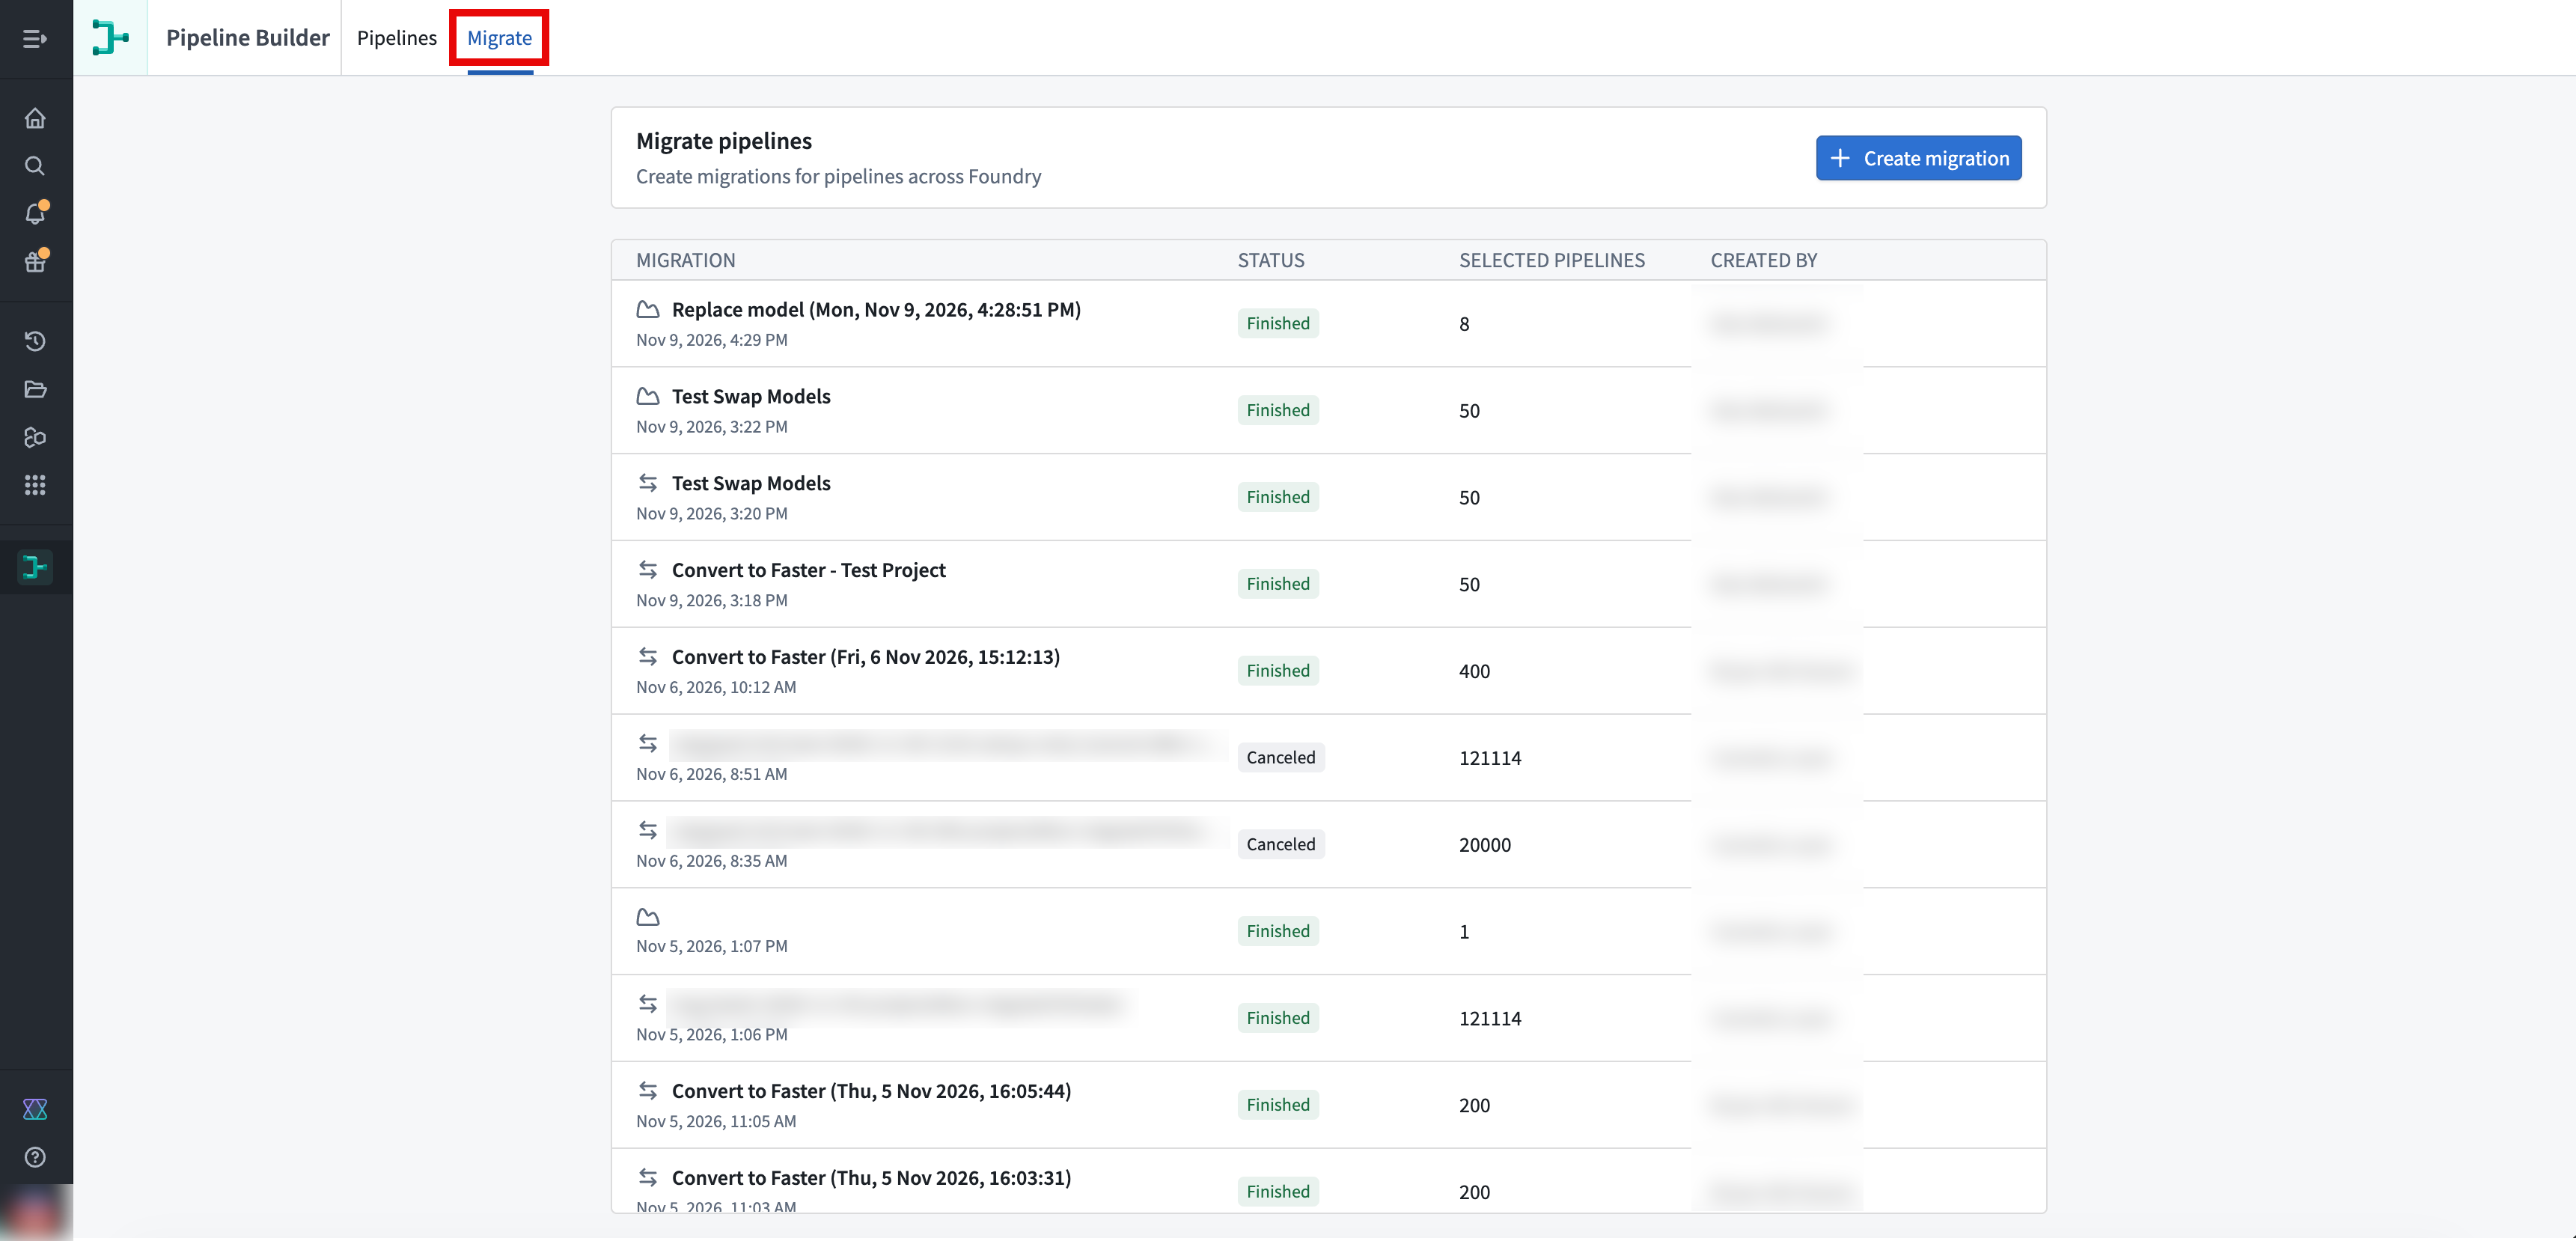
From the Pipeline Builder landing page, select the Migrate tab in the top bar.
-
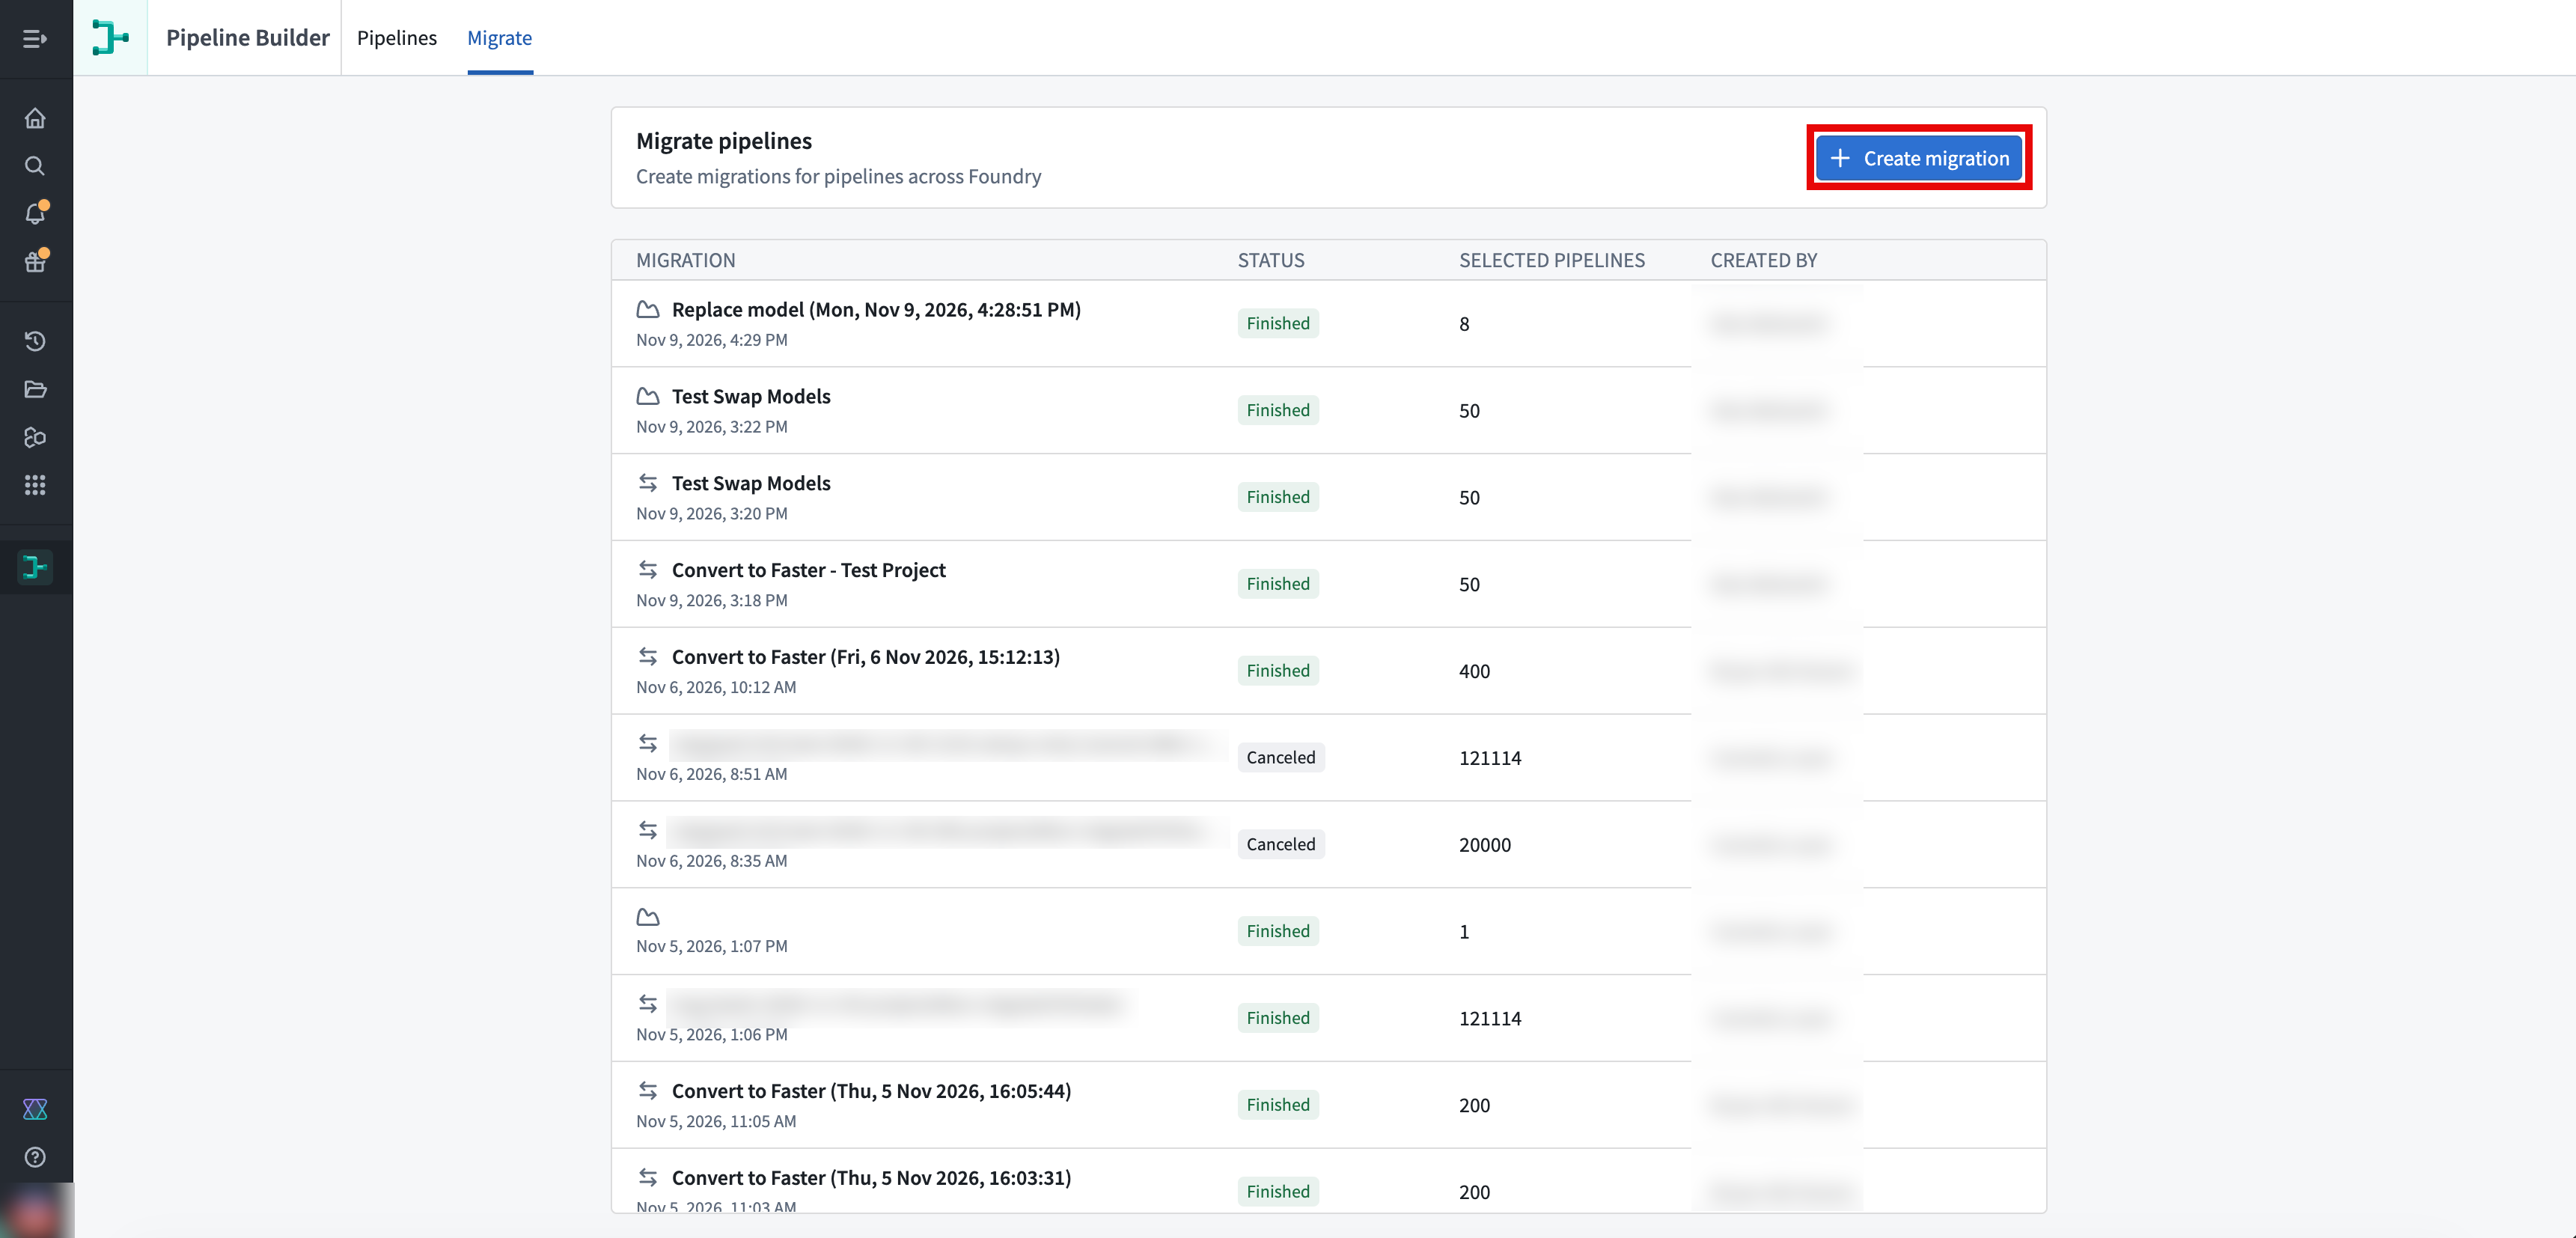
On the Migrate pipelines page, select Create migration. Migration names are visible to all users in the enrollment, but users can only view resources they have permission to access.
-
In the migration configuration menu, enter a Name for the migration or keep the default name.
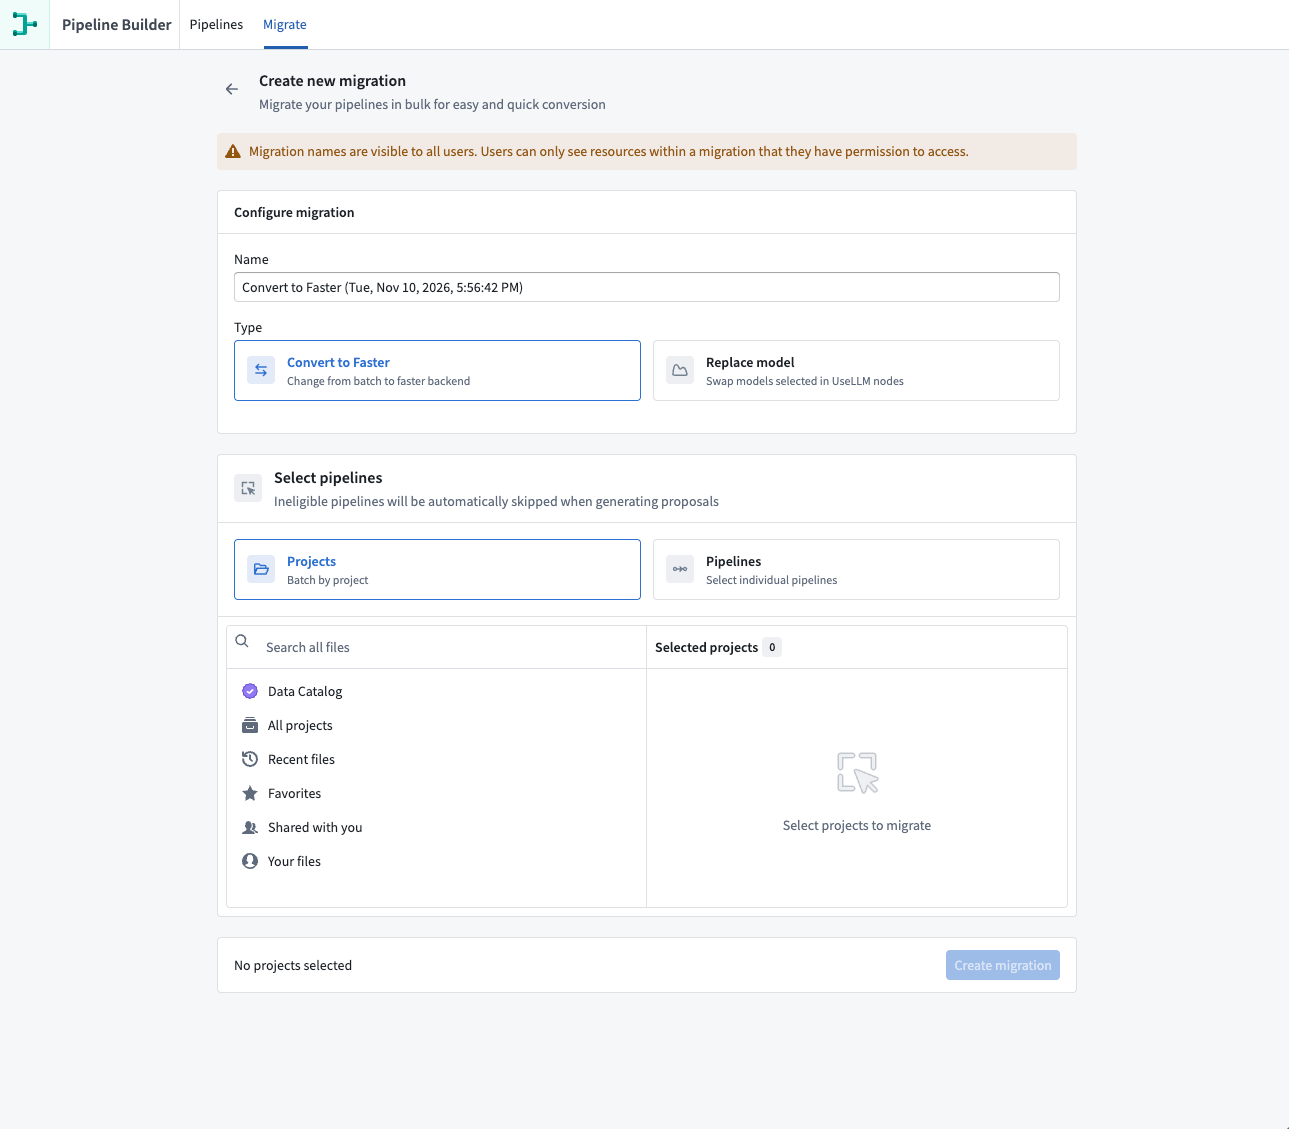
Next, select a migration Type and complete the steps for that type:
- Convert to Faster: Migrate to faster pipelines
- Replace model: Replace models
Migrate to faster pipelines
Before you create a migration, review the known limitations of faster pipelines. Unlike converting a single pipeline, a bulk migration creates a proposal for each compatible pipeline and skips pipelines that are not compatible.
-
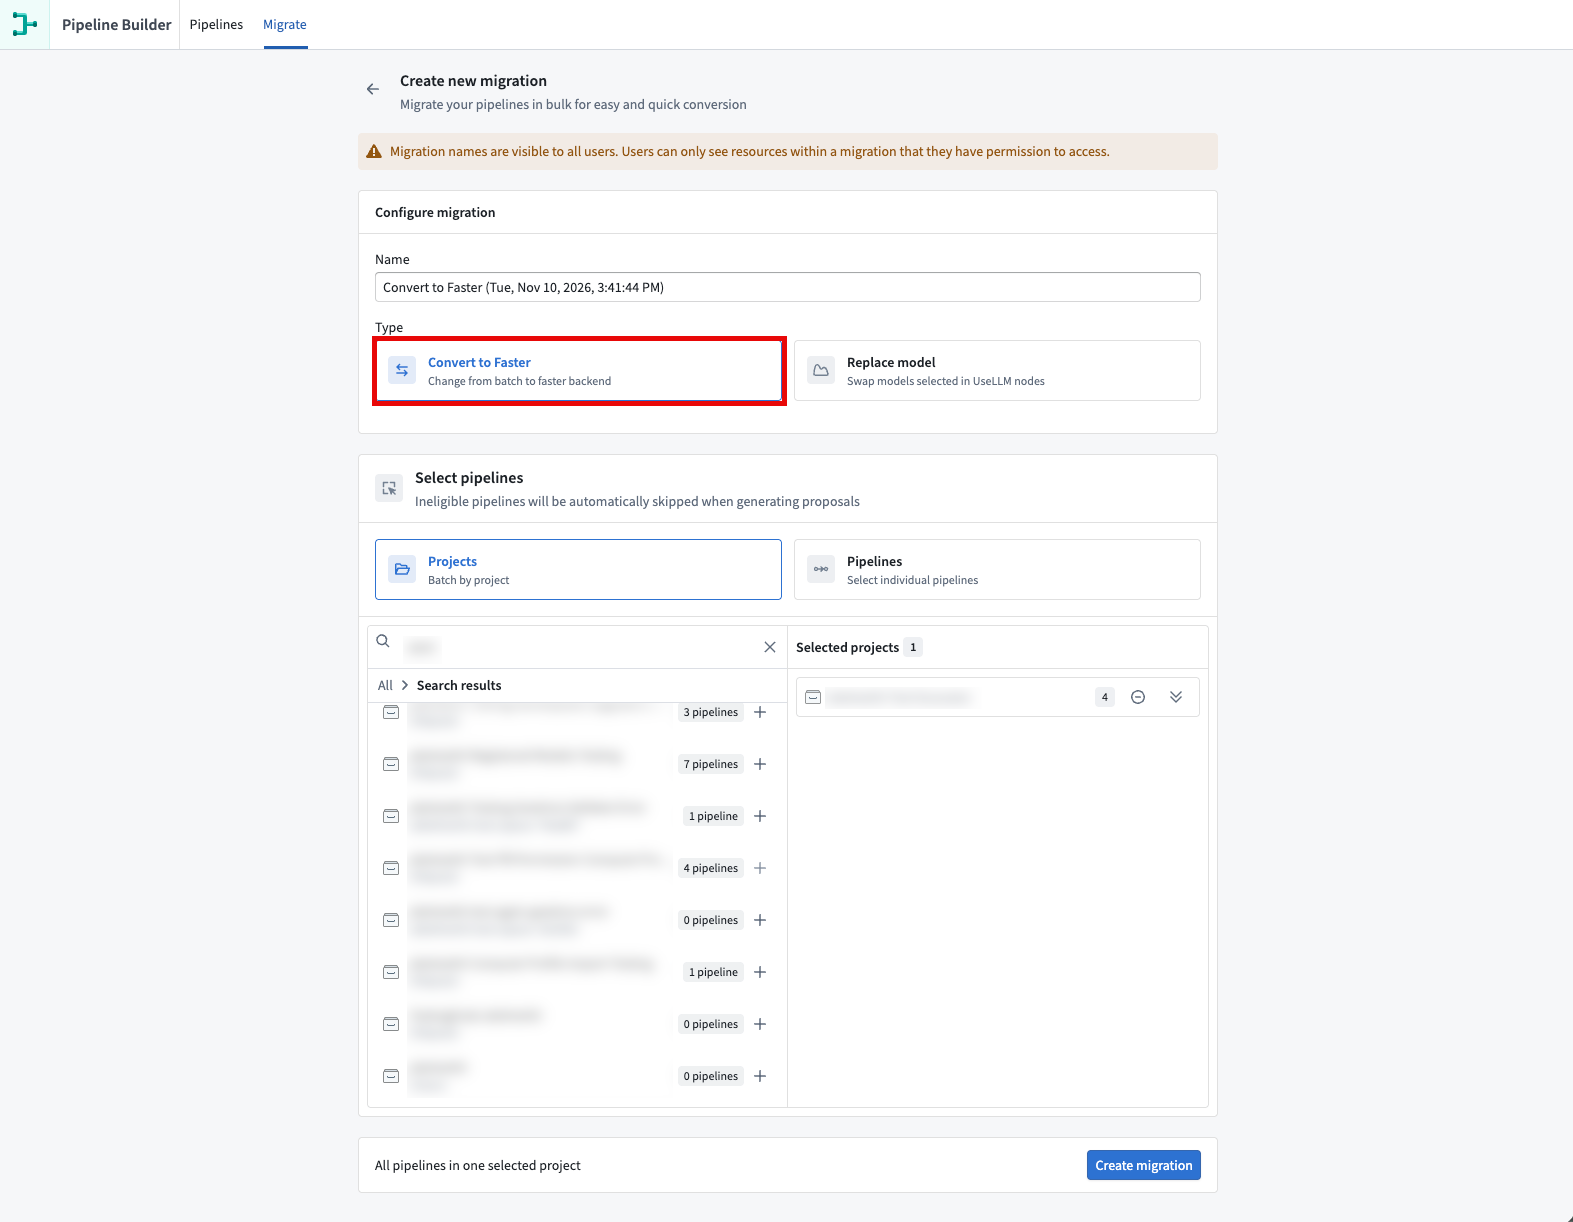
In the migration configuration menu, select Convert to Faster.
-
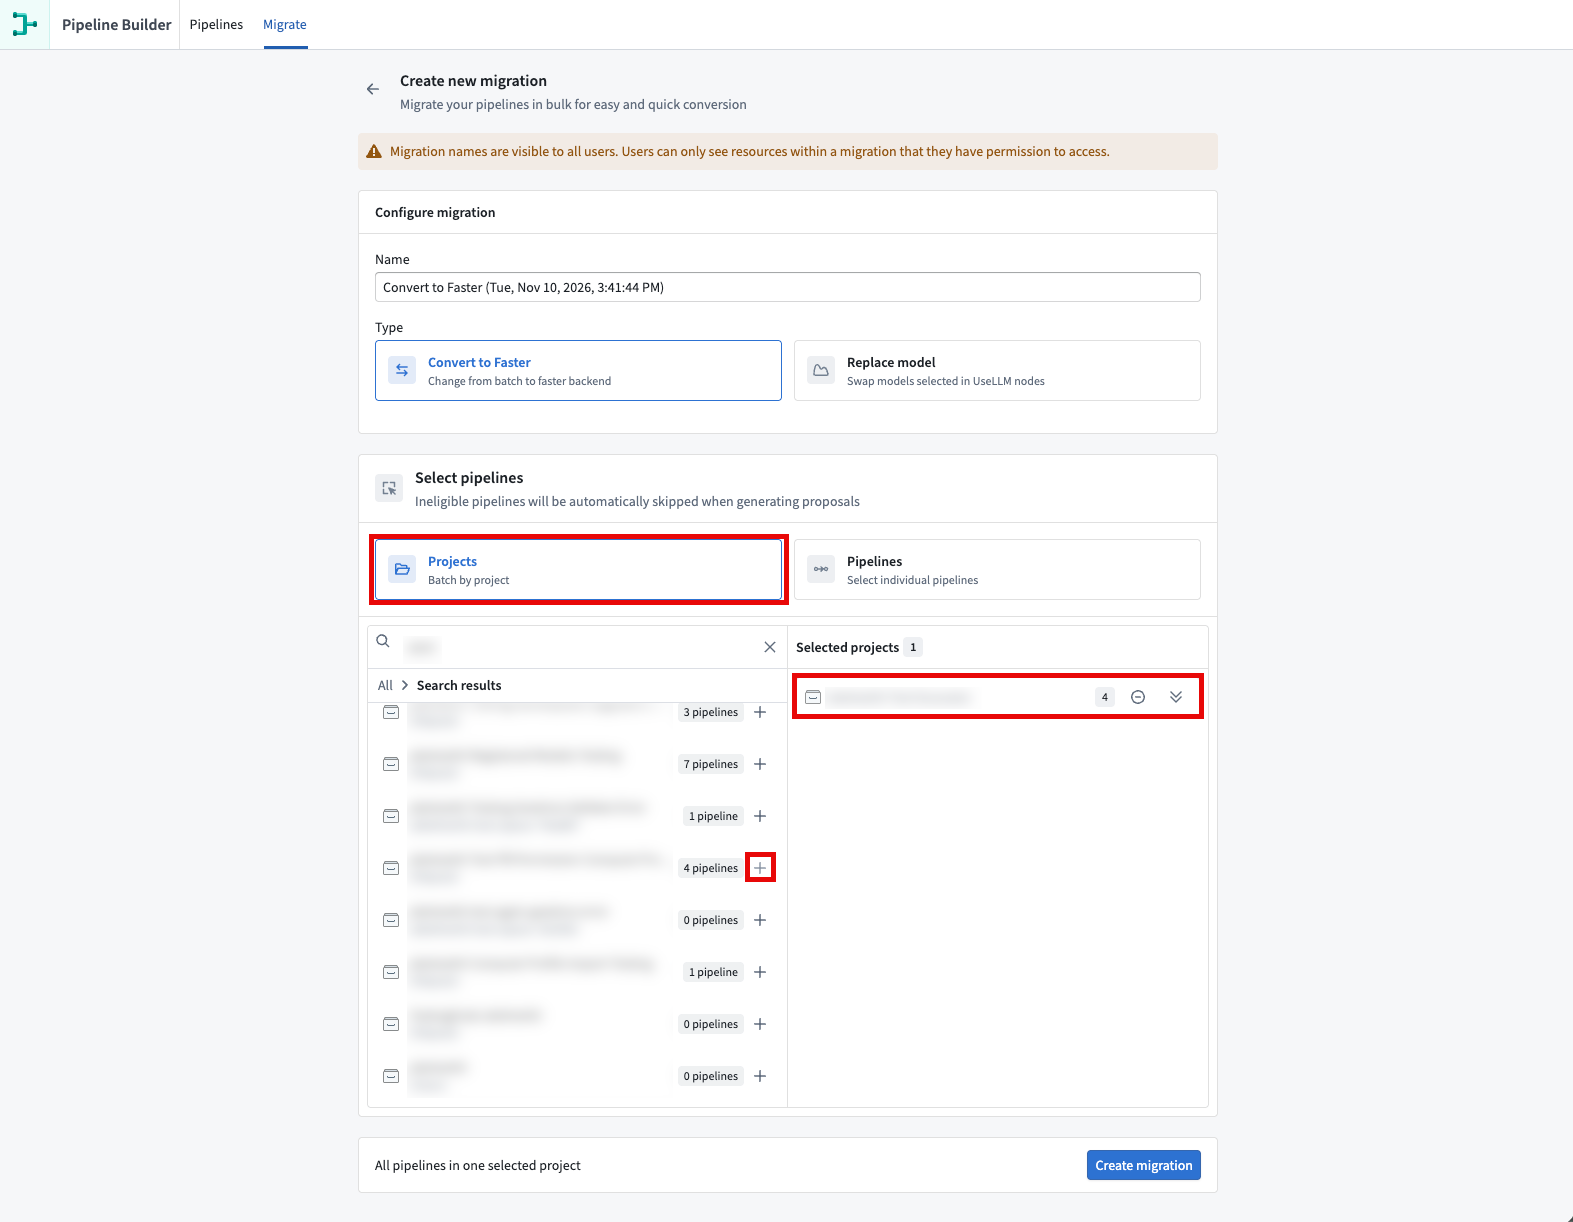
Under Select pipelines, choose a migration scope:
- Projects: Include all pipelines in one or more projects, including pipelines in their folders.
- Pipelines: Select individual pipelines to include.
- All in enrollment: Include all pipelines in your enrollment.
For this example, select Projects and add the projects containing the pipelines you want to migrate.
-
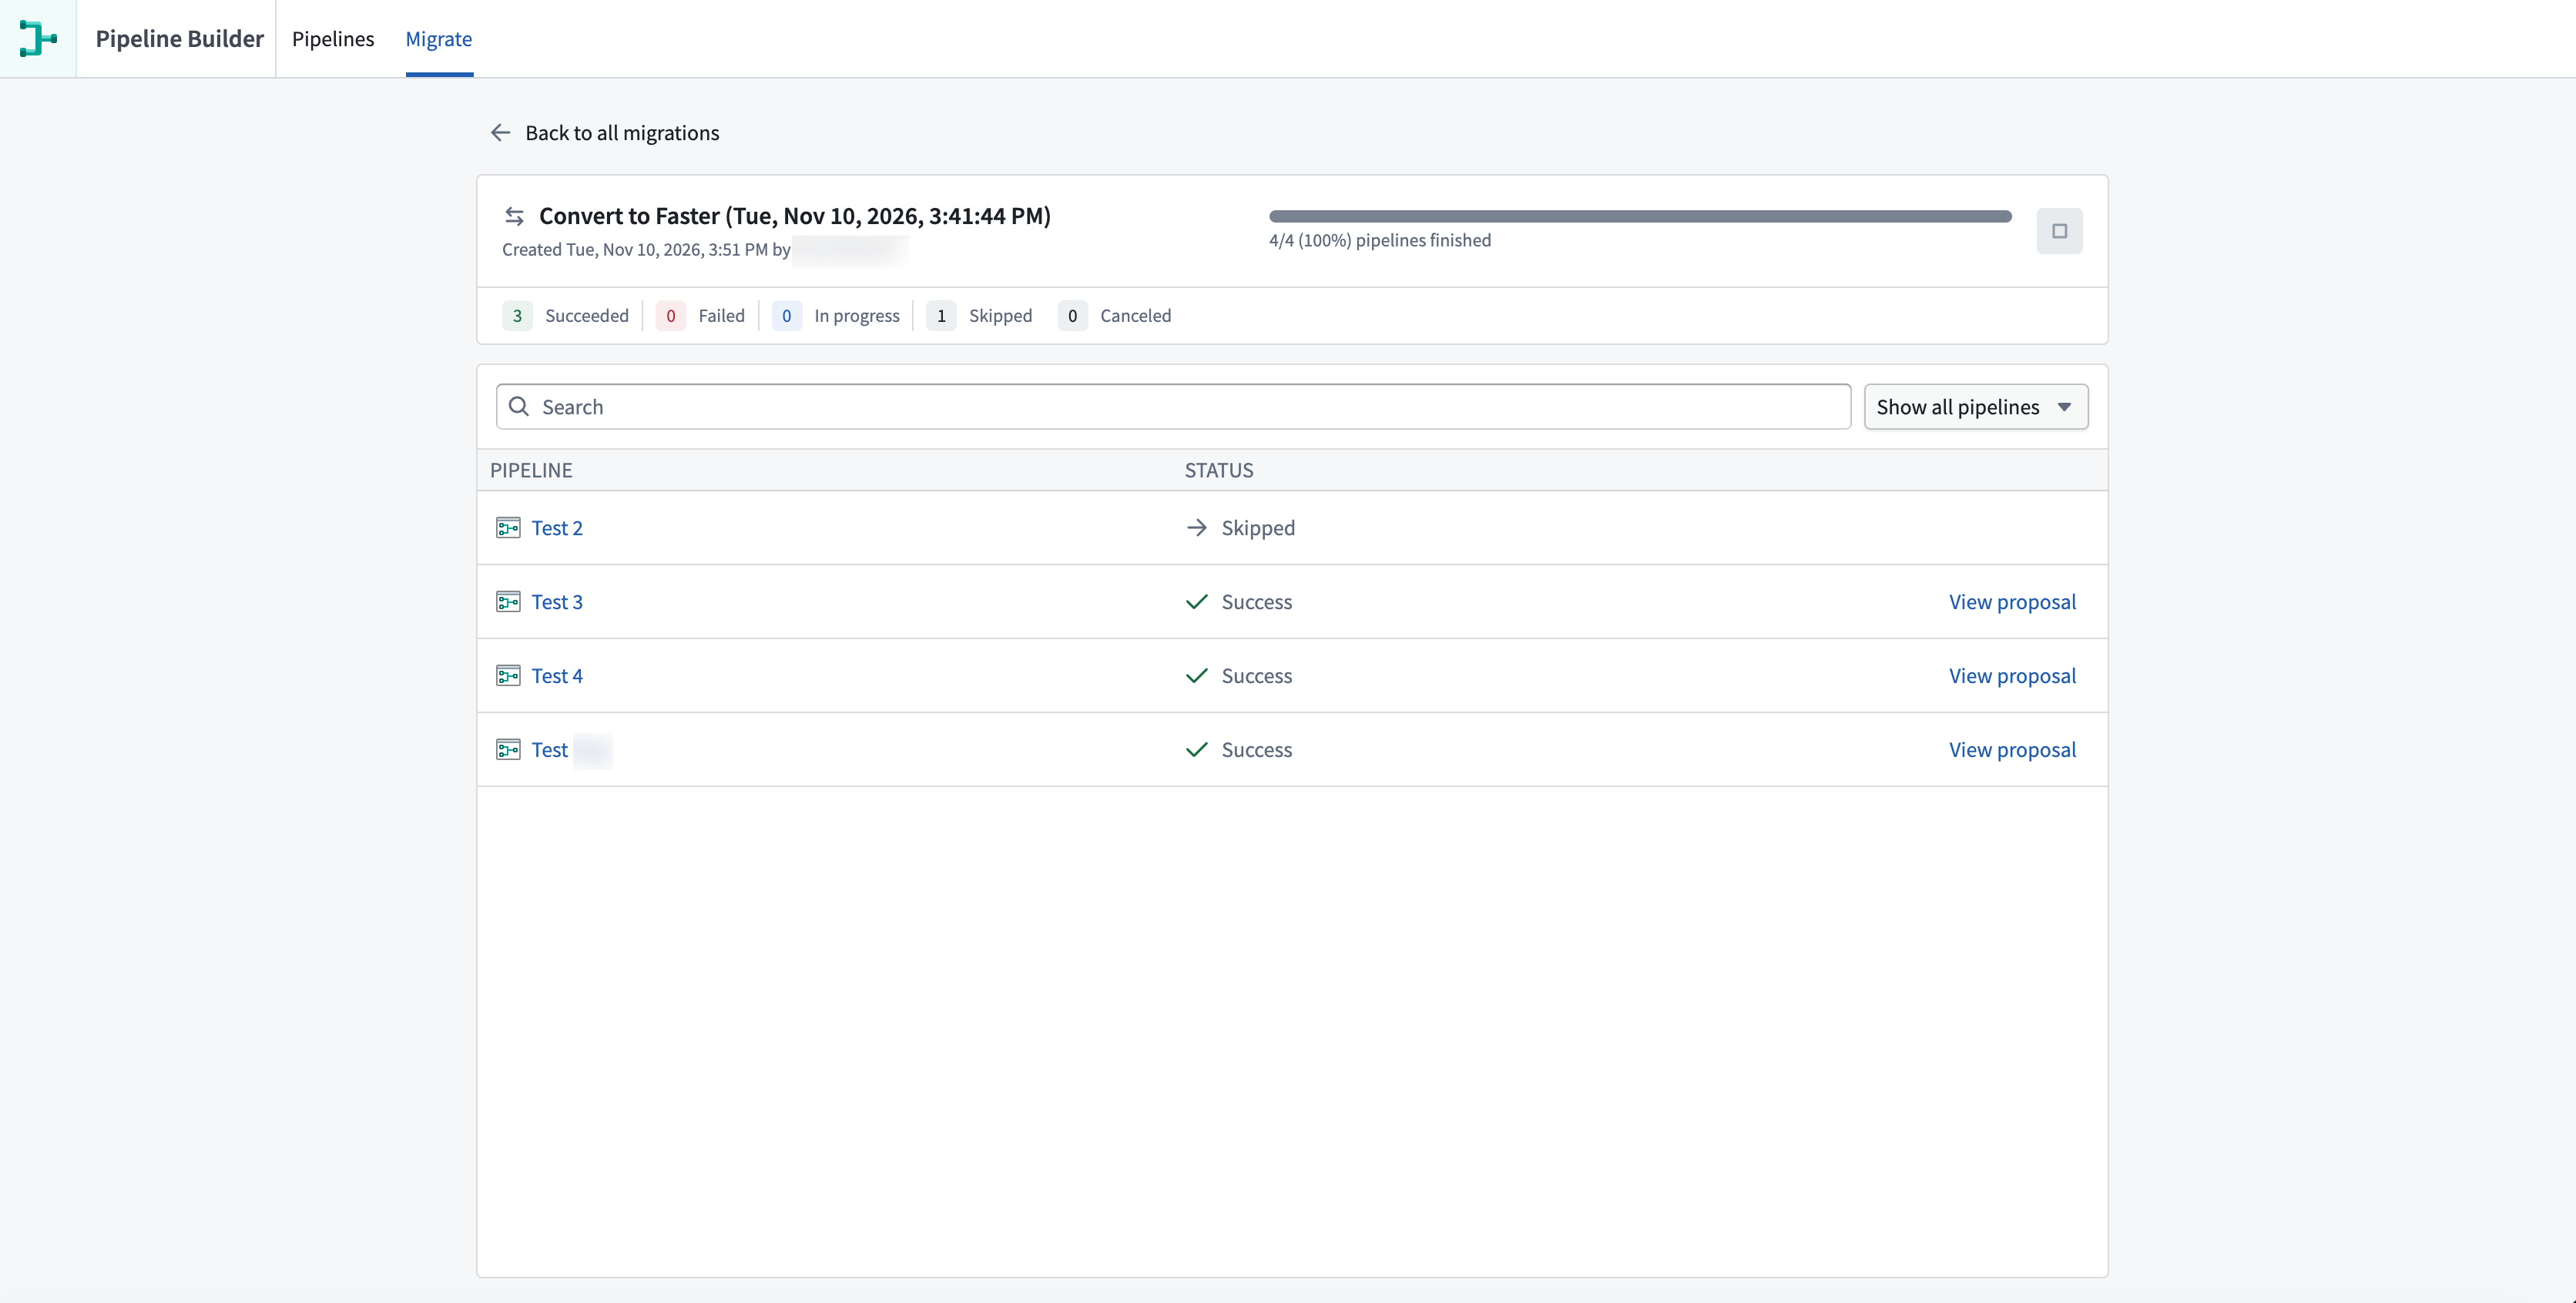
Select Create migration at the bottom right of the menu to open the migration details. To filter pipelines by status, use the Show all pipelines dropdown menu to the right of the search bar. For definitions of each pipeline status and reasons pipelines may be skipped, see Pipeline statuses.
-
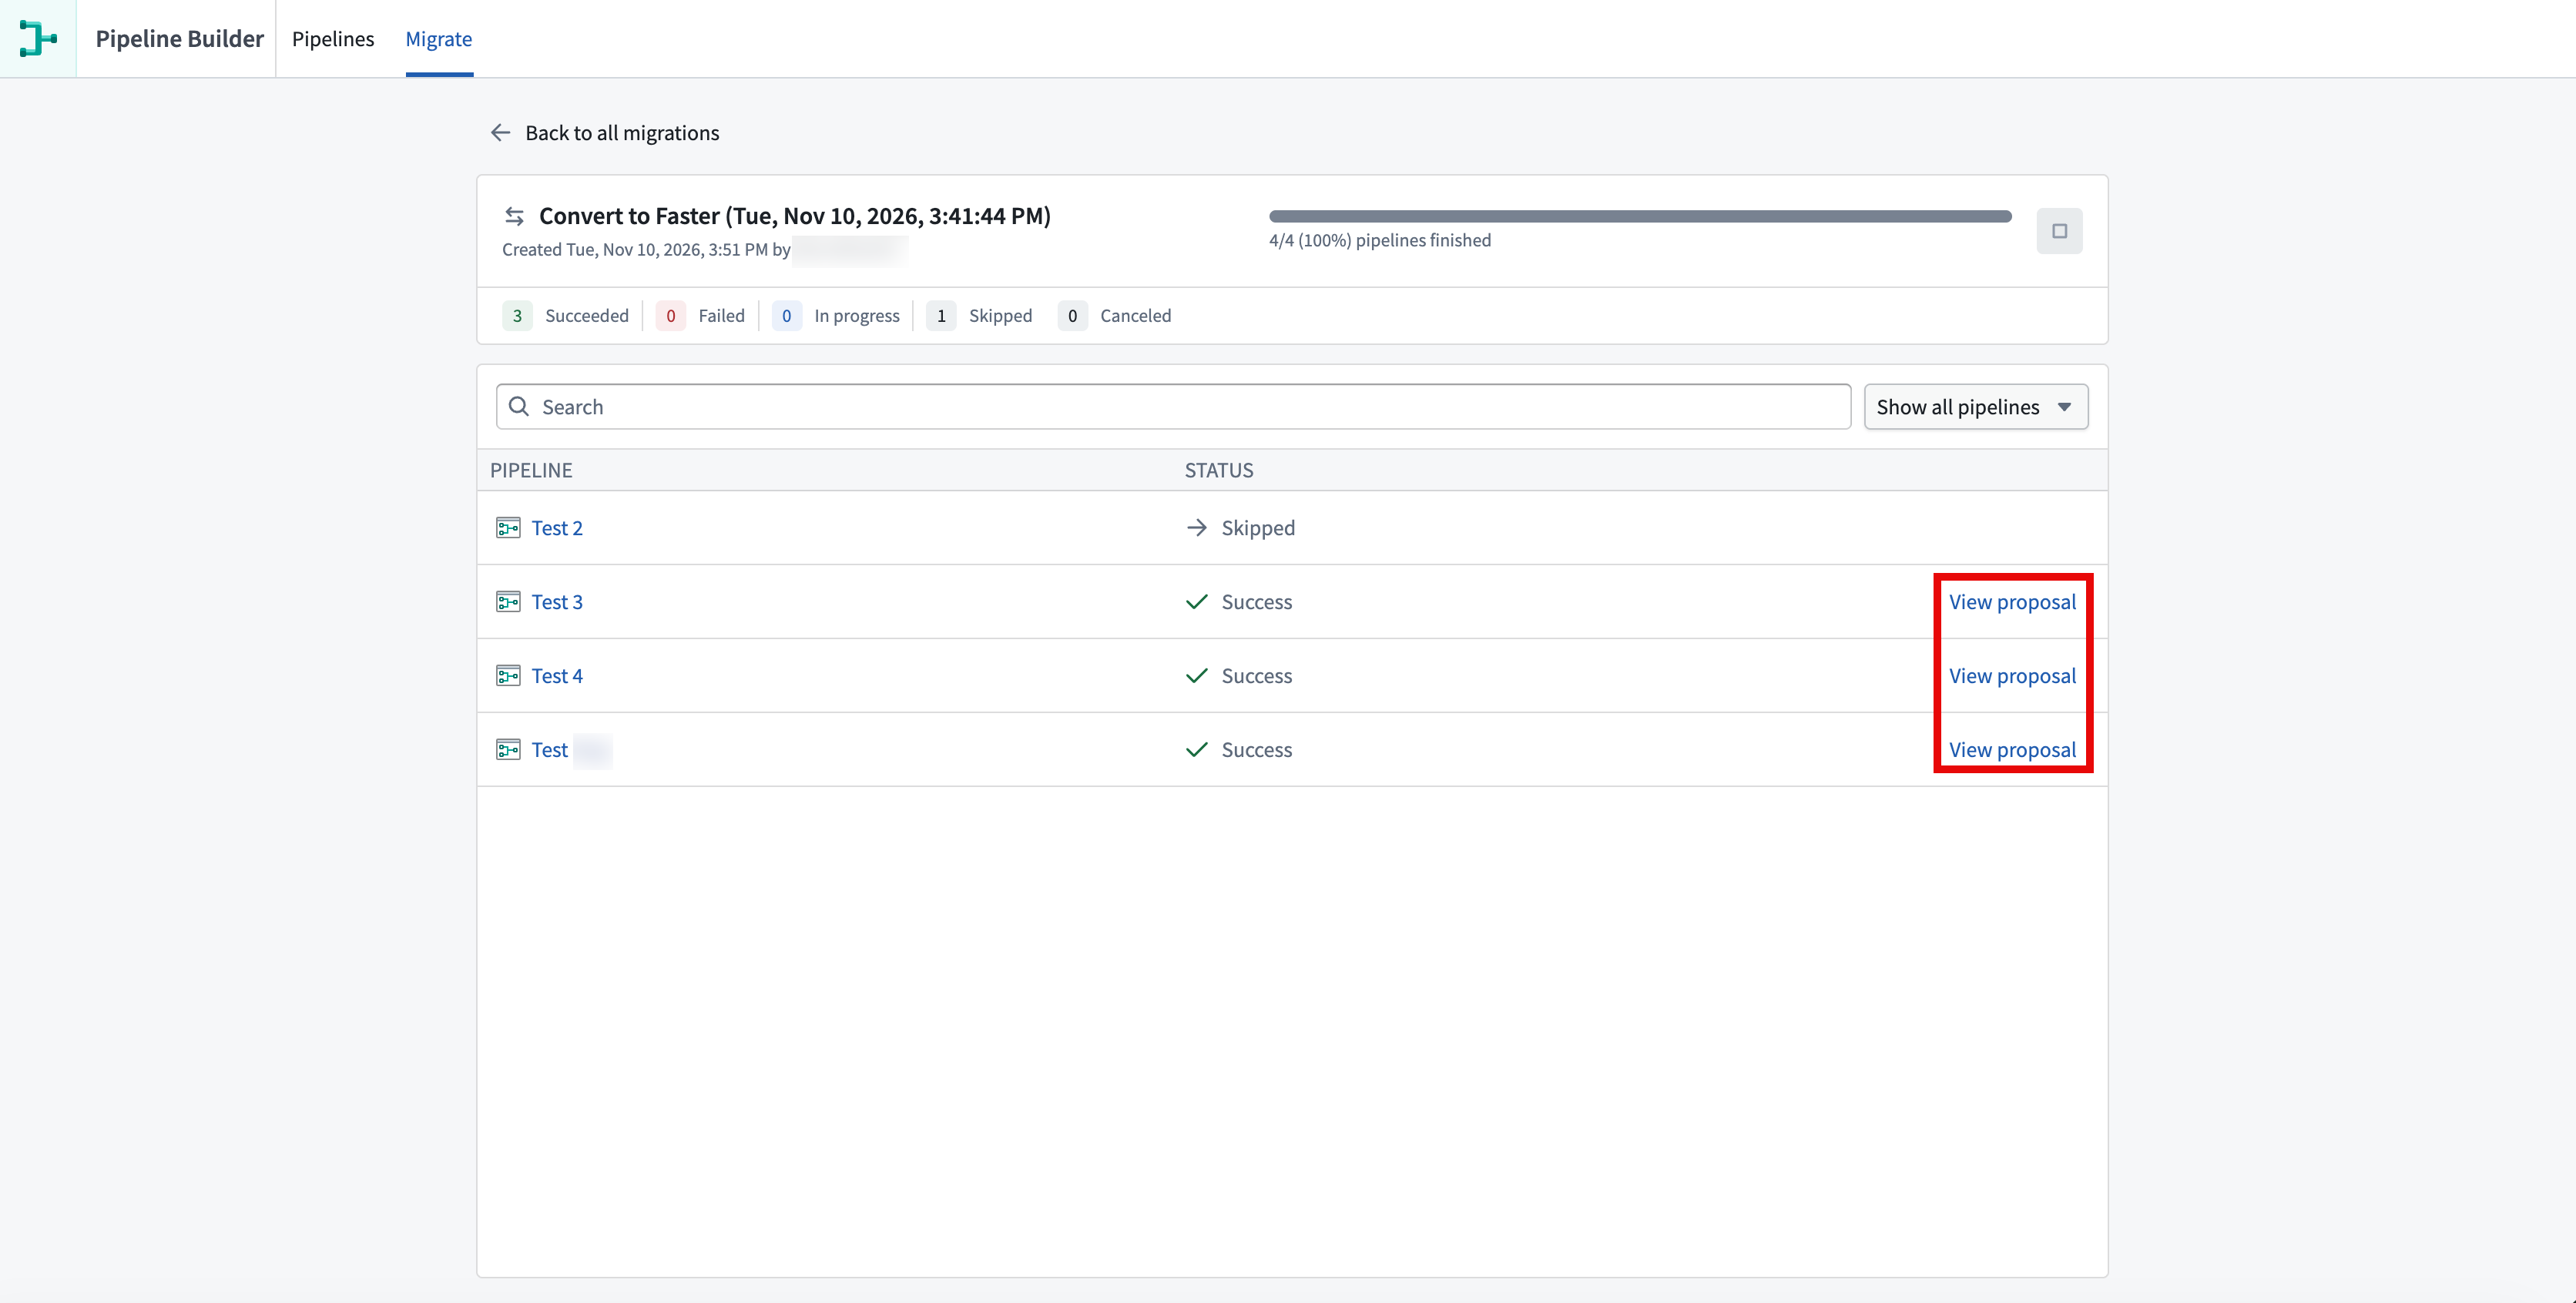
When a proposal is available, select View proposal beside the pipeline. You can review proposals while the migration continues processing other pipelines.
Learn how to review and approve pipeline changes.
Replace models
-
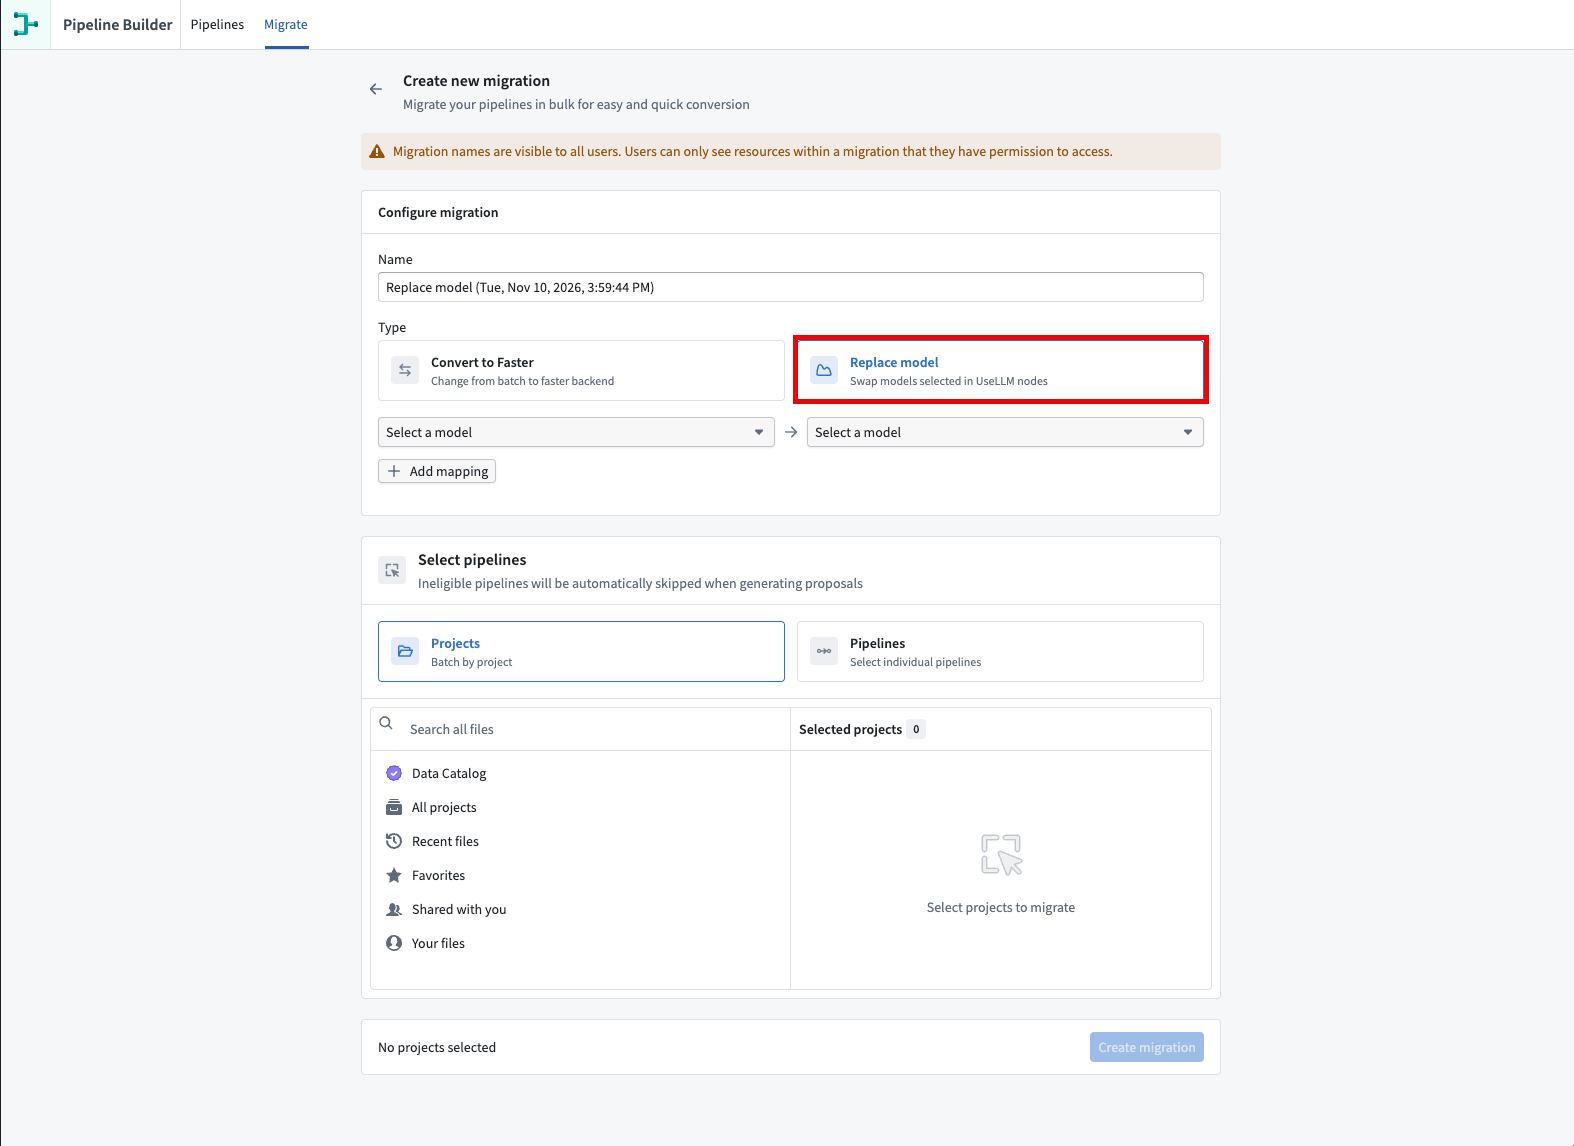
In the migration configuration menu, select Replace model.
-
Select the current model in the left dropdown menu and its replacement in the right dropdown menu. To replace additional models in the same migration, select Add mapping.
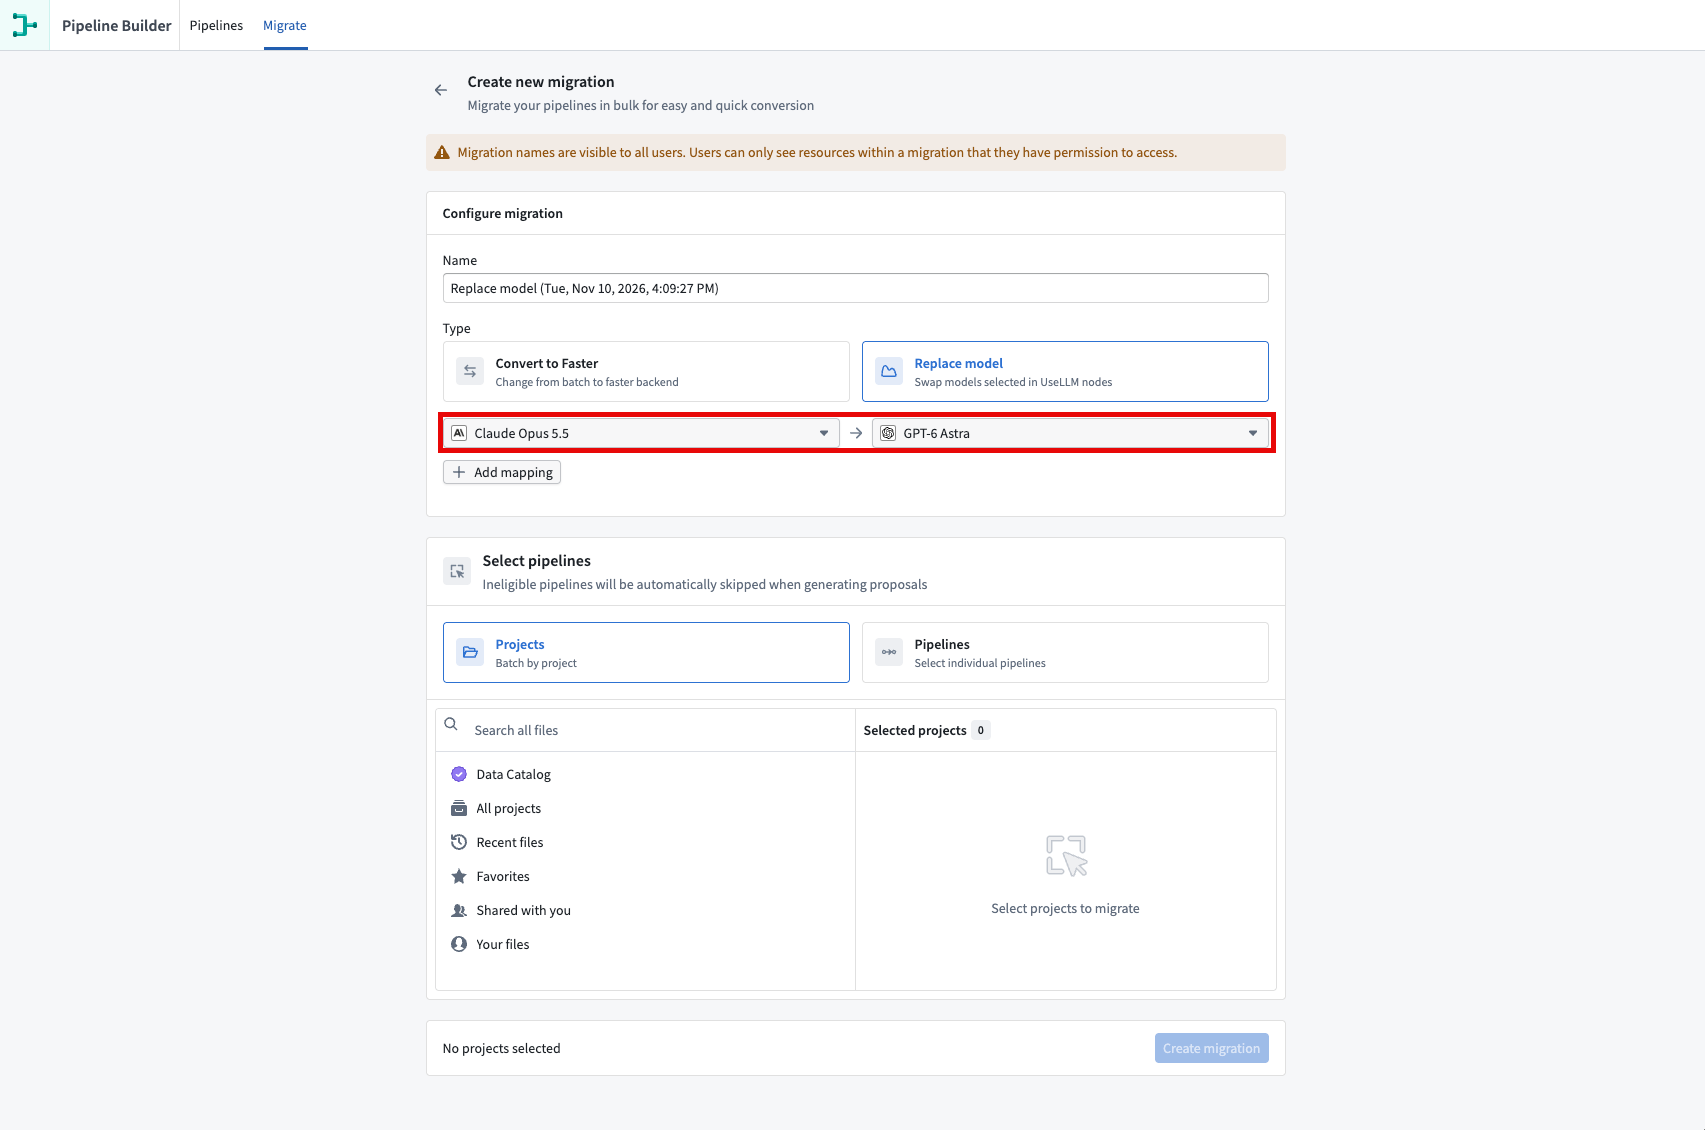
-
Follow steps 2–4 in Migrate to faster pipelines to select a scope, create the migration, and review its proposals.
Cancel a migration
If you need to cancel a running migration, for example because you created it with the wrong configuration, select the stop icon beside the progress indicator. Processing winds down after cancellation, and proposals already created remain available for review.
Pipeline statuses
The migration details view shows a status for each pipeline that indicates whether its proposal was created.
| Status | Description |
|---|---|
| Not started | Processing has not started for this pipeline. |
| In progress | Processing is underway, and a final outcome has not been recorded. |
| Success | A migration proposal was created. Review and merge the proposal to apply the changes. |
| Failed | An error occurred while checking the pipeline or preparing its proposal. |
| Skipped | The migration does not apply to this pipeline. See the conditions below for each migration type. |
| Canceled | Processing was canceled before a final outcome was recorded. |
The conditions for skipping a pipeline depend on the migration type:
- Convert to Faster: The pipeline is skipped if it is not a standard batch pipeline, such as a pipeline that already uses faster pipelines, or if it does not pass the faster conversion compatibility checks.
- Replace model: The pipeline is skipped if it does not use any of the source models in the mapping, such as when those models have already been replaced.
Support for additional migration types is planned for future releases.